Released back in 2018, Pillars Of Eternity 2 has grown to be massive due to the constant amount of content updates and feature improvements. While the essence of the game has remained the same, its maps and coverage have improved to the point where it’s hard to keep track based on memory alone.
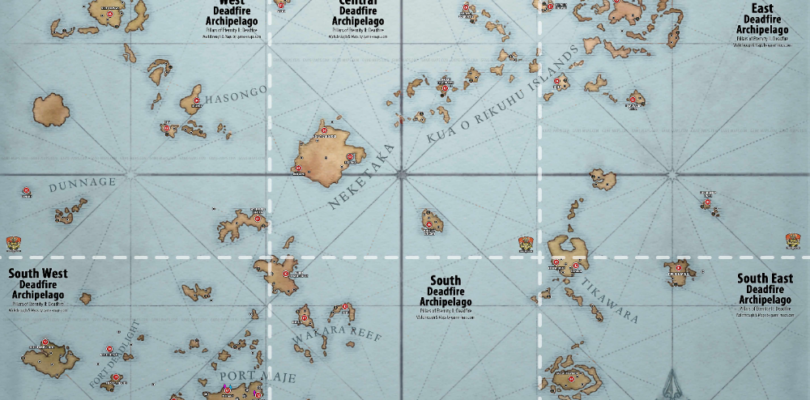
Having said that, Pillars Of Eternity features four general areas with the northwest zone having the most areas to check out. The southwest zone comes after that with the southeastern zone and northeastern zone following suit.
These regions total up to cover the entirety of the Pillars Of Eternity 2 Map. You get to visit obscure locations like Tehiwai Islands along with the main hubs like Maje Island depending on your exploration choices.
Areas In Pillars Of Eternity 2: Deadfire Map
There are a total of 38 locations (approx) spanning the seventeen major regions of Pillars of Eternity 2. Each area comes with its own specific set of challenges and trials that the players need to overcome in order to progress through the game. With that said, let’s take a look at how these areas operate according to their zones and regions.
Southwest Zone
The Southwest Zone mainly comprises fortresses and ruins and spans four major regions. They can be generally challenging, but a little effort is all you need to pass through these trials.
Having said that, here are the major regions present in the Southwest Zone:
Maje Island
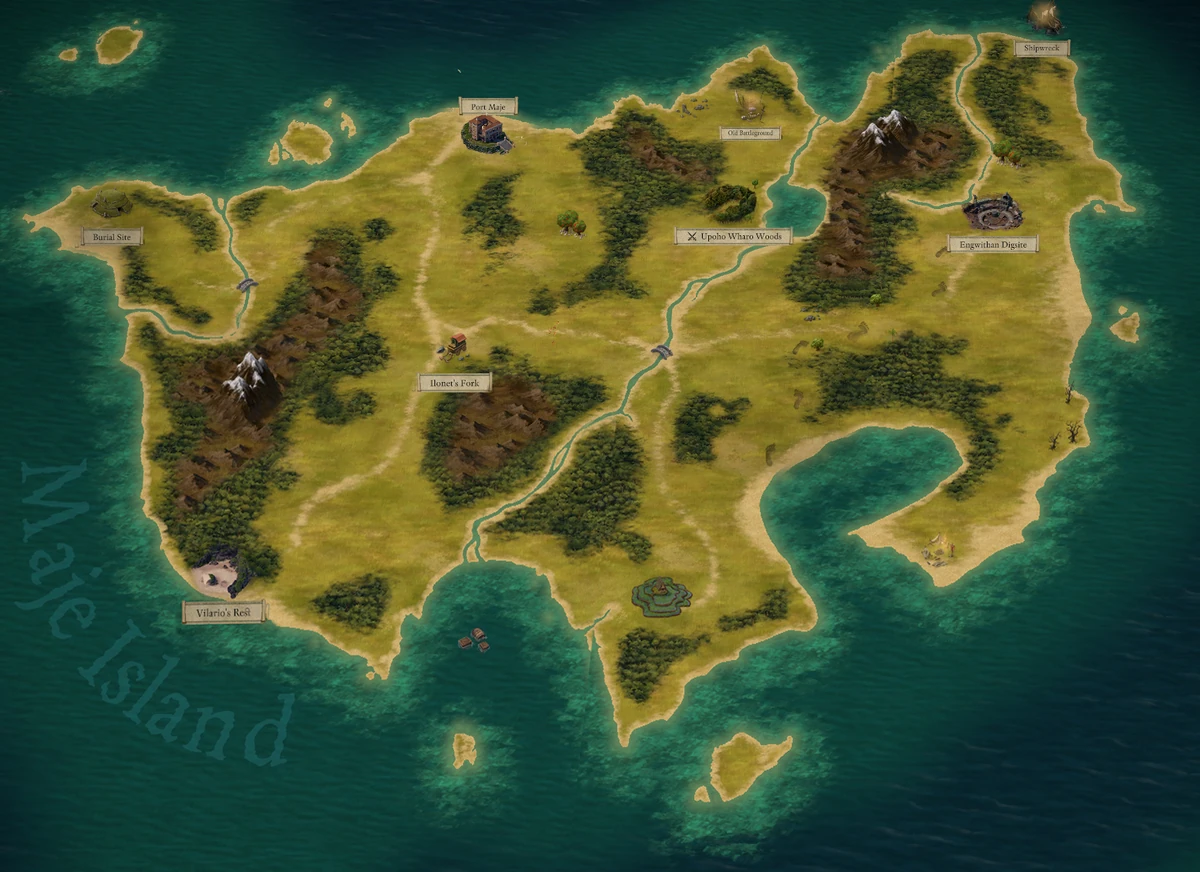
Maje Island | Source: Wiki
Maje island is the hub where everything begins. It hosts a total of three major locations and is generally the starting point for every newbie. Since it is tuned to provide a tutorial-like experience, the difficulty is quite easy.
It contains the following minor locations:
- Ilonet’s Fork: This location contains a group of pilgrims from Readceras. You will be rewarded handsomely if you help them find their way.
- Upoho Wharo Woods: A quest related to the old druid is obtained from this location. Upon its completion, you will be rewarded with the Wise Teeth Necklace.
- Whakura Pass: It is the only way of reaching the Wndwithan Digsite. This is one of the best places to search for xaurips.
Aside from the minor ones, it also features some main locations that present a wide assortment of opportunities to the rookie players. Here’s how they work:
Vilario’s Rest
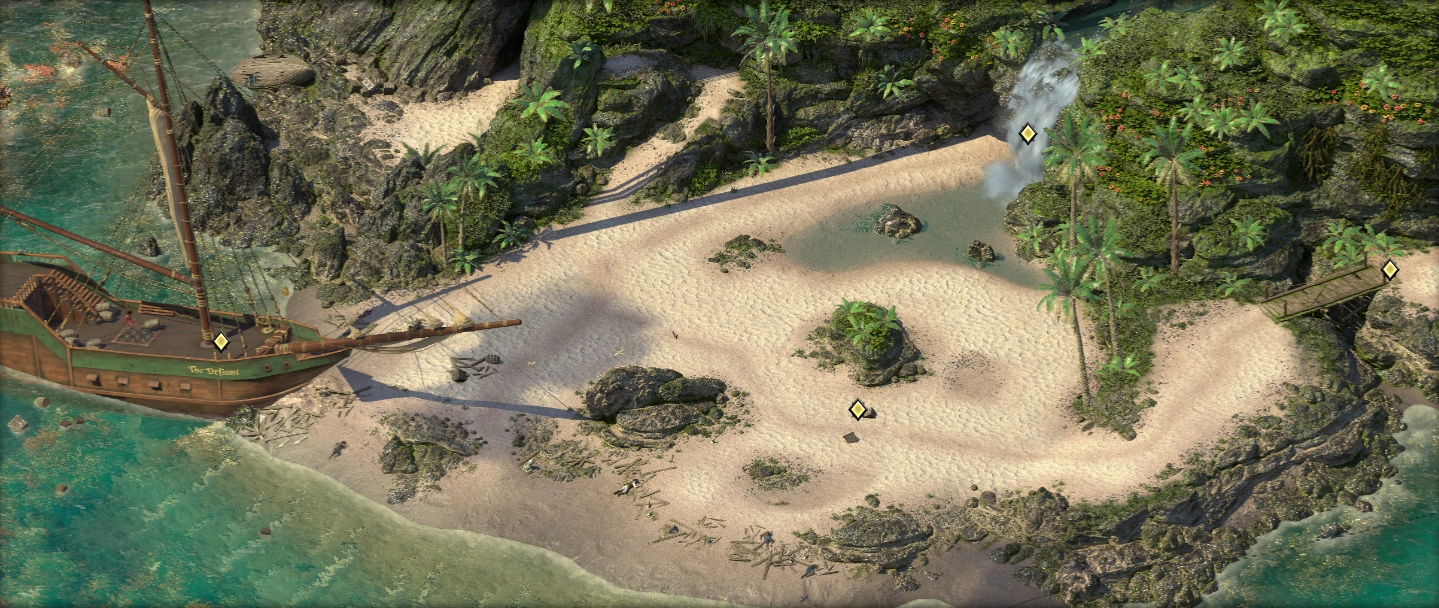
Vilario’s Rest | Source: Wiki
This area contains the Sea Cave of Maje Island. It’s the location where The Defiant went to eternal slumber. You will be meeting the following Inhabitants here:
- Edér: A tall fighter that was present in the Pillars of Eternity and was usually seen travelling with the Watcher.
- Irrena: One of the only survivors of the Deadfire welcome and the founding leader of Defiant’s crew.
- Chitupec: A sailor that has sailed side by side with Edér while serving The Defiant.
- Beodul: A grumpy dwarf that can be a surprisingly capable officer – given the opportunity is there.
- Vela: One of the children of Widhwn, Vela is one of the few that are free from Widhwn’s legacy. While she has many suitors, most of them are only in it to use her as a sacrifice.
The following three quests will be made available here:
- Helping Hands
- Skeleton Crew
- Stranded
It’s generally better to skip this area altogether if you’re aiming for a speed run. However, doing it can bring some hefty rewards for a beginner. Consequently, the Sea Cave is not to be underestimated, since it is hiding quite a lot of treasures within.
Port Maje
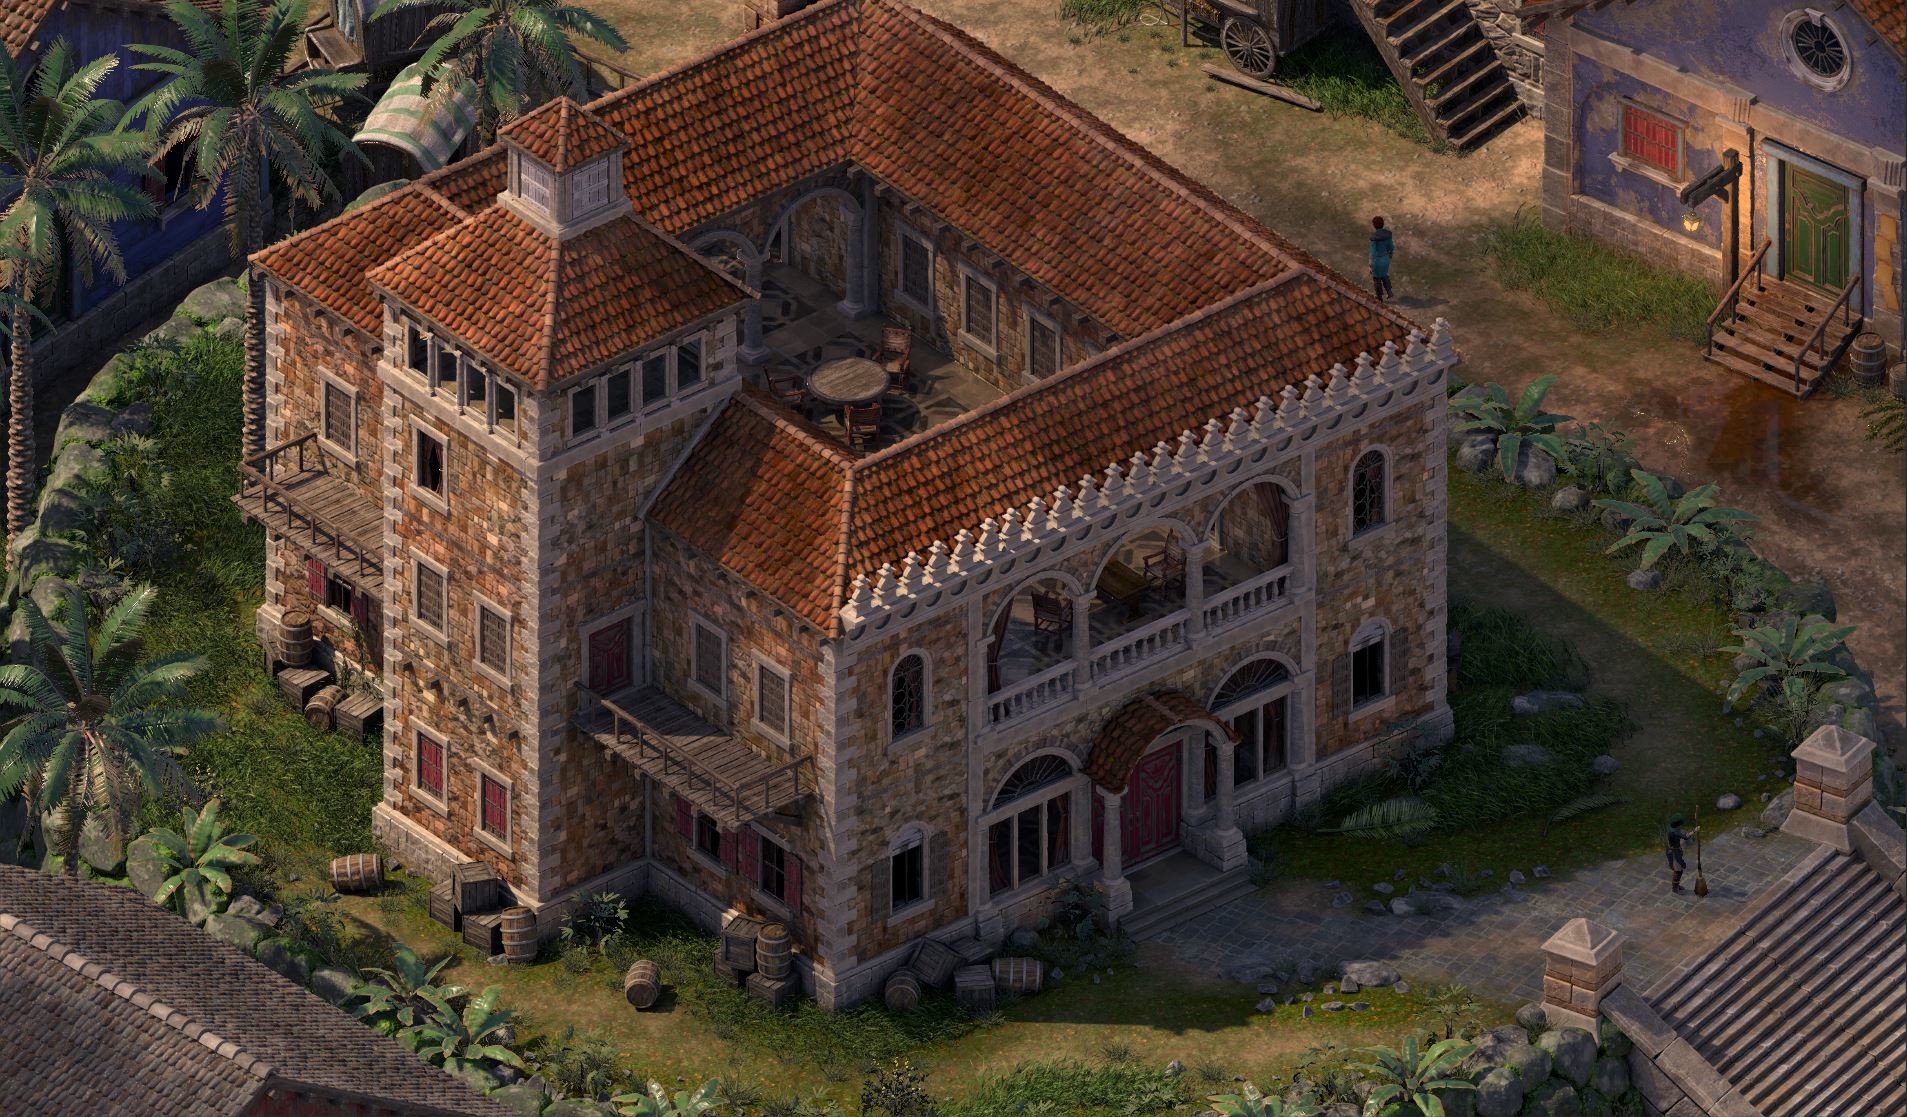
Port Maje | Source: Daniel Keating
Being one of the oldest colonies in the game, Port Maje once belonged to the Vailian Trading Company. Its history is as rich as the game itself, with references dating as far as the 2750 AI. You won’t be finding many new characters at the Port Maje.
However, it does contain a ludicrous amount of quests designed to keep you busy for as long as possible. Having said that, you will be finding the following locations within Port Maje:
- Port Maje Harbor: The main hub of the town that connects everything (both commercially and politically).
- Sātahuzi: The main village of the Huana tribe. Since these guys believe in a mutually beneficial relationship, you will be relying on them for their aid in exchange for virtually anything of equal value.
- Gorecci Street: The “back-alley” of the town that has been ruined due to heavy flooding to date.
You can expect to clear the following quests during your stay at Port Maje:
- Basic Provisions
- Burning Bridges
- Restoring Order
- Skeleton Crew
- Stranded
- The Better Man
- The Courier’s Calling
- The Drunk Sailor
- Wandering Stars
Since most of these are considered sidequests, you’d be fine skipping them for the sake of optimization.
Engwithan Digsite
Engwithan Digsite | Source: GFG
The Engwithan Digsite is a former combat area that has been unearthed for luminous adra. Unfortunately, that venture didn’t end well when the Eothas stopped through the area, thereby causing massive death tolls throughout the vicinity.
Surprisingly, there are only two major inhabitants of the area. Their details are as follows:
- Benessa: She is the leading animancer at the dig site. She generally operates under Port Maje’s authority and is responsible for extracting all the luminous adra from the underground.
- Engferth: He’s a wizard whose identity is later revealed in the game. You might’ve encountered him before in the Pillars of Eternity. Aloth Corfiser (Engferth) will join your party later on as long as you can solve his problems.
This area does not feature any major quests. Therefore, you can just follow through the main storyline in order to pass the Engwithan Digsite.
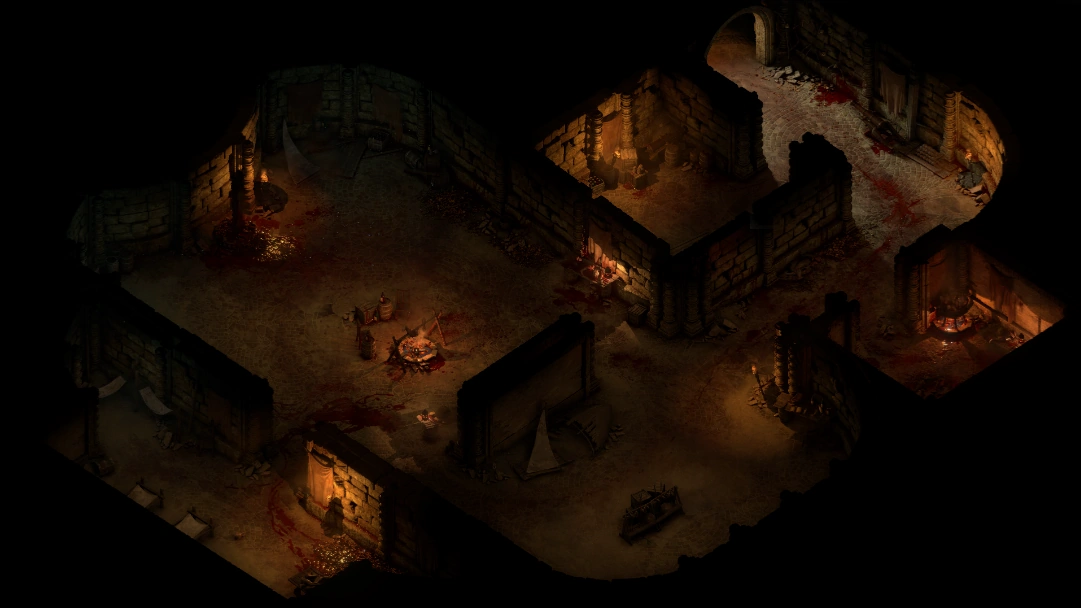
Fortress #1: Fort Deadlight

Fort Deadlight
This is one of the only two fortresses available in Pillars of Eternity 2. It’s generally used as a staging area by Captain Aeldys – who claimed it a few years ago. You will find a decent amount of micro-locations along with the Principi hideouts in this Fort.
Luckily, Captain Aeldys is quite easy to talk to. Therefore, you won’t have to worry about your neck flying off anytime soon. With that said, this area is not integral for a speed run. However, it does contain some decent quests. Their names are as follows:
- A Shrewd Proposition
- A Sorcerer and a Gentleman
- Blow the Man Down
- Goods and Services
- Honor Among Thieves
Aside from the mentioned quests, you will also be meeting a merchant titled “No-Nut Ned”. He’s not really integral to the storyline but can be a stroke of fortune for newer players.
However, you need to spare Benweth in Blow the Man Down mission or he will identify the smell of blood on your hands from a mile away. Luckily, there’s nothing to lose, since the interaction is only meant to be static.
With that being said, here are all the micro-locations present in Fort Deadlight:
- Deadlight donjon
- Deadlight dungeon
- Deadlight Court
- Secret dock
Moreover, you will also be encountering the following characters during your stay at the Fort Deadlight:
| Character Name | Description |
| Snake Eyes Condwen | A local gambler that loves to cheat innocents and newbies with the help of his rigged dice. |
| Unlucky Ancret | A pirate that has an insane amount of bad luck. |
| Sceydwin | A Prankster and a Pirate. She is also a part of Benweth’s crew. |
| Minao | A prisoner that’s too weak to do or say anything. |
| Ruddy Feyr | The king of the drunken, and a pirate. |
Fortress #2: Dunnage
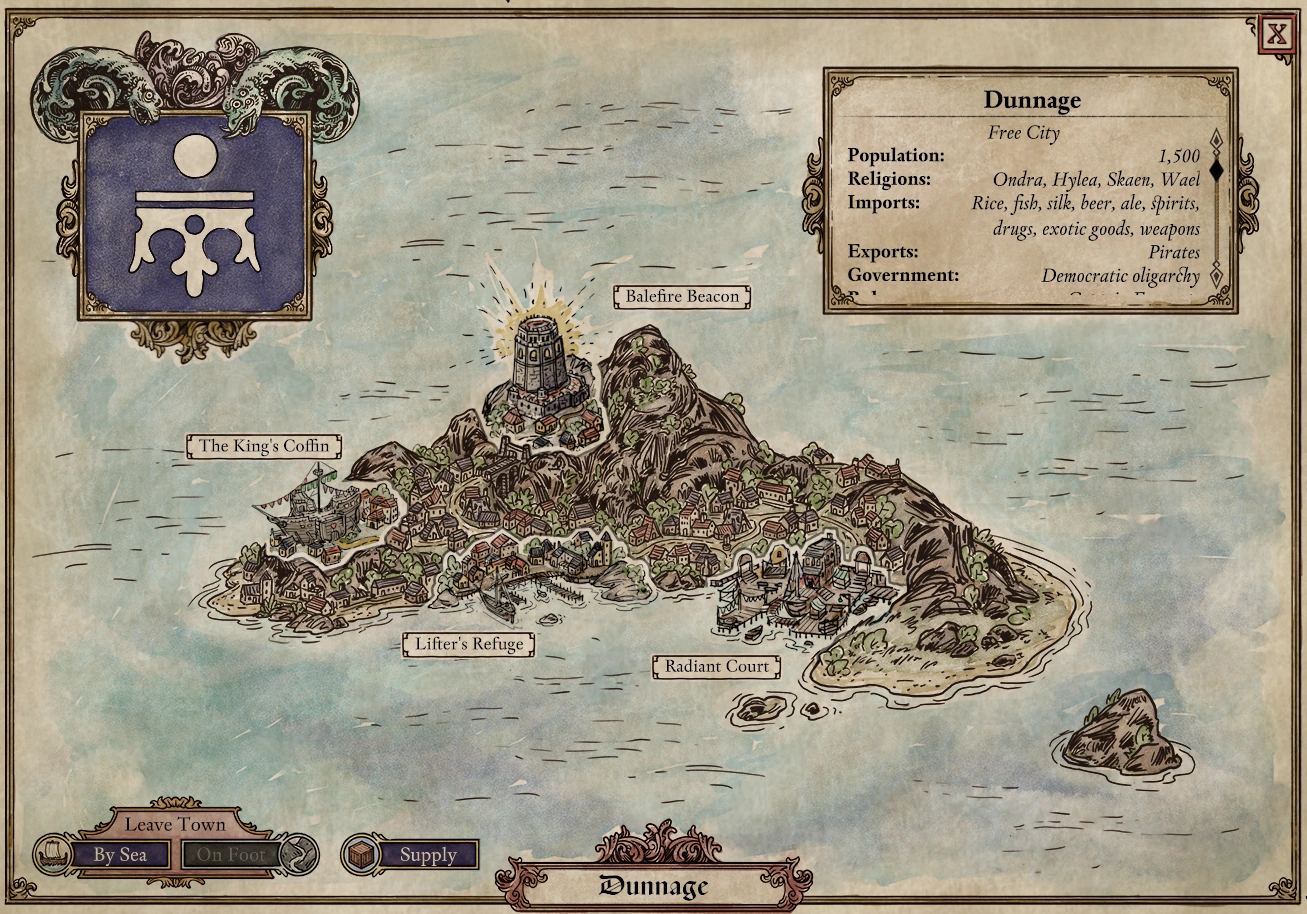
Dunnage | Source: Wiki
This is a pure dwarven colony with over 1500 denizens. Captain Furrante is the one governing the entirely of Dunnage. Luckily, the place is riddled with quests. Therefore, you would find it quite easy to lose track of your time.
There are four minor locations present in the Dunnage fortress, with each being extremely important to the local residents. Here’s how these locations work:
- Lifter’s Refuge: The pirate town docks that offer passage to the free city.
- The King’s Coffin: The main tavern in Dunnage. It’s the place to go if you want to eat (or drink) to your heart’s content.
- Radiant Court: The main market of Dunnage. It features a variety of goods catered to the local folks.
- Balefire Beacon: A relic of the past made by dwarven trailblazers.
Having said that, here’s a list of all the quests available in the Dunnage:
- A Shrewd Proposition
- A Tidy Performance
- Bounty – Chornu
- Bounty – Katrenn
- Bounty – Kuaro
- Bounty – Lady Epero
- Bounty – Rock-Stomper Rodul
- Bounty – Torkar
- Honor Among Thieves
- Iron Gut
- Of Like Minds
- Symbols of Death
- The Coming Storm
- The Seeking Face’s Hunt for the Hunt for the Haemneg’s Handmaiden
Kângati Islands
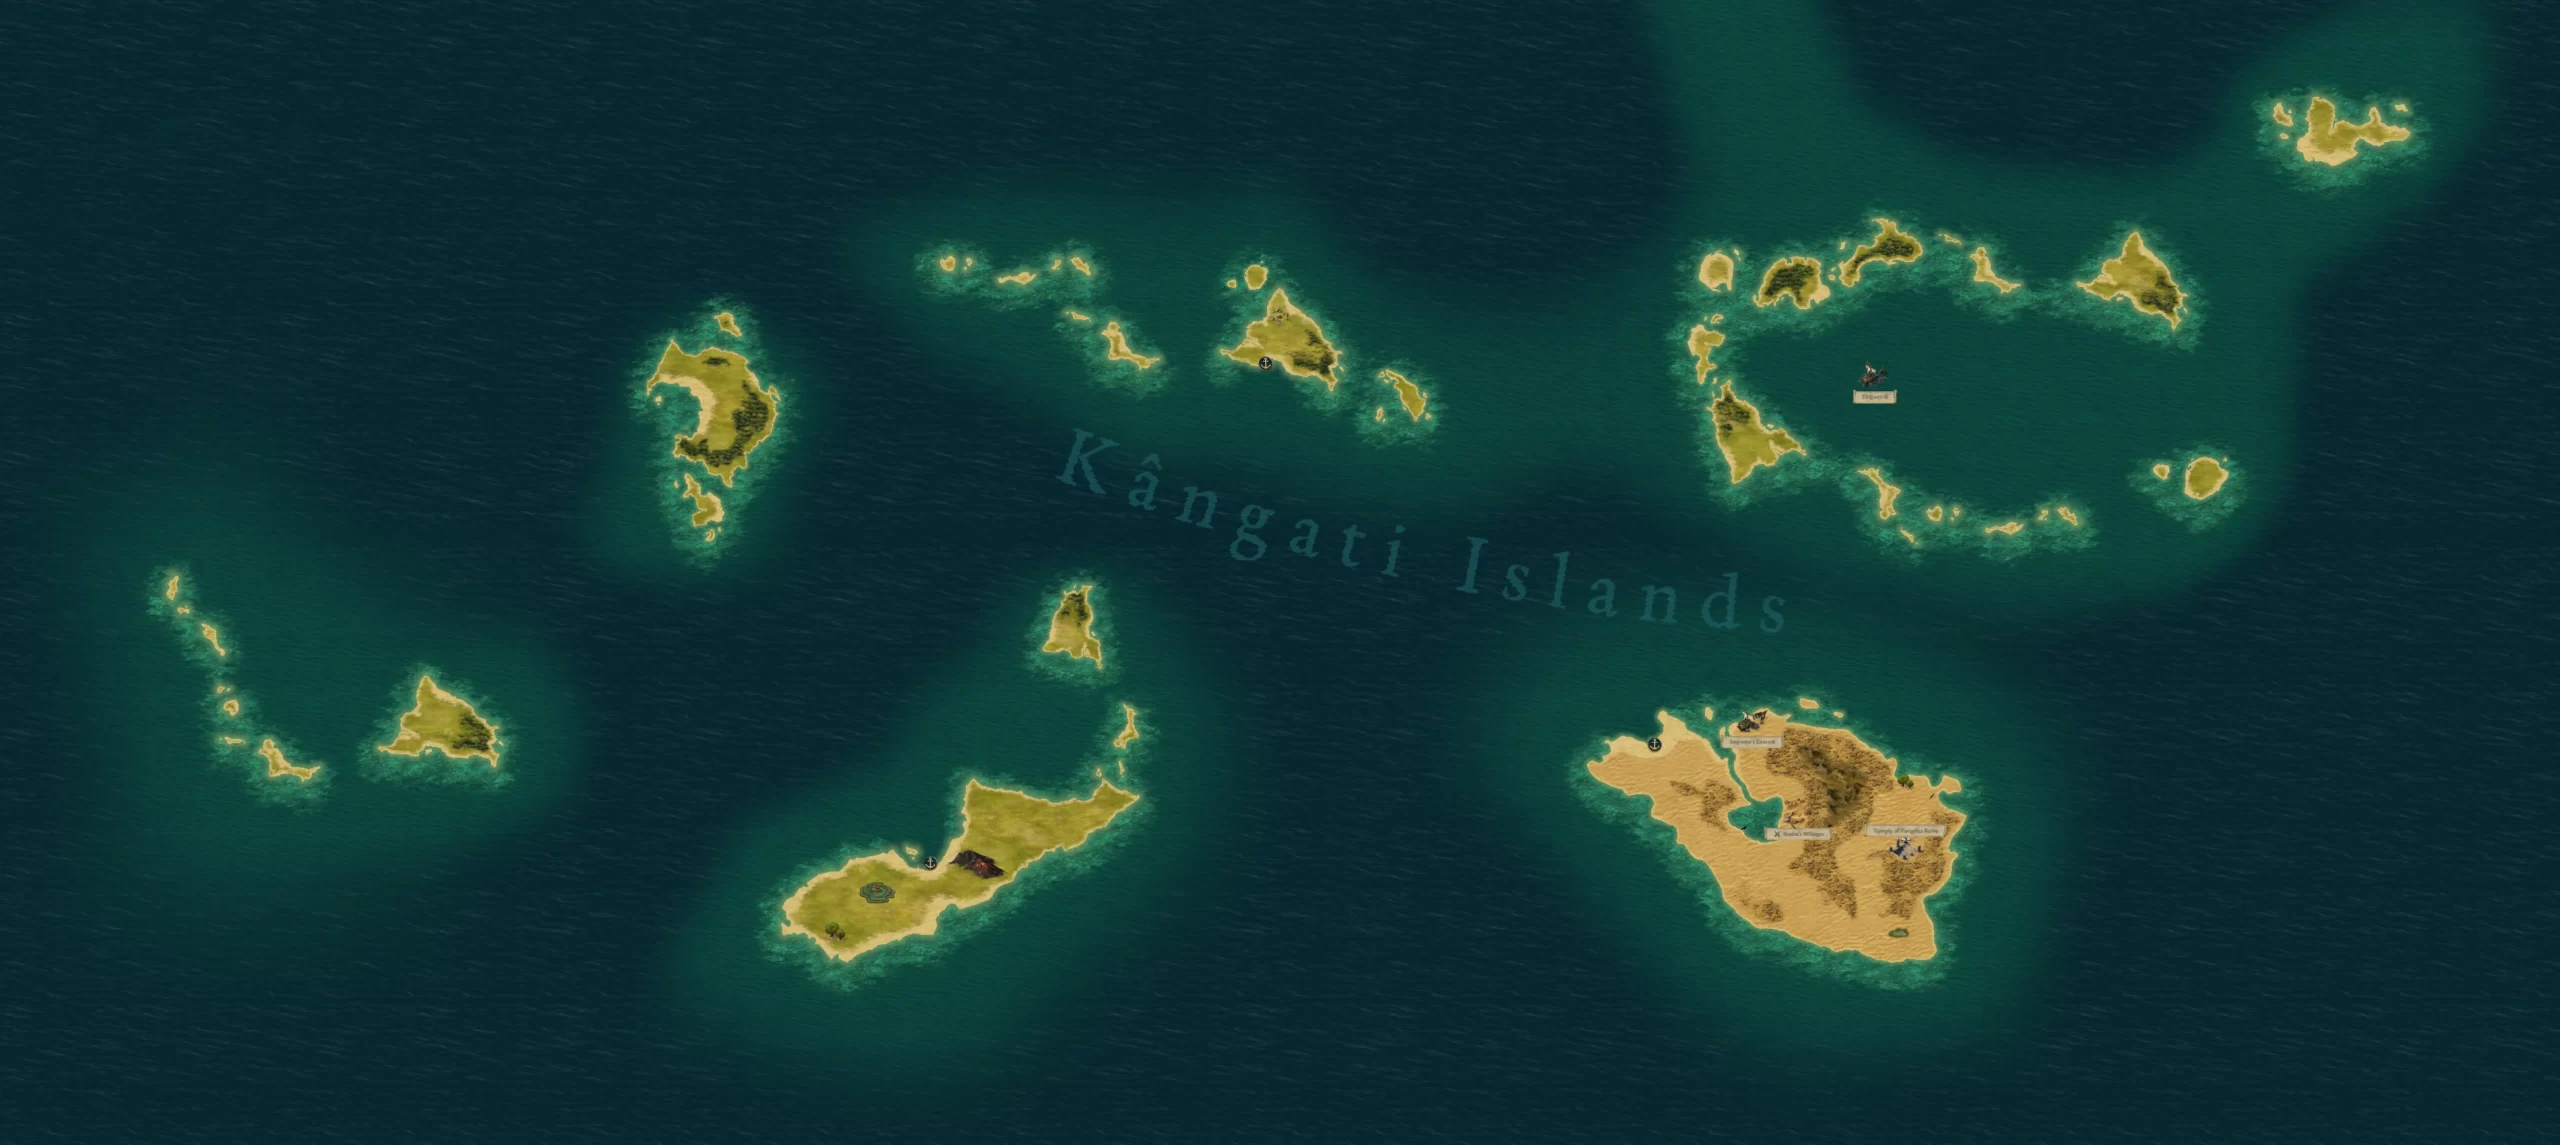
Kângati Islands | Source: Wiki
The Kângati Islands are a series of small lands located on the southern side of Maje Island. As one might conclude, there isn’t much to do in this area. You will, however, find a shipwreck to loot, but that’s really it. As for sub-locations, it features the following:
- Tangaloa Island: An all-desert island that features the ruined Temple of Tangaloa. It’s also the place where Importer’s Lament breaches.
Temple Of Tangaloa
Temple Of Tangaloa | Source: Wiki
The Temple of Tangaloa is a ruins-based location that features a variety of mazes and loot. You will be meeting two new inhabitants here. Despite their secluded lifestyle, both are quite easy to talk to, so you won’t have to worry much.
- Captain Angfor: He’s the Impostor’s Lament’s former captain. Since there’s not much to eat on an uninhabited island, Captain decided to feast on his teammates instead.
- Giordu Red-Ganded: A potential crew member that was the only sane member of his previous crew. On a side note, his prepared dishes are nothing less than gourmet.
You will be completing the “Mapping the Archipelago: Port Maje” during your stay in the Temple of Tangaloa. Despite all the blood and muck, it’s not as terrible of a place as rumors depict it to be unless you run out of food.
Wakara Reef
Wakara Reef
The Wakara Reef is one of the few island ranges located in the southwestern region of the Pillars of Eternity 2: Deadfire map. Its encompassing creates a natural barrier that goes from Karatapu Channel to the east of Maje Island.
This Reef is generally divided into east and west cross sections. The western Island is more triangular, whereas the eastern one makes more of an inverted U shape. All in all, you can expect to find the following in the Wakara Reef:
Eastern Island
Here are the general locations / characters found on the eastern portion of the Wakara Reef:
- Tāhae: It’s a type of sea troll that has been rather popular due to his raids on nearby fishing villages. The Tāhae is generally found with a bounty on its head.
- Teitata Marvel: An ancient formation located in the center of the lagoon. It not only grants experience per visit but also given sailor ranks – given that you have more than 4 crew members.
Western Island
Here are the general locations / characters found on the western portion of the Wakara Reef:
- Pūrākau: A drake-esque creature that is well known for tormenting any traveler seeking water. Luckily, it has a decent bounty on its head, so it is your job to reap the rewards.
- Fanged Strait: A small, narrow passage that is considered the shortcut to the eastern Island range. However, you need to have a Helmsman in order to make the travel.
Karatapu Channel
Karatapu Channel
The Karatapu channel is the final yet most expansive region located in the southwest of the Pillars Of Eternity 2: Deadfire map. Despite its sizable area, the landmass is mostly deserted. However, it contains some of the most pivotal locations in the southwest.
The Karatapu Channel Is divided into three main portions, with each area having its own eye candy ready for the player base. With that being said, let’s dive into more detail regarding these locations:
Northern Island (Sanctum)
The Northern Island, or Sanctum, in short, is a landmass located in the southwest direction of Neketaka. It comprises the following major locations:
- Oasis:
An oasis is a dream for any traveler since it quenches thirst like none other. Unfortunately, this one features filthy water, so you won’t be getting anything special.
- Old Battleground:
As the name indicates, it’s a deserted battlefield that can prove to be a decent tourist attraction.
- Call for Help:
Appears after the Unsigned Missive from A Sorcerer and a Gentleman is used / collected.
Oathbinder’s Sanctum:
This is a large multi-floored Woedica temple that comprises the following two quests:
- Lost Dues in Good Faith
- The Surviving Face’s Hunt for the Finger of the Exiled Queen
Consequently, you will also meet two new fellows in your pursuit of progression:
| Name | Description |
| Oswald | An elder elf, who just happens to be a war veteran. Pair all that with his history with Kahn, and you have the perfect crew member. |
| Inquisitor Lödwyn | The main commanding body of the Oathbinder’s Sanctum. No oathbreakers shall escape him! |
Southern Island
This is a large land mass with a harsh desert environment. While it isn’t exactly “habitable”, you will still find a decent number of inhabitants.
With that said, Southern Island contains the following attractions:
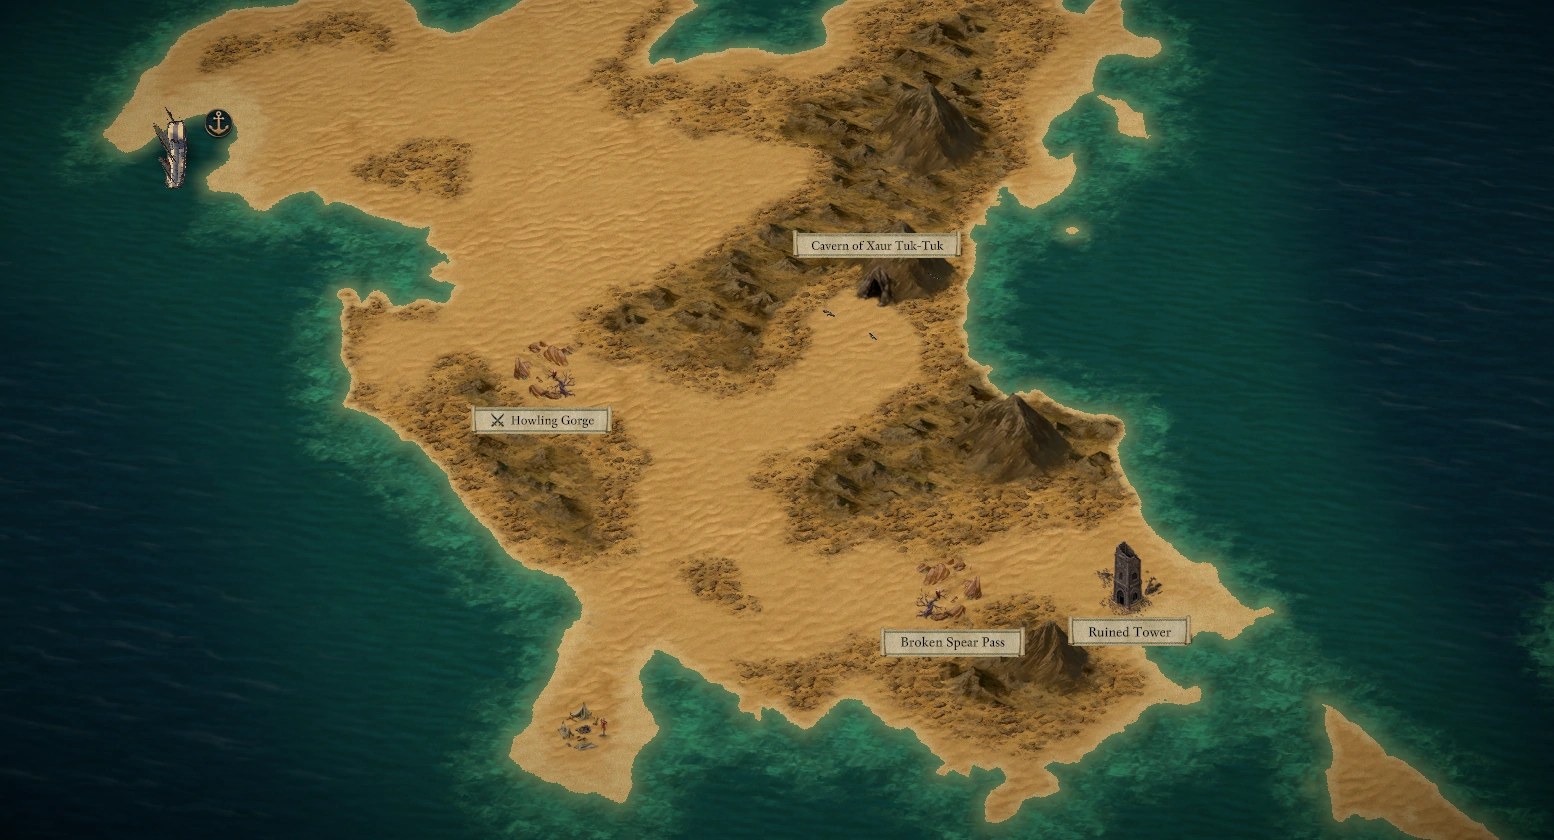
- Broken Spear Pass: This pass is located on the southeastern side of the island and is famous for its abundant supply of withered corpses.
- Ruined Tower: From the Broken Spear Pass, simply head east to find this location. You might end up with a decent freebie.
Cavern of Xaur Tuk-Tuk:
This is the second major location in the Karatapu channel. Despite its small size, you will need to go through it in order to complete the Mapping the Archipelago: Port Maje quest.
Needless to say, almost every quest in the Pillars of Eternity 2 makes you meet new people. Therefore, you can expect the same to happen here as well. Here are the two major NPCs of the area:
| Name | Description |
| Warchief Rauki | A Xaurip war chief that leads the Warband. You will generally find him at the Cavern of Xaur Tuk-tuk. |
| Mother Sharp-Rock | This female Xaurip was supposed to die according to Warchief Rauki’s intentions, but she somehow makes her way into your crew. |
South Western Island
The South Western is the smallest island of the three. As such, it only contains two major regions, with one being only useful for localities.
- Fishing Village: Trades good and fish, an awful lot of it.
- Osa Channel: A river inlet that hosts a swimming race. Since the entirety of the race is scripted, it’s pretty easy to keep on winning.
Northwest Zone
The Northwestern Zone of the Pillars of Eternity 2 comprises five major regions, with around thirteen small areas. Since it’s essentially a mixture of every kind of area, the Northwest Zone is often considered the main hub of operations for the entirety of the Pillars of Eternity 2 map.
Having said that, here are the major regions present in the Northwest Zone:
Neketaka Island
Neketaka Island
The Neketaka is the largest island available on the entire Deadfire map. It contains the eponymous Neketaka while featuring a multitude of minor locations. It’s a relatively lush area, so you won’t be finding many deserts here.
Having said that, here are the minor locations available on Neketaka Island:
- Teo Ramunga: A shrine where the locals pray during their pilgrimage. It’s relatively maintained and cleaned. Teo Ramunga is located to the northwest of Neketaka Island.
- Weba O Tangaloa: A graveyard-esque area where the Huana people bury/cremate their loved ones. An entire ritual ensues before this activity, so you’d be sure to spend a lot of time there for a single death.
- Pāhowane: Another temple that’s not as popular, but is overrun by the Xaurips.
With that out of the way, here is the major location in the vicinity of Neketaka Island:
Neketaka
The Neketaka (Serpent’s Head) is the main attraction of the entire island. It’s an extremely old city that has been standing since legends. It features a multitude of minor attractions that have a bunch of unique traits.
Here’s a general overview of all of them:
- Serpent’s Crown: The highest habitable area in the entire ancient city of Neketaka.
- The Sacred Stair: These stairs act like a temple for pilgrims to test their faiths.
- The Brass Citadel: The center point of all that’s related to the military in the town.
- Periki’s Overlook: An explorer and the founder of the Watershapers Guild named Periki named this place due to its unique home design.
- Queen’s Berth: The main commercial area in Neketaka.
- The Gullet: The slum area of the city, you won’t want to stay here longer.
With that said, here are the quests available in the Neketaka region:
- Bounty – Nomu the Marauder
- Bounty – Uamoru the Pretender
- From the Wreckage
- Fruitful Alliance
- Symbols of Death
- The Coming Storm
- The Last Sanctuary
- The Storms of Poko Kohara
- The Veins of Eora
Hasongo
Hasongo
Hasongo is one of the few minor regions in the Northwest zone. It’s essentially a port under shambles due to its war-ridden past. Luckily, there are a plethora of inhabitants to meet here, and it comes under the speedrun path, meaning any delay here is going to cost you.
With that said, here are all the inhabitants you will be meeting during your time in Hasongo:
| Name | Description |
| Zuhira | An Aumaua woman designated as the assistant quartermaster of Hasongo. |
| Sugaan | A naga shaman that leads the entire incursion inside Hasongo. |
| Aimuro | An engineer at Hasongo that created explosive shells. |
| Bearn | A bastard son lost everything and got exploited to the point where he became a religious fanatic. |
| Yanass | A naga whose job was to find a way inside Hasongo for Sugaan. |
Crookspur Island
Crookspur Island
Crookspur Island is the main point of operations for the slave traders. It’s located on the north of Dunnage and features a lot of attractions. It’s generally divided into the following two halves:
Southern Half
Here are all the regions located in the southern half of Crookspur Island:
- Bleakrock Shrine: A Huana shrine located deep inside the jungle. Make sure to stay vigilant, since you will be ambushed by a group of bandits here.
- Old Battleground: An attraction for random loot. However, it’s not really worth the effort.
Northern Half
Here are all the regions located in the northern half of Crookspur Island:
- Cockerel Forest: Yet another area of ambush. If you manage to survive the incoming arrows. you will be met with Cathwenna, Cemoc, and, Hudango.
- Egno’s Thicket: A cemetery that is way past its expiration date.
- Crookspur: A keep that belongs to the Crookspur Slavers. It is jam-packed with a multitude of inhabitants and enemies.
You will be meeting the following NPCs here:
| Name | Description |
| Auctioneer Marcca | A slave auctioneer that sells the finest wares Crookspur can offer. |
| Bauha | A Wakahi warrior captured by the slavers. |
| Handsome Eliam | An exotic slave that also happens to be a loyal godlike from Drywood region. |
| Master Kua | Head of the slave traders in Crookspur. |
| Seafol | A Príncipi agent that offers various tools of trade. |
| Taskmaster Grom | An ogre executioner at the slaver port. |
| Merchant | He sells his wares while camping on the shores. |
Aside from this, you can also expect to encounter the following quests here:
- A Shrewd Proposition
- Clearing Out Crookspur
- Cruel Cargo
- Of Like Minds
- Tip of the Spear
Sayuka

Sayuka | Source: Wiki
A colonial outpost that operates under Fleetmaster Okaya. It contains the following locations:
- Huana Longhouse
- Fleet Master’s Quarters
- Workshop
Having said that, it’s relatively small in size but possesses a decent amount of quests that you need to clear as soon as possible since it will impact your clear speed. You will be meeting the following Inhabitants:
| Name | Description |
| Tebe | A Huana Woman that works as a greeter. |
| Undersecretary | An official employed to keep Rauatai etiquettes in check. |
| Marofeto Liano | Former Goldpact Knight who wandered the Deadfire. |
| Remaro | A veteran captain that fled to Neketaka. |
| Tipa | Weto’s sister. |
| Weto | A Rauatai practitioner and a devout follower. |
| Riwahi | Elderly refugee. |
In addition, you will be going through the following quests:
- A Matter of Import
- A Sorcerer and a Gentleman
- Hunting Season
- Overgrowth
Bentbranch Bog
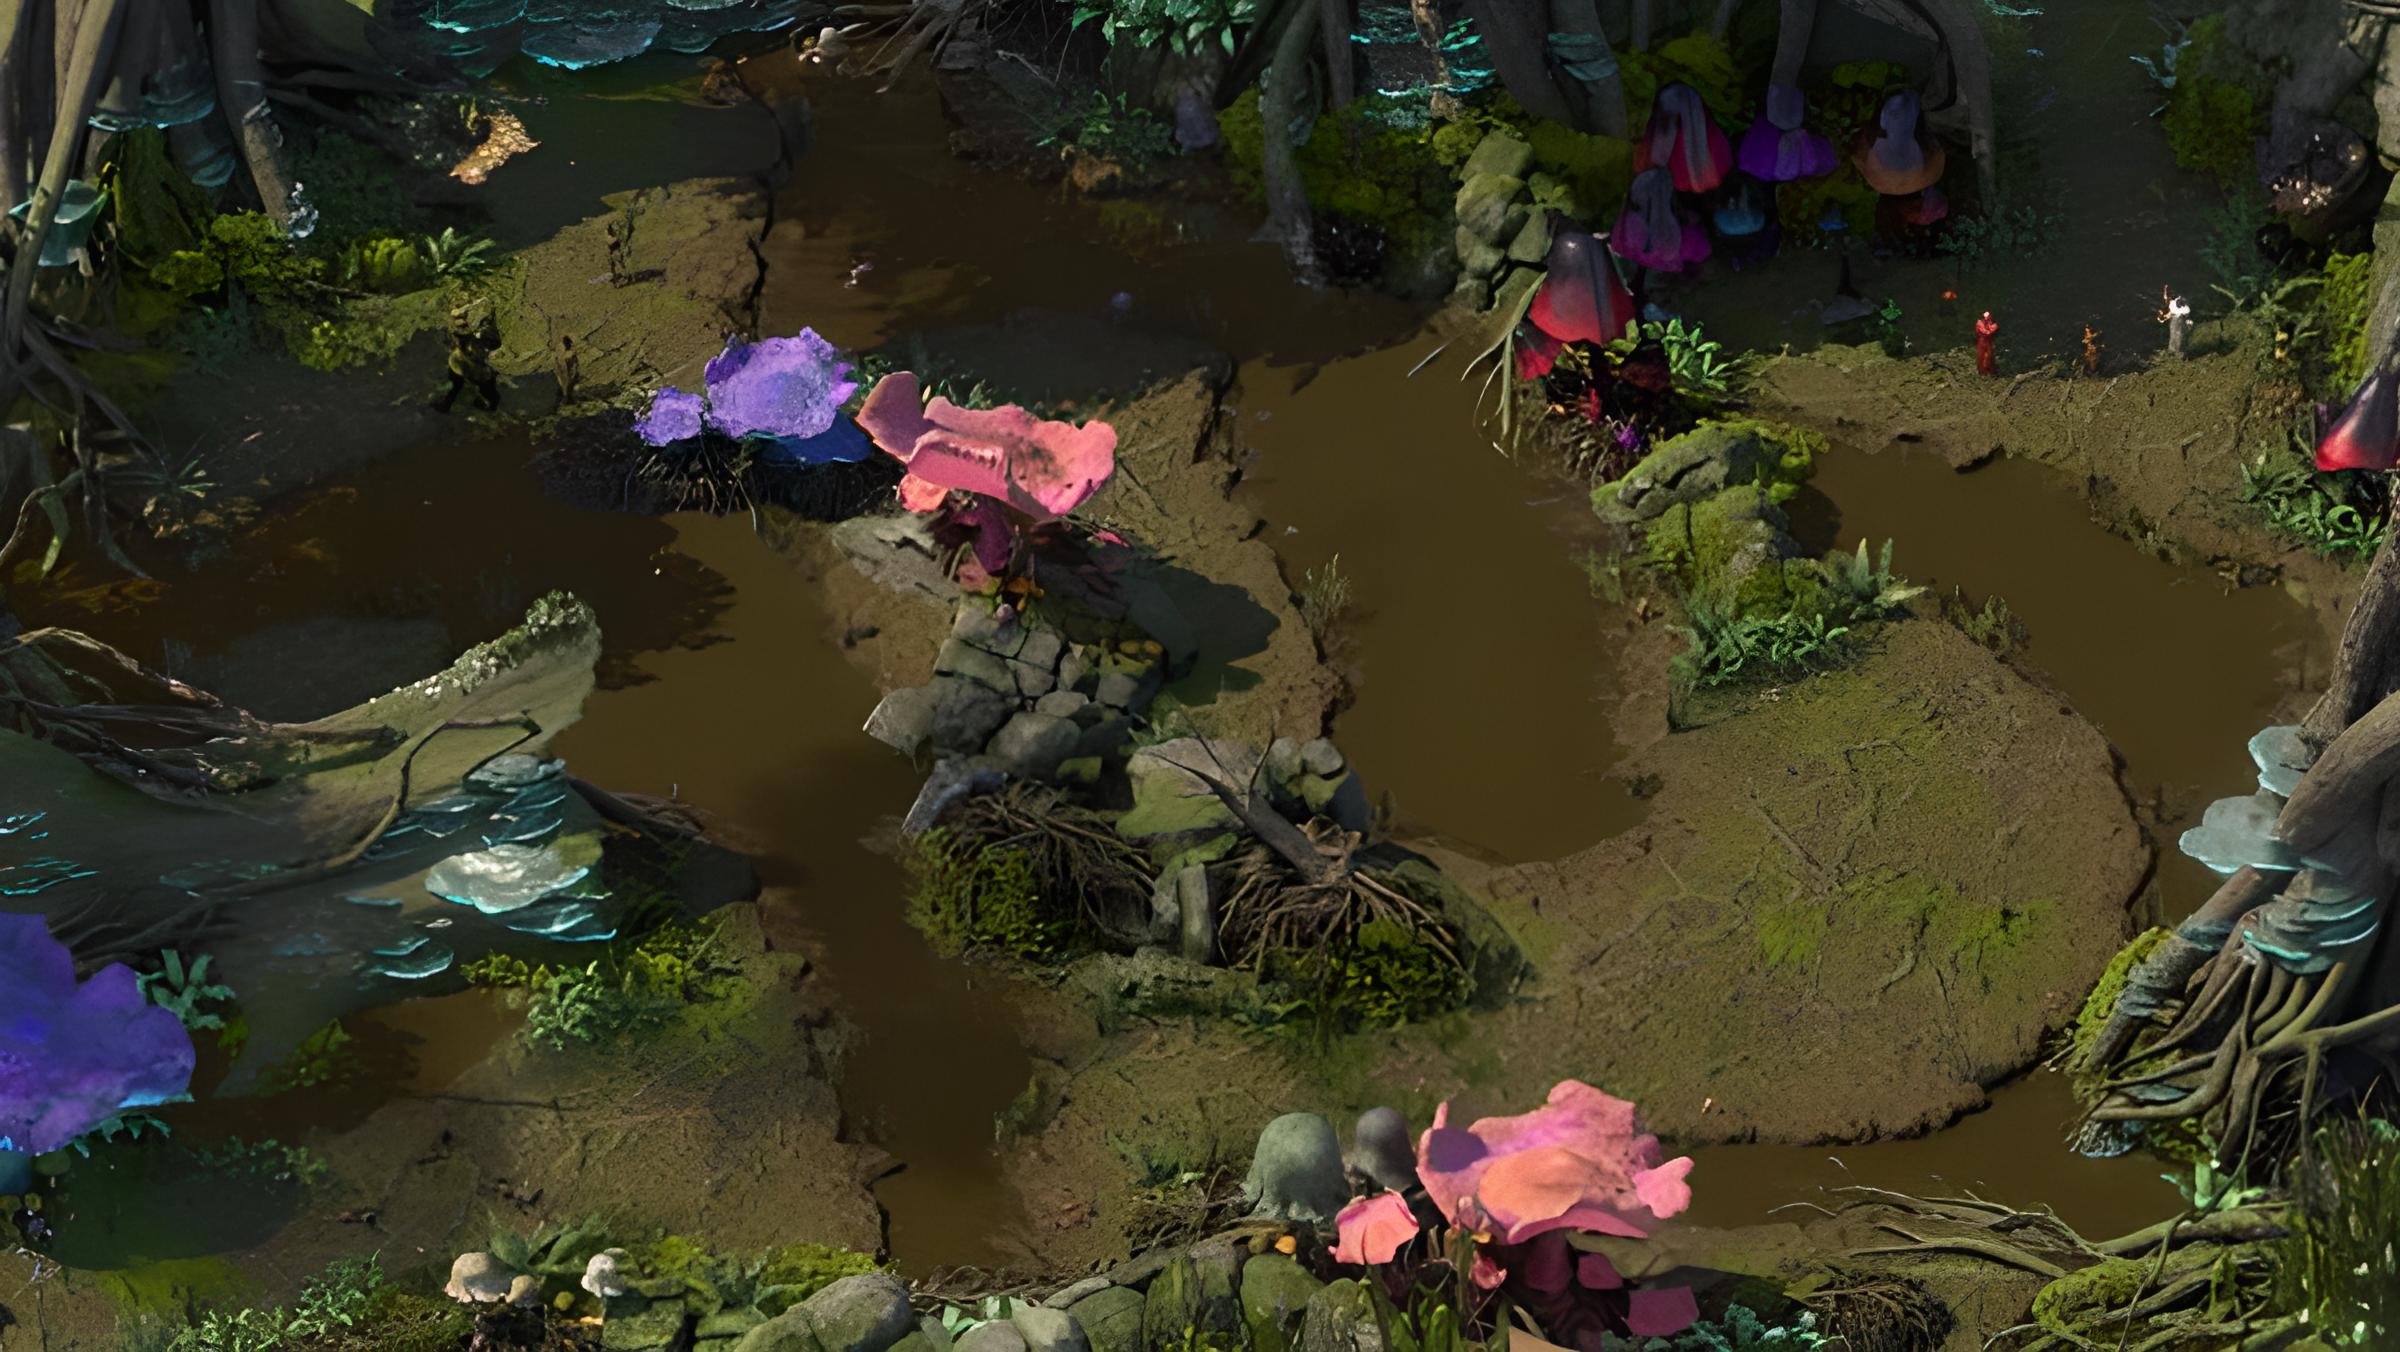
Bentbranch Bog
A region containing the druids of four seasons. You will be meeting a lot of enemies here. Since you will only be clearing a Hunting Season quest here, it’s better to skip it if possible. Having said that, you will gain Saint Omaku’s Mercy if you do manage to complete it.
Cignath Mór
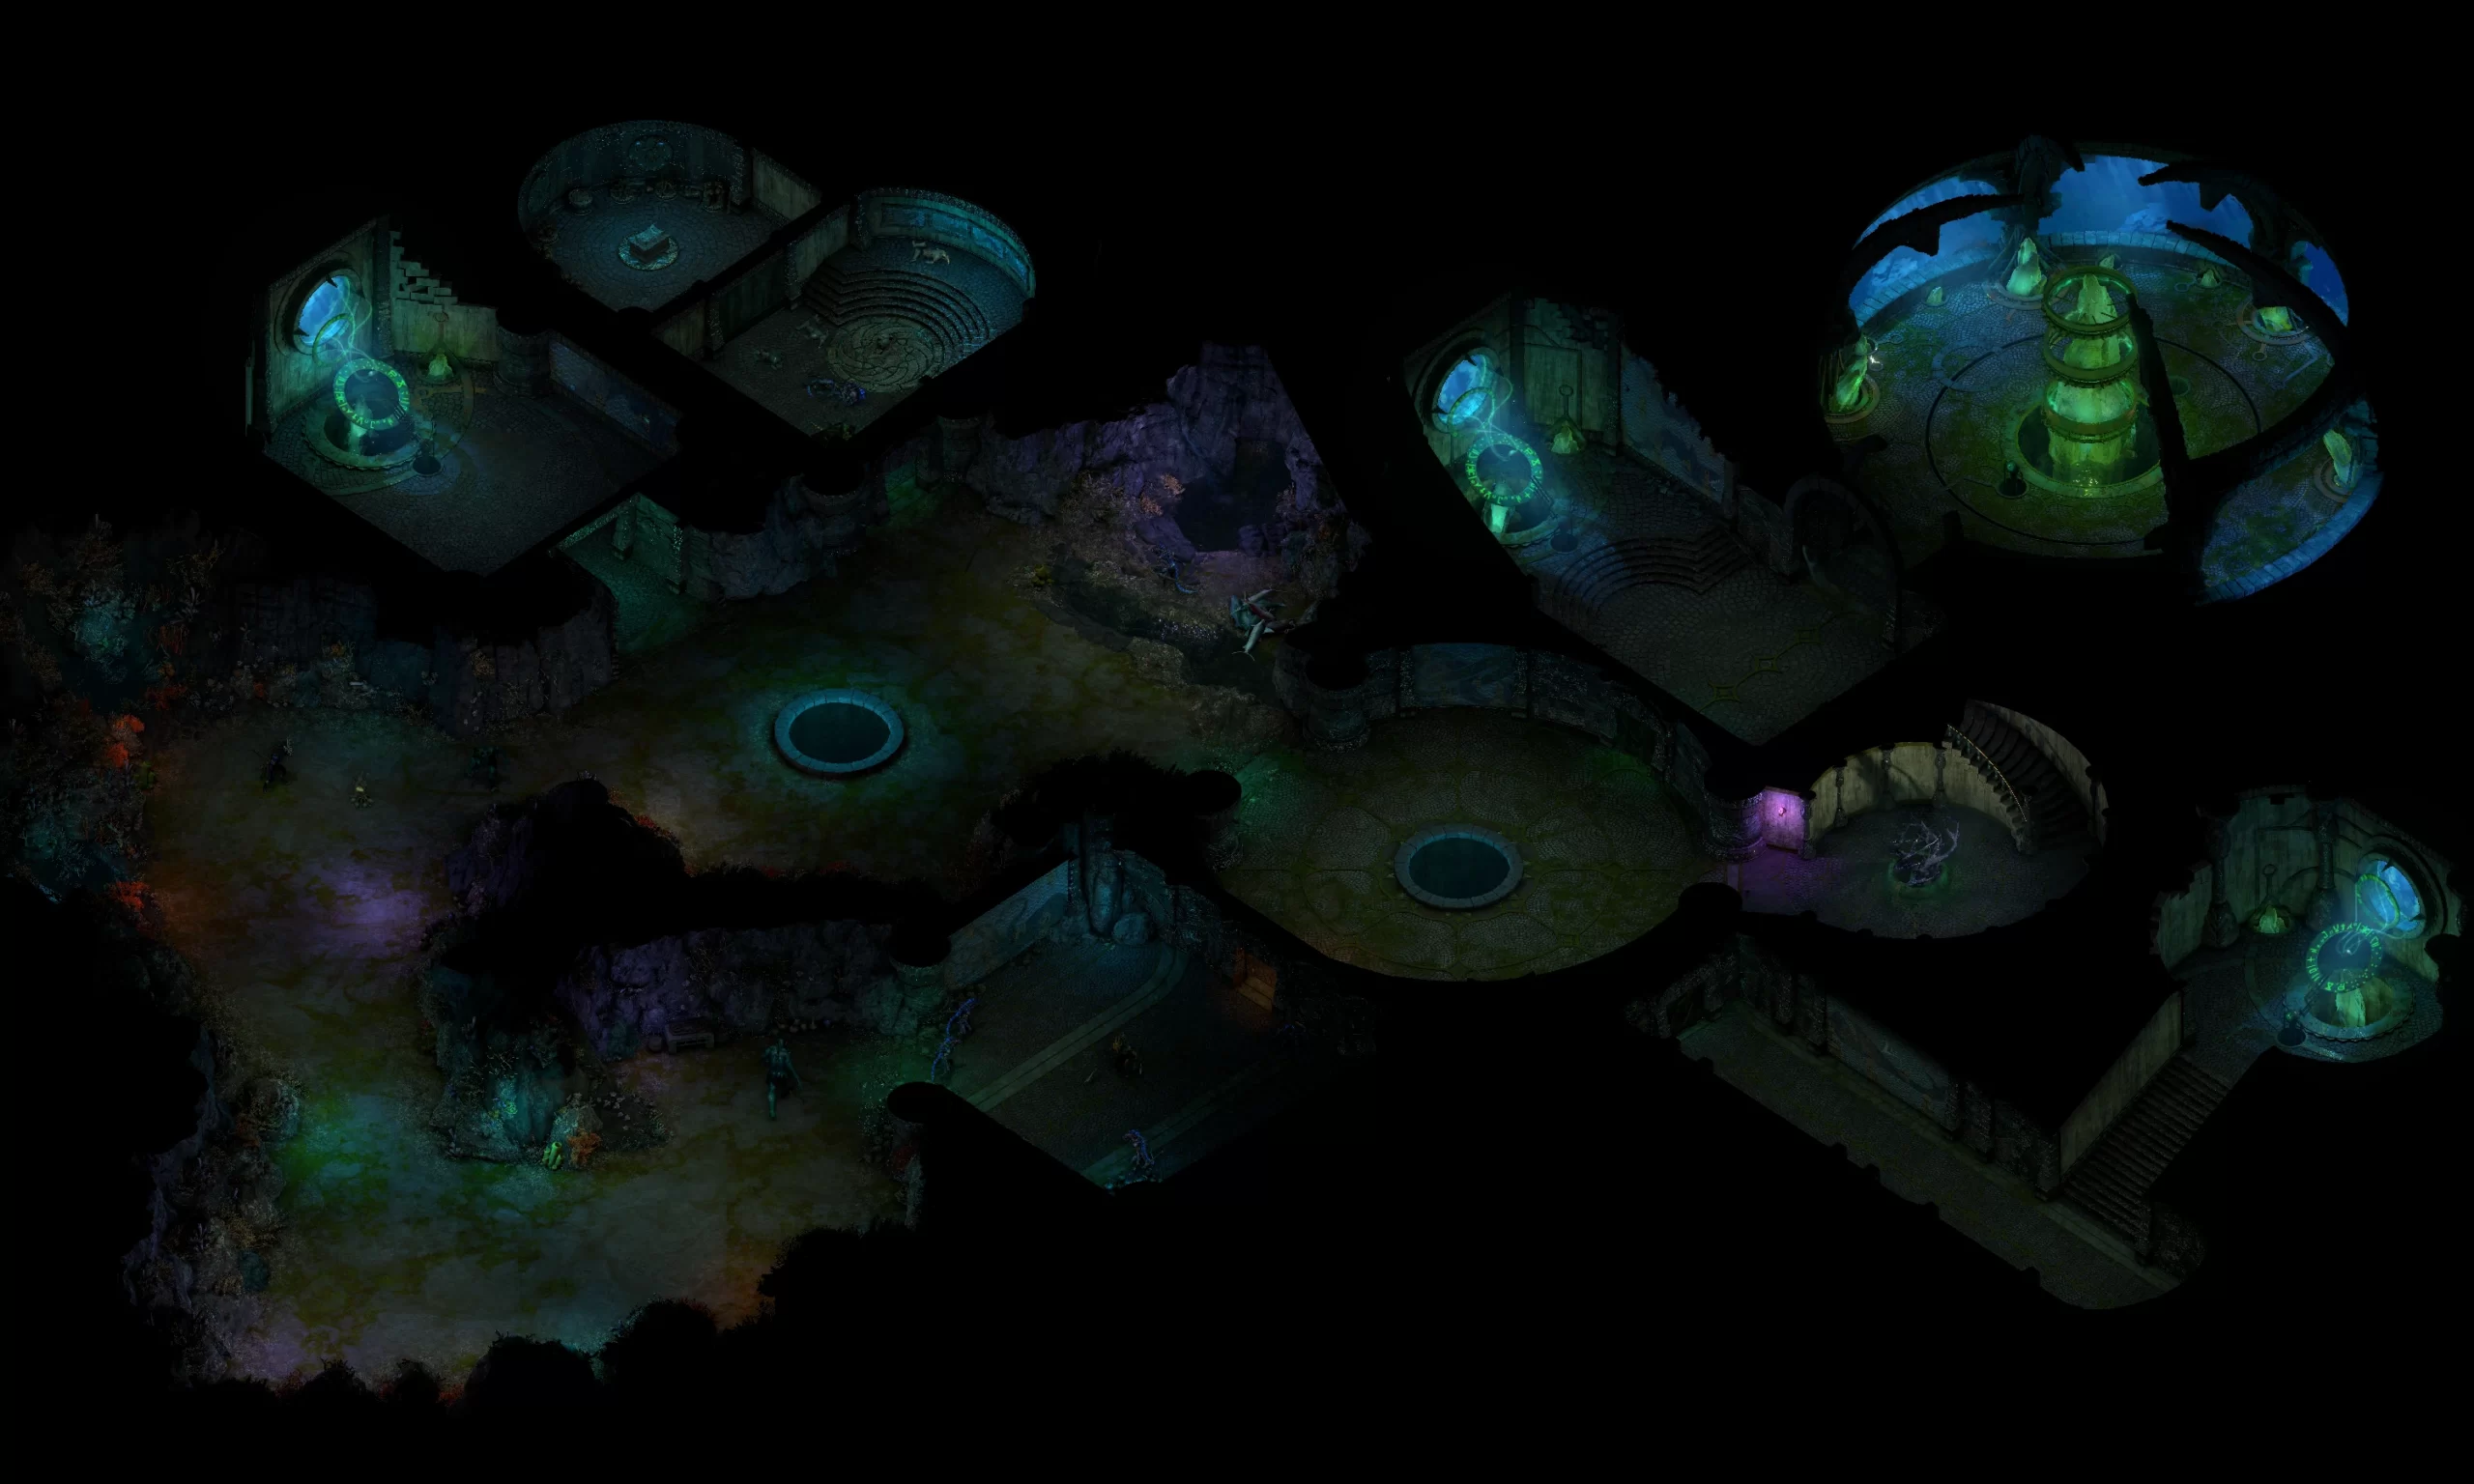
Cignath Mór | Source Wiki
A suboceanic research facility that had many experiments going wrong for it. Every inhabitant here has the enraged indicator on them.
Rikushu’s Maw
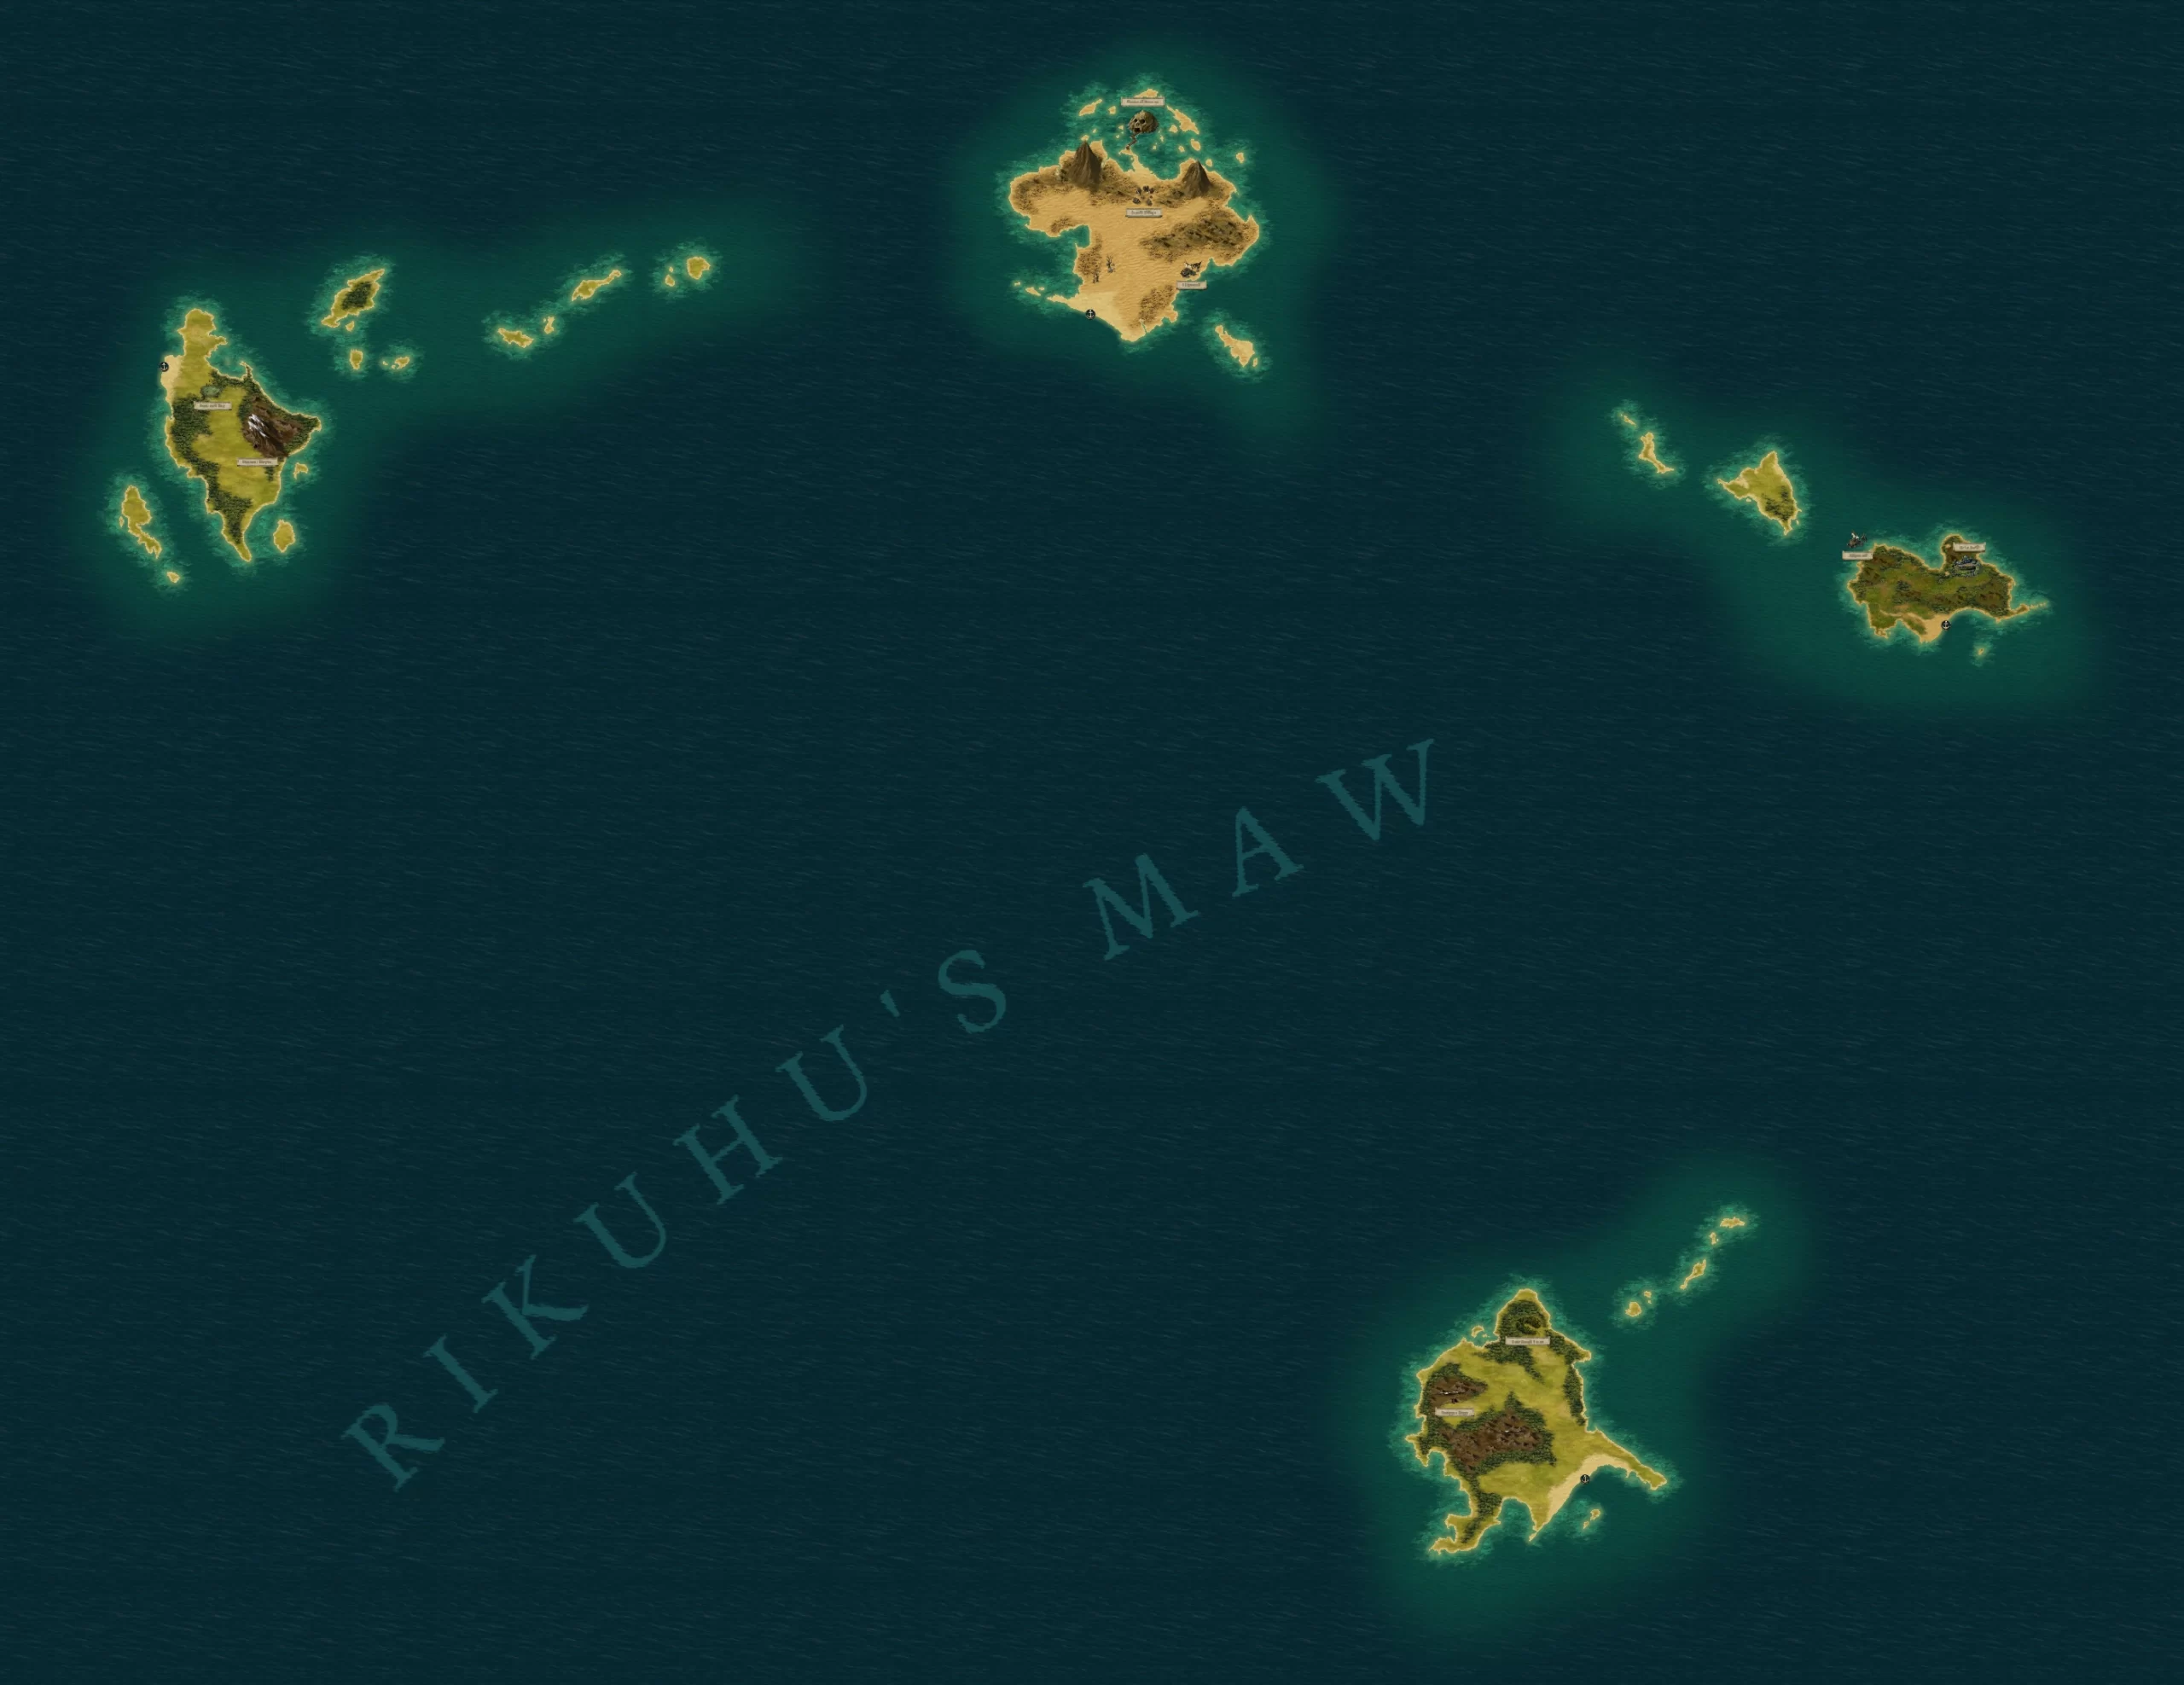
Rikushu’s Maw | Source: Wiki
An expanse that features five distinct areas with their sublocations. Here’s how it is segmented:
Southern Island
Here are all the regions in the Southern Island:
- Cave of Threshing
- Bent Bought Forest
Northwestern Island
Here are all the regions in Northwestern Island:
- Outcast’s Respite
- Boot-suck Bog
Northern Island
Here are all the regions in the Northern Island:
- Junvik Village
- Drowned Barrows
- Shipwreck
Northeastern Island
This area only contains the Ori o Koīki, which is deemed as the heart of Wahaki tribe.
School of Fish
An area located in the center that eventually leads you to the barbed ravager.
Razai Passage
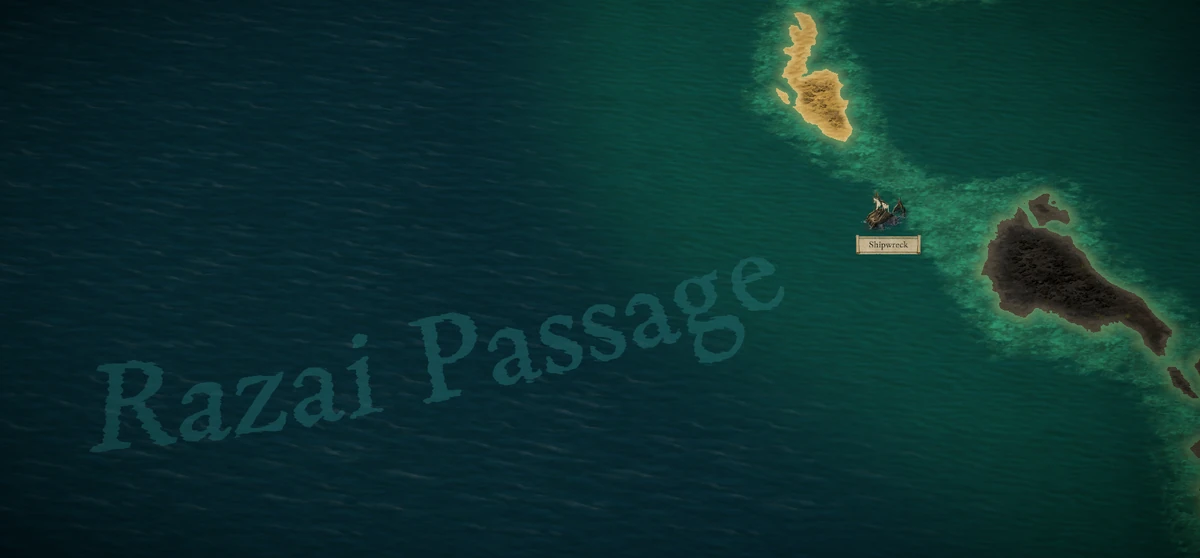
Razai Passage | Source: Wiki
A passage that contains some of the most obscure locations in the Deadfire archipelago. It’s directly connected with the northern edge of the mountain range known as Magran’s Teeth.
With that said, it features the following areas:
Kohopa’s Fang
A pure naga colony that spans over the Razai Passage. You will be meeting Uvaala here. She is a priestess that takes care of the main Fang temple.
The Crystal Desert
It is an island located on the northern side of the passage. It’s recommended that you avoid this desert since the Crystal Empress resides here.
Kazuwari
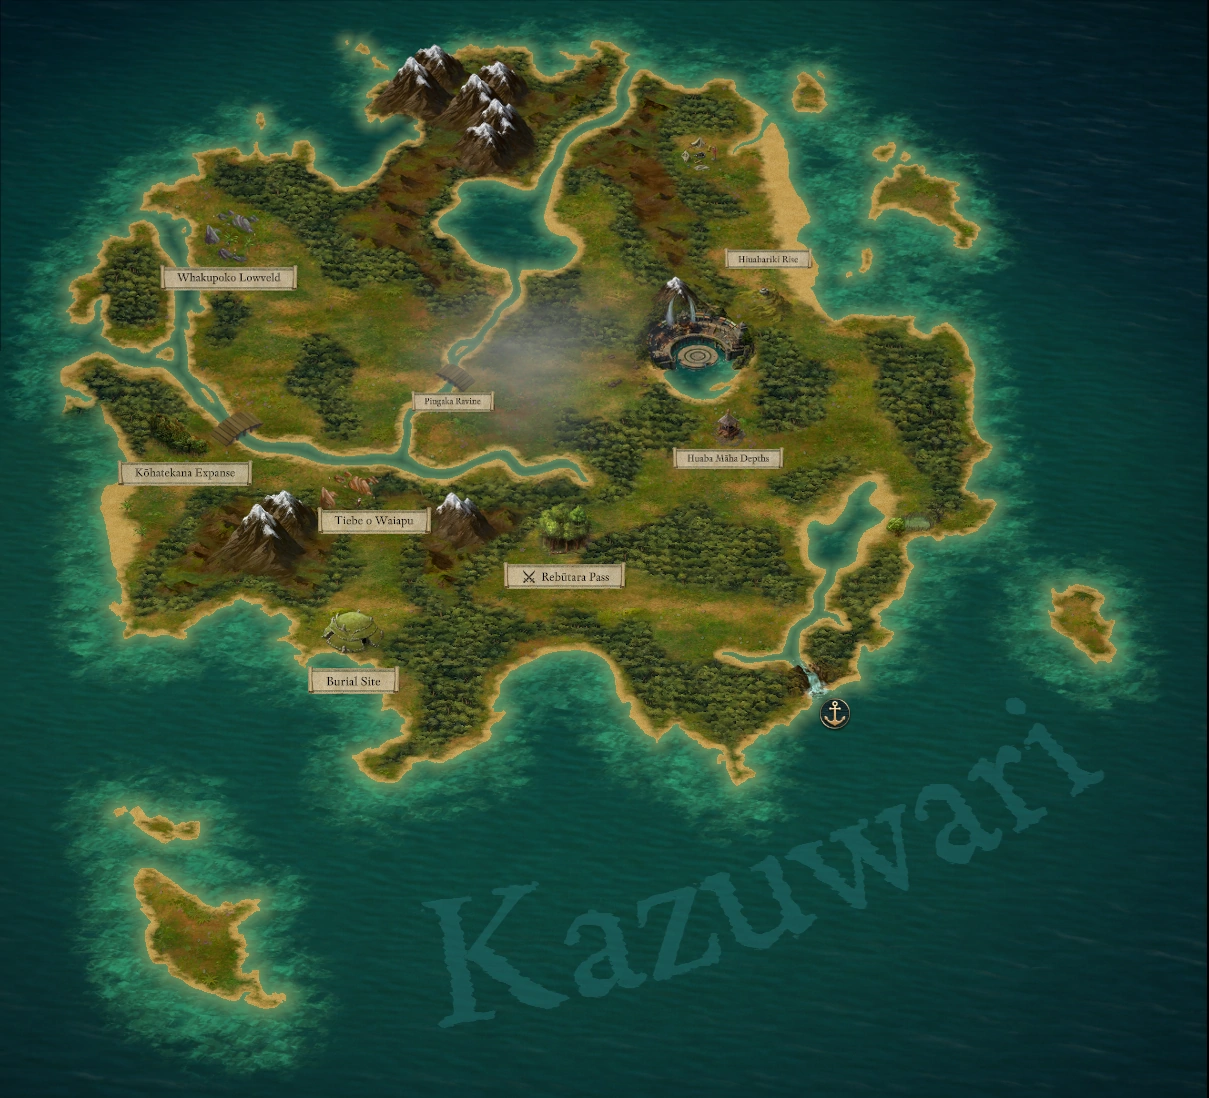
Kazuwari | Source: Wiki
This is an island located in the western regions of the Deadfire archipelago. It is the main hub for heroes seeking to make a name for themselves.
Its major regions include the following locations:
- Rebūtara Pass: Located southeast of Kazuwari, this pass contains the leader of the boarmen named Hateno and Scibéal – who is not really known for her nice personality.
- Temple of Toamowhai: The main hub of Kazuwari that consists of large stone arenas.
Northeast Zone
This is a relatively smaller portion containing two big regions with one smaller city that contains a number of marvels to behold. It is mostly comprised of the wilderness, so you will be doing an awful lot of exploration.
Having said that, here are all the regions that comprise the Northeast Zone in the Deadfire Archipelago:
Magran’s Teeth

Magran’s Teeth | Source: Wiki
This is a volcanic mountain range on the northeastern edge that acts as a treacherous barrier. It starts from Ondra’s Mortar and Stretches to Ukaizo. Having said that, here are the main locations present in Magran’s Teeth:
Ashen Maw
The Ashen Maw – as the name suggests, is a location with extreme smoke and ash. Since it is located on the peak of a near-active volcano, there’s always a chance of a random volcanic eruption. You will be completing the “He Waits in Fire” mission while passing through here.
Unfortunately, the mission lies on the critical path. Therefore, we recommend you clear it as soon as possible in order to maximize your power leveling.
Urnox Berinth
The Urnox Berinth is the area where Rathuns reside. With the directions of their leading warlord, they attack any ship that passes through in order to loot all the riches. Since it has already become a problem in the entire archipelago, the warlord has a juicy bounty on his head.
Luckily, killing him is pretty easy and can set you up for a smoother journey ahead.
Kua o Rikuhu Islands
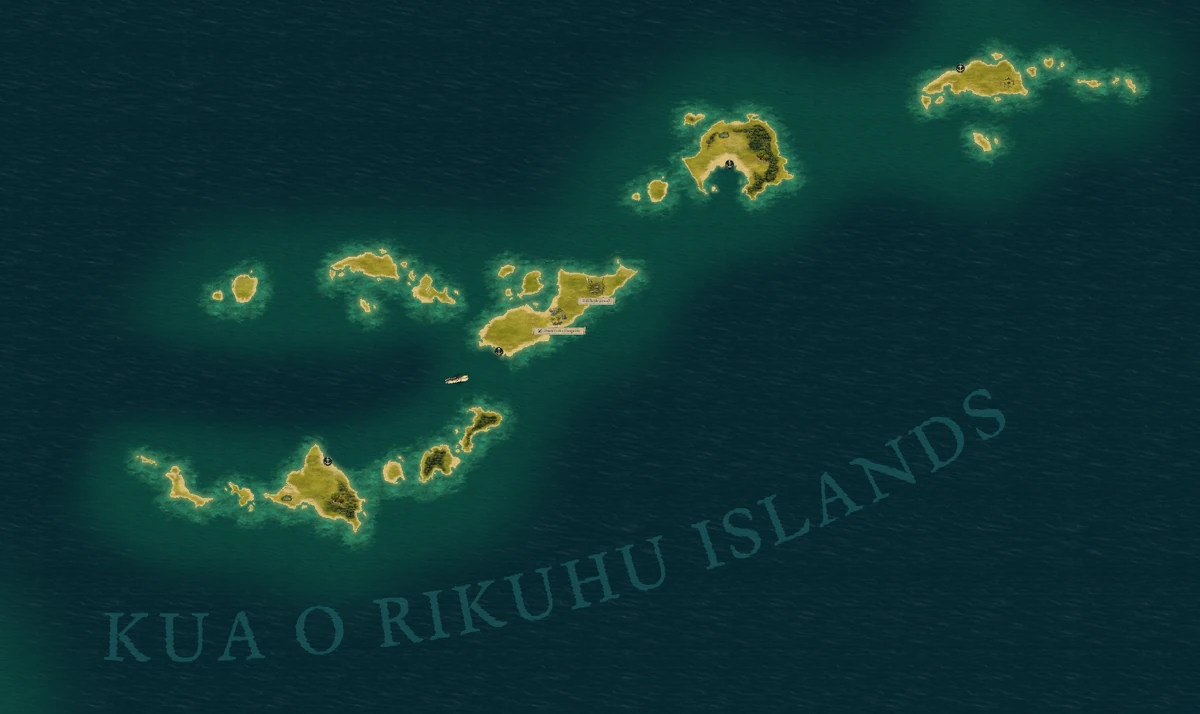
Kua o Rikuhu Islands | Source: Wiki
This is a relatively bigger island chain that spans Nekataka and Offecchia Channel. As one can expect, the area is humongous enough to be divided into several subsections. Here’s a general overview of how it works:
- Eastern: Single Island, you will be finding Ikorno here.
- Southeastern: An old lagoon that has a once-abandoned village in the middle of it. There’s a decent bounty to be taken here.
- Motare Cluster: A humongous lagoon that possesses areas like Motare o Kōzi. You will be meeting the following NPC warriors here:
Name Description Wahaki A tribe that lives near the jungles. Embēta A warrior of Wahaki that defends the tribe against the maddened nature.
Ondra’s Mortar
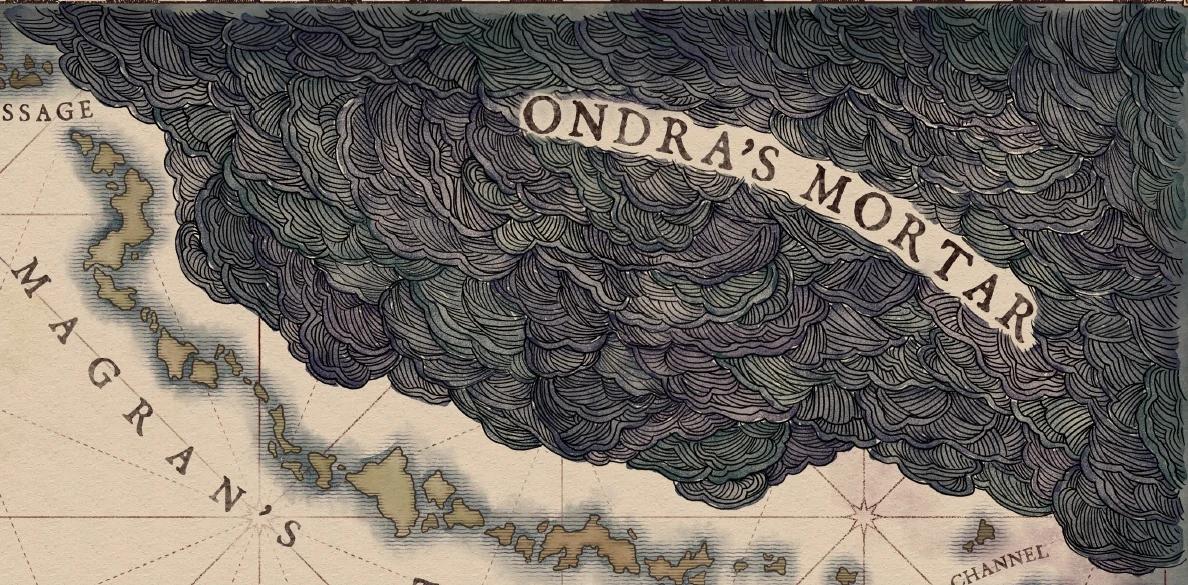
Ondra’s Mortar | Source: Wiki
This is the uncharted sea expanse on Pillars of Eternity 2: Deadfire. It features hurricanes, extremely high waves, and storm showers. You will also be finding the lost city of Ukaizo here.
You will be completing The City Lost to Time on the mythical island. Finding Ukaizo is a big achievement that can help it get back to the world map. The city itself is extremely pretty, so you will be enjoying your stay there.
Southeast Zone
This is the final zone that comprises the Deadfire Archipelago. It contains a multitude of ruins and is generally known as the endgame zone for most players. The locations here are generally pretty tough to complete unless you have sufficient gear and skills.
With that said, here’s what transpires in the Southeastern Zone in Pillars of Eternity 2: Deadfire:
Forgotten Catacomb
Forgotten Catacomb
As the name suggests, this is a once-lost catacomb dungeon that is present in the middle of the wilderness. It can be relatively hard to find since it’s not a big location. However, if you’re well versed with the workings of the map then simply head to the uncharted island on 21° 5’S, 51° 14’E and you should be good to go.
You will be finding the Death Guard Fanatic here whose main purpose in life (or after death) is to roam around endlessly. They occupy their former bodies and become psuedo-immortal, thereby remaining in the real world by burning their flesh.
As you could guess, this venture is extremely painful and can result in them entering a state of frenzy. You will be completing a quest named Mapping the Archipelago: Tokawara during your stay in the Forgotten catacomb.
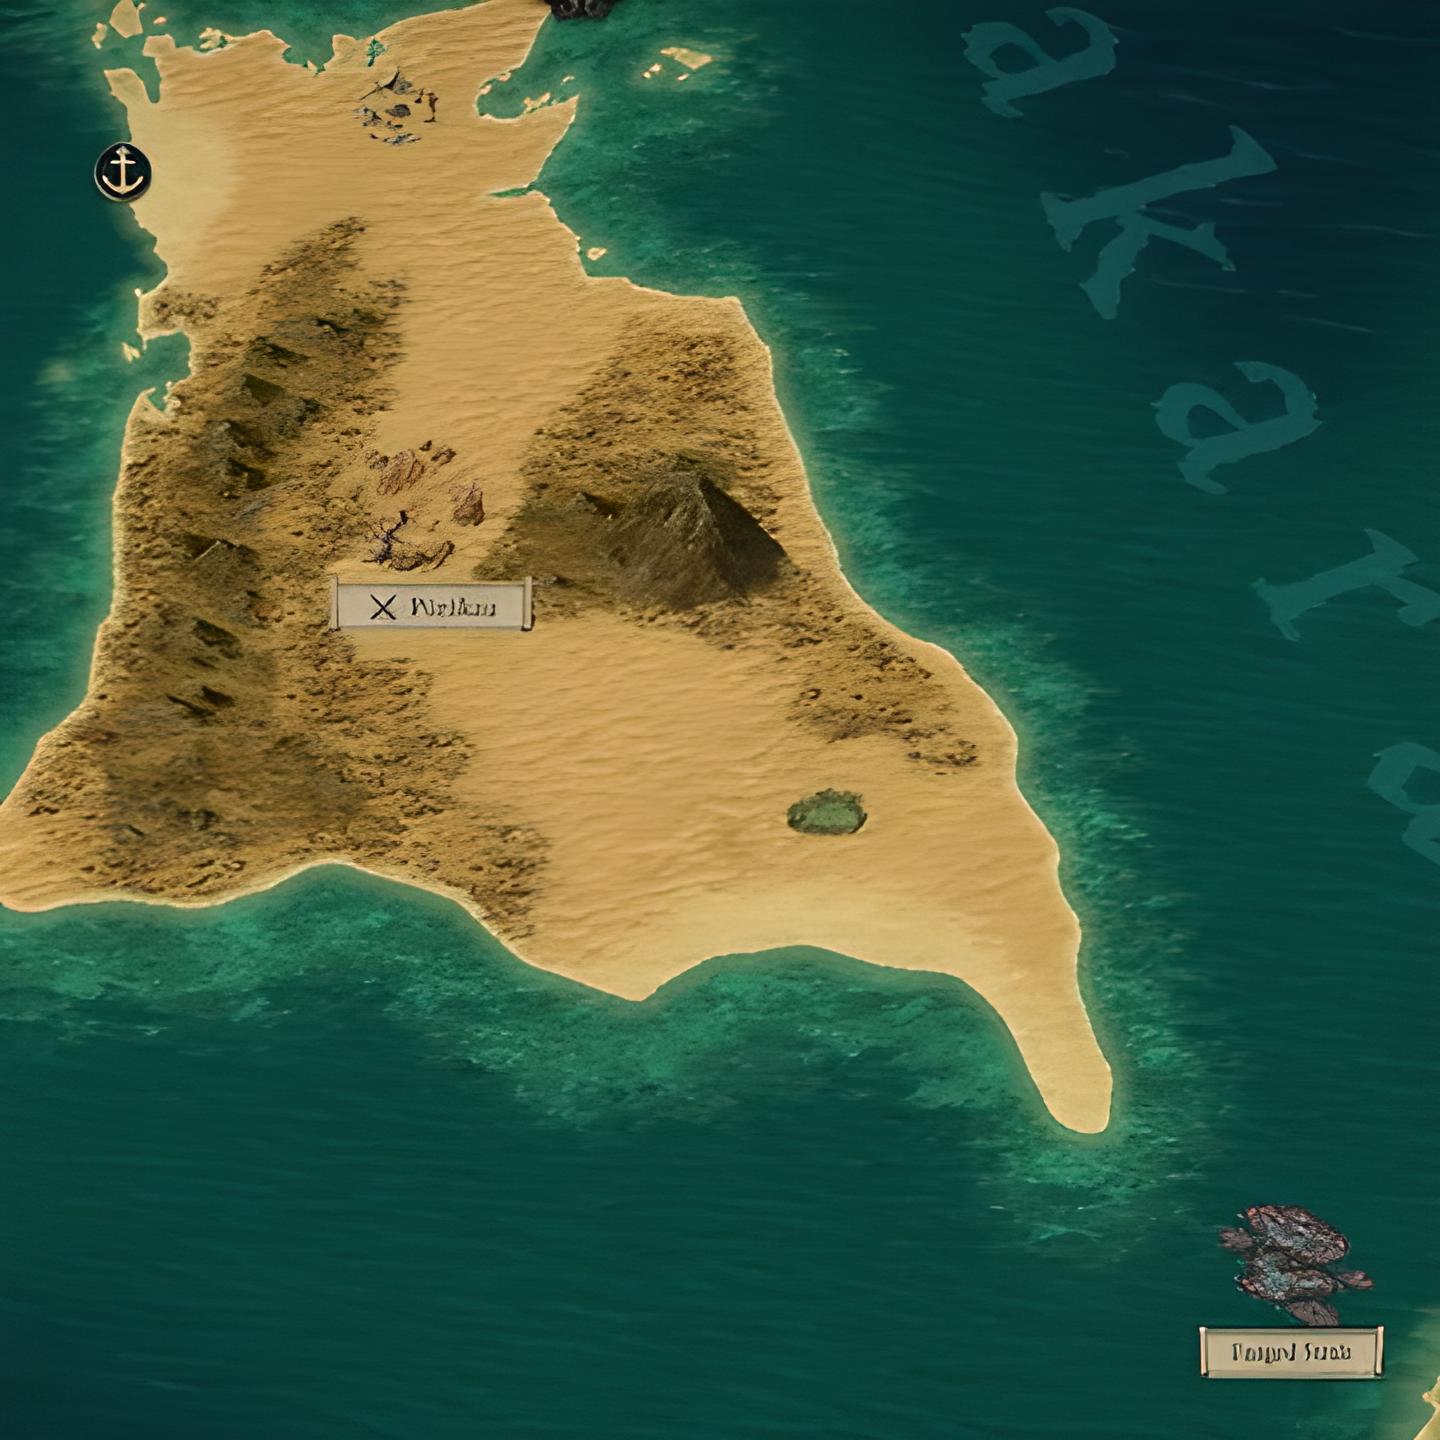
Tehiwai Islands
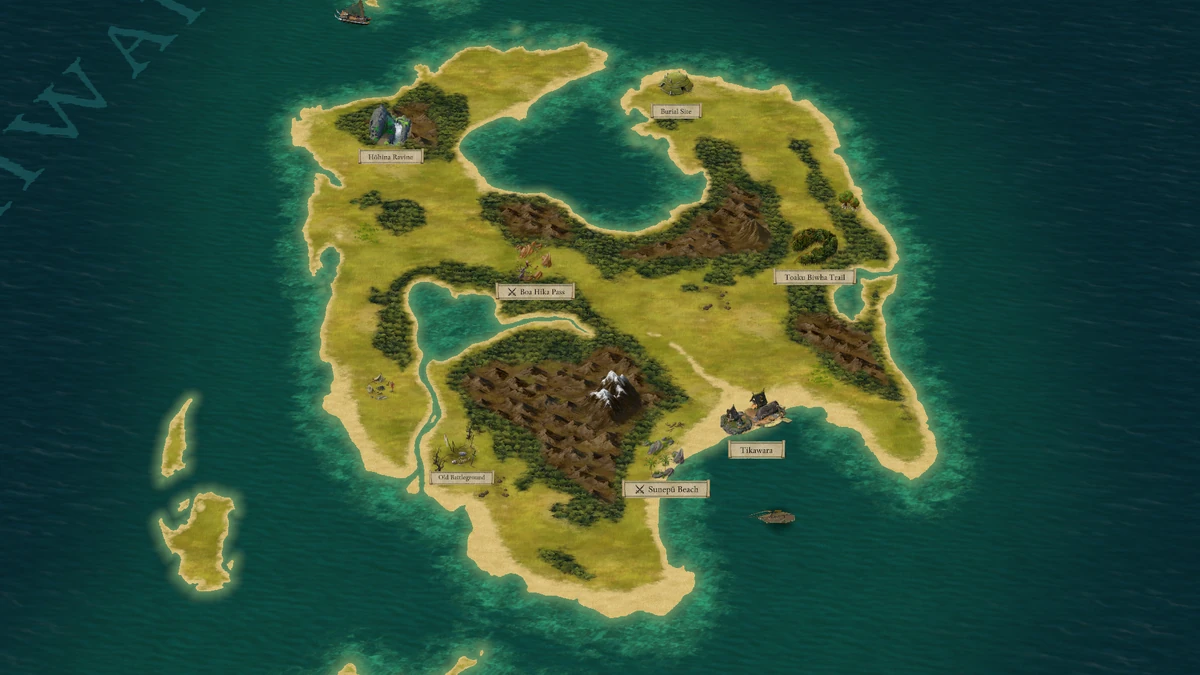
Tehiwai Islands | Source: Wiki
This area contains a series of tropical islands that are rather small in size. The area is located near the Vailian Trafing company’s trade routes and is rather secluded from the rest of the world. Having said that, it does have a decent amount of locations and can be a fruitful venture – depending on the quests you take and complete.
Tikawara
Despite Tehiwai Islands’ secluded origins, the Island of Tikawara is relatively new and is inhabited by a Huana tribe. You will be meeting an awful lot of characters here. Since this area exists on the critical path, we recommend you put this on your priority list.
With that said, here are all the inhabitants present on the Tikawara Island:
| Name | Description |
| Ranga Ruānu | The head of the Tikawara people determined to succeed in this new location. |
| Vektor | Mountain Dwarf related to the Pargurnen immigrants. He’s affiliated with the Republics. |
| Himuihi | She runs the Tikawaran trade post as a member of the Mataru caste. |
| Rongi | A mat weaver who doesn’t have a single shred of patriotism. |
| Pekeho | A fisherman that’s generally considered a lower caste on the island. |
| Mukūmu | A vigorous warrior that stands for righteousness. |
| Tamau | A member of the lowest cast in the Huana society. He’s accused of stealing food – which is a capital offense. |
| Teāna | A drummer in the Tikawaran village. |
| Wehata | Daughter of Rongi. |
| Nairi | The main representative of conservative Huana culture. |
Having said that, here are the quests present in this region:
- Broodmother’s Fury
- Plucked Fruit
- The Courier’s Calling
- The Storms of Poko Kohara
Hōhina Ravine
This is the main spawning ground of the local lagufaeth tribe. There’s only Broodmother’s Fury quest available here. It’s recommended that you clear this area as fast as possible since there isn’t much to explore here.
Poko Kohara
Poko Kohara
This landmass contains the final survivors of an Engwithan civilization. It mainly consists of Ruins and a Shrine. Since the area is generally intended for speed clearing, you’re better off finishing the quests in a systematic way, rather than approaching them randomly.
On that note, here are all the quests present in the Poko Kohara:
- Dim Prospects
- Terms of Trade
- The Storms of Poko Kohara
- The Surviving Face’s Hunt for the Uncut Gem
Subterranean Temple
Subterranean Temple | Source: Wiki
This is a relatively small temple that has most of its area blocked off. Since it is located in the center of a clearing, you will be able to find many interesting inhabitants. Here are the main ones:
| Name | Description |
| Gulfaryc | A veteran that once tried to be the Hero of the Steel. |
| Arnfryda | A Gulfaryc’s companion that found the Maistrate’s Cudgel. |
| Bildh | Another Gulfarys’s companion with a similar story as Arnfryda. |
| Carmet | Eldest member of the Steel Garrote. |
You will be only completing the Mapping quest. Therefore, there isn’t much to look for here.
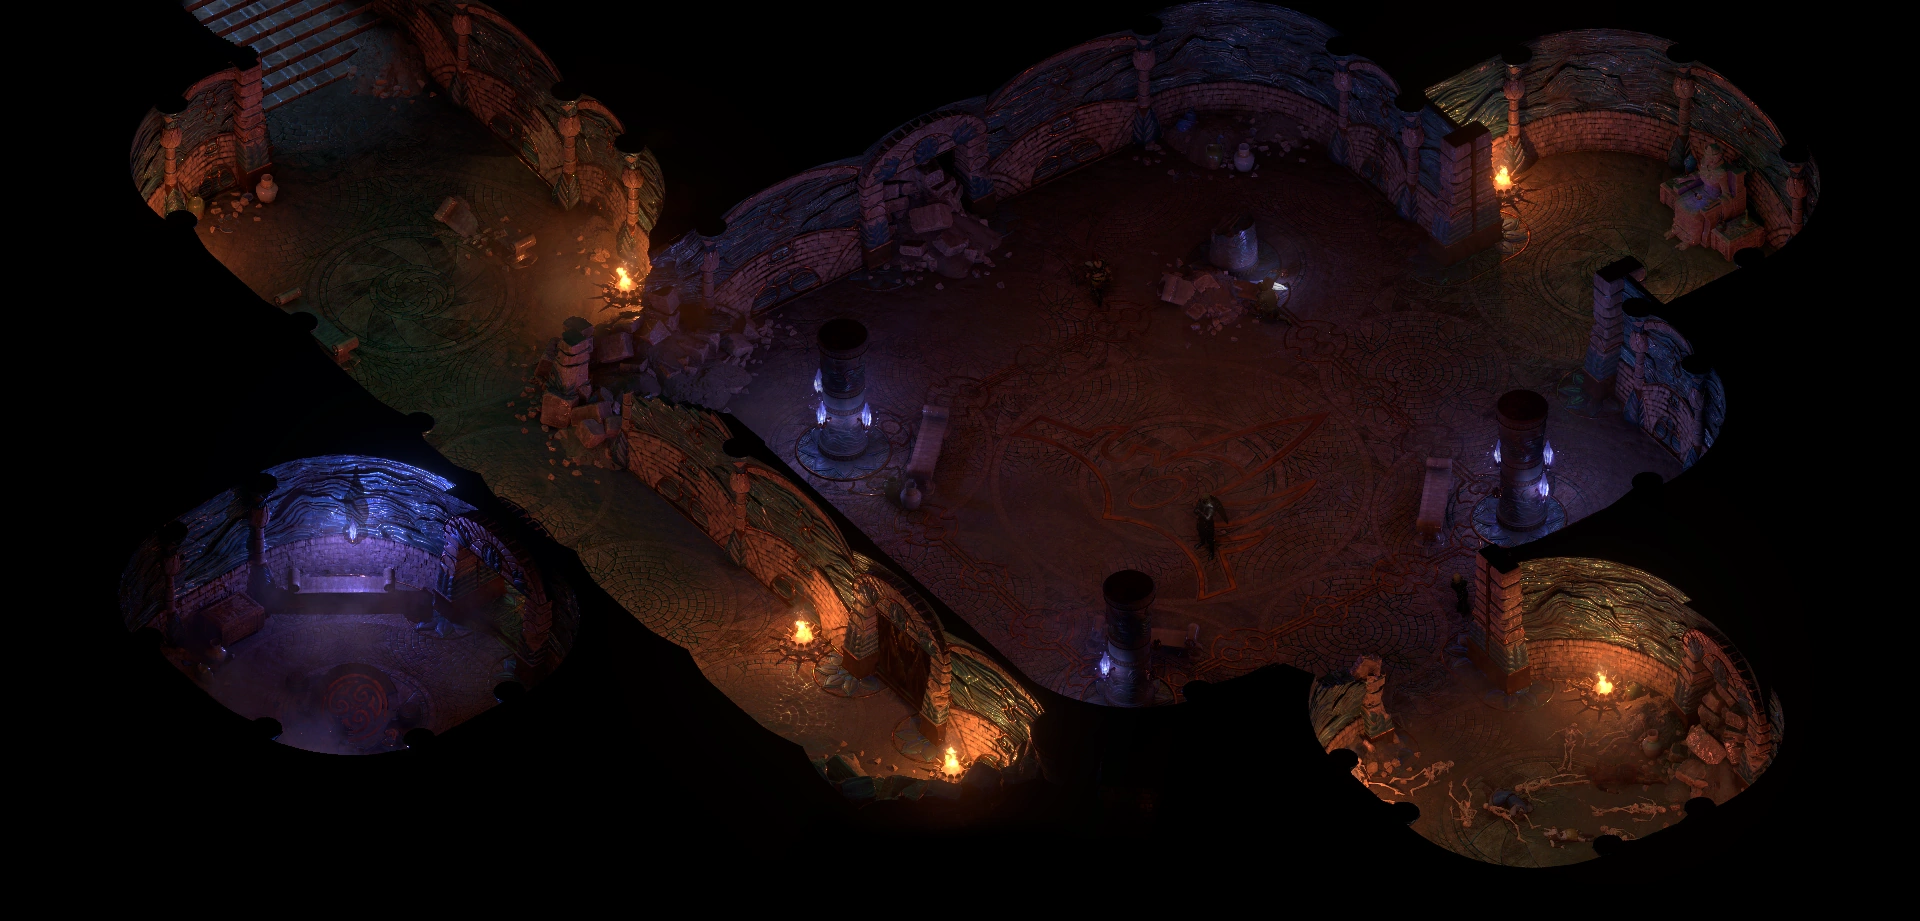
The Black Isles
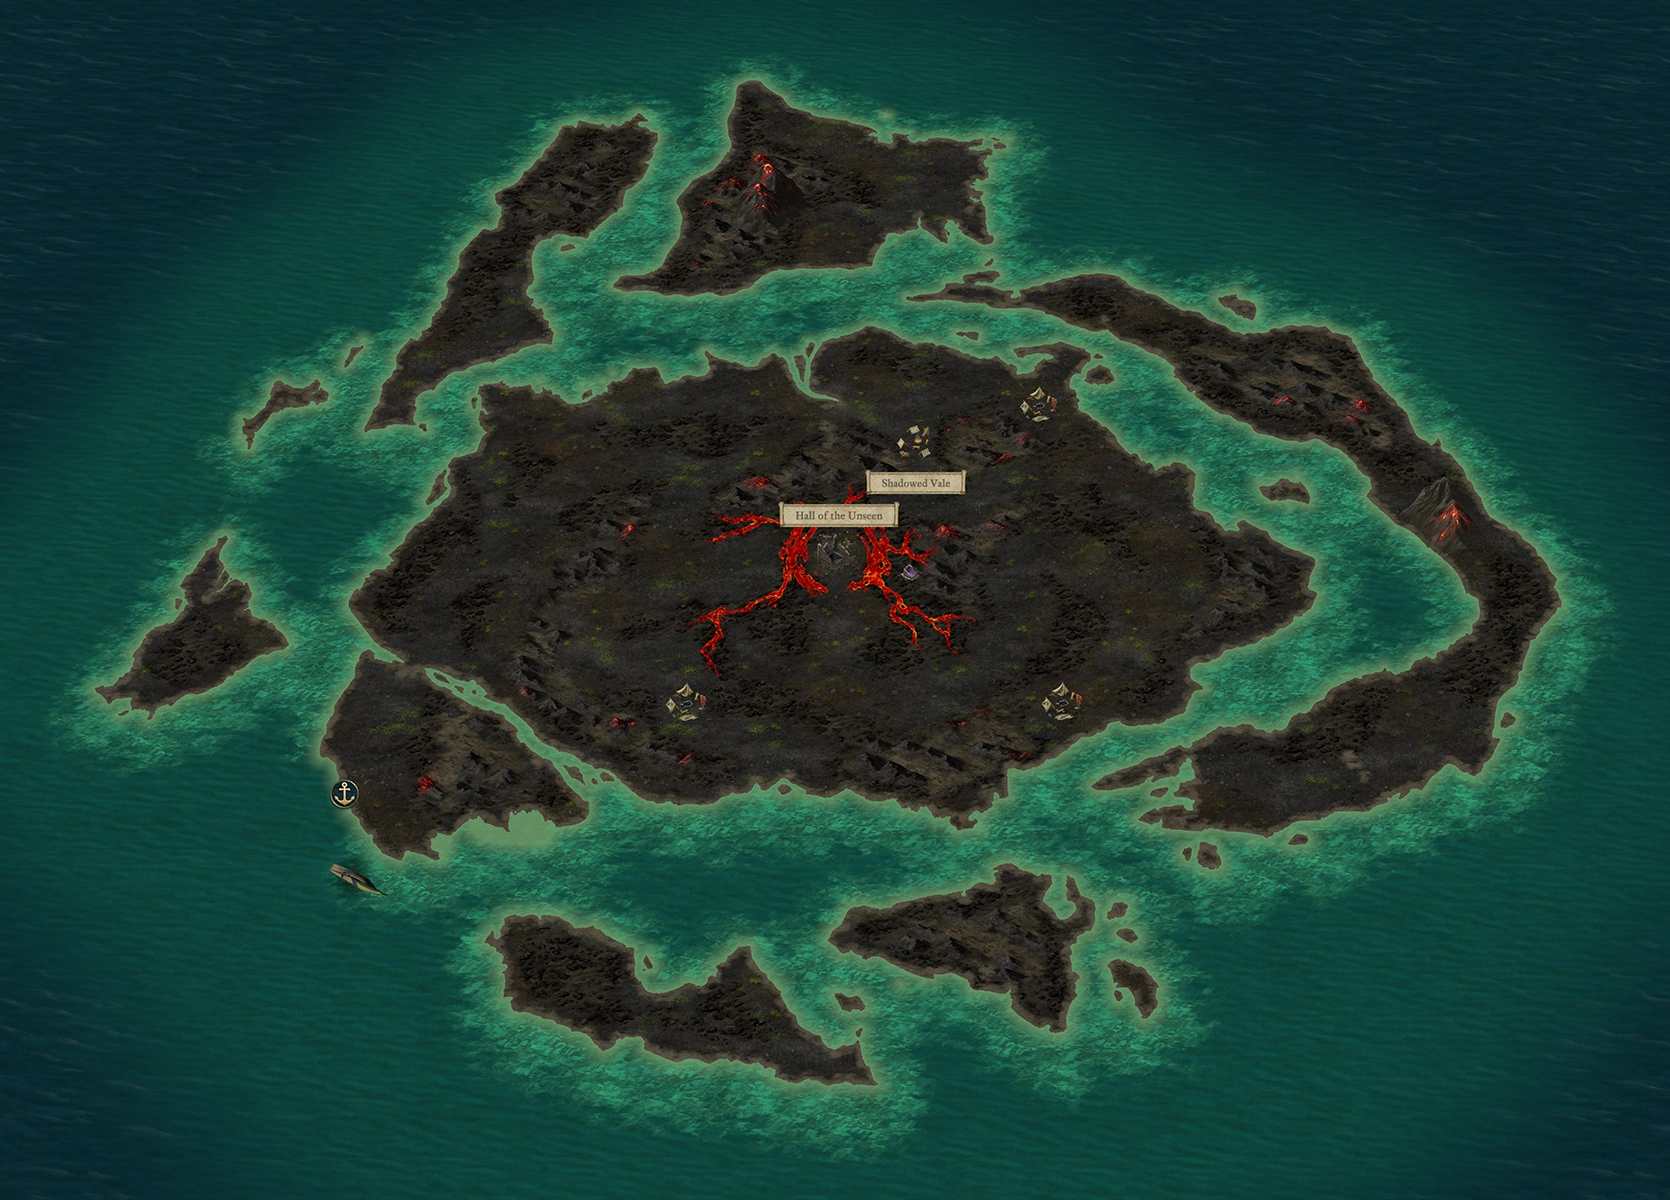
The Black Isles | Source: Wiki
This range contains a set of volcanic islands where the Black Isle bastards reside, It contains the Hall of the Unseen and the Shadowed Vale. Since you won’t be meeting a lot of people here, it’s better to spend your time exploring instead.
With that said, this area contains the following quests:
- Hall of the Unseen
- Mapping the Archipelago: Tikawara
The Windless Wastes
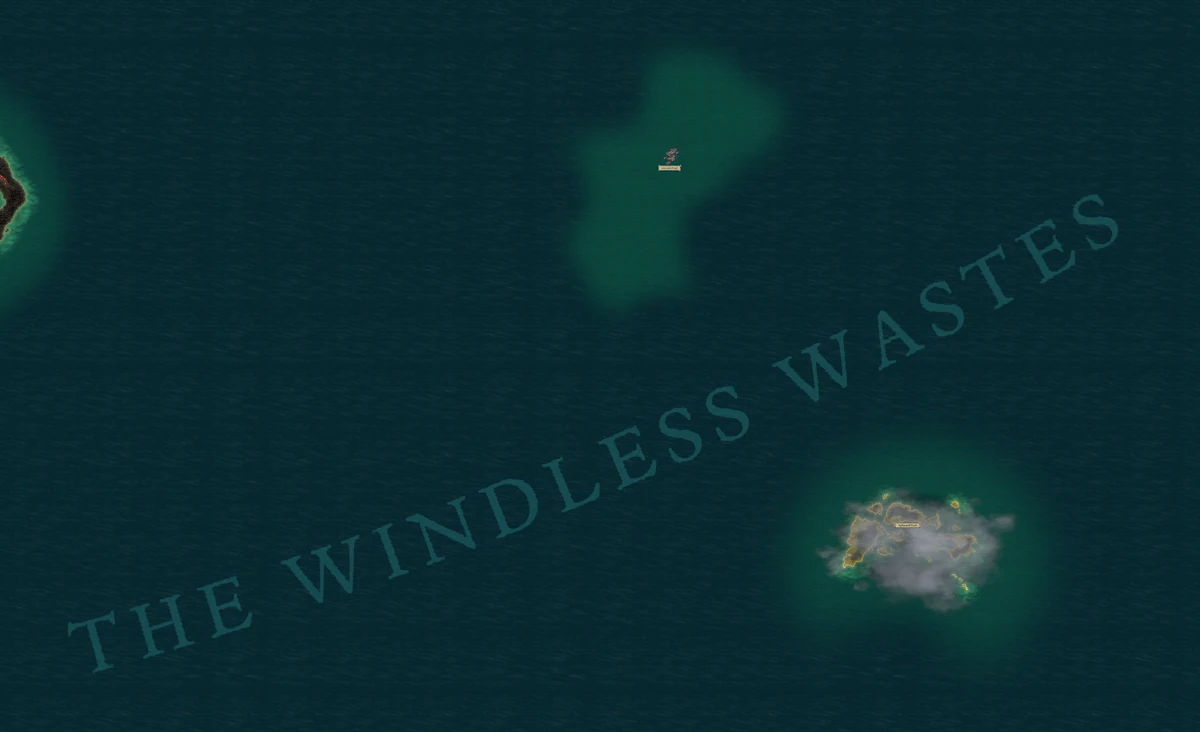
The Windless Wastes | Source: Wiki
This is a segmented landmass with low population counts. Since the information on this area is rather scarce, you can either meet your fortune or downfall depending on your luck.
As the treasure, it contains the Splintered Reef that is home to the paladin Lucia Rivan’s treasures, and for the demise, it contains the Mara-Mara Trench. Luckily, the area isn’t as dangerous as the rumors make it out to be, and if you get lucky – you can even hunt a whale.
The Dead Floe
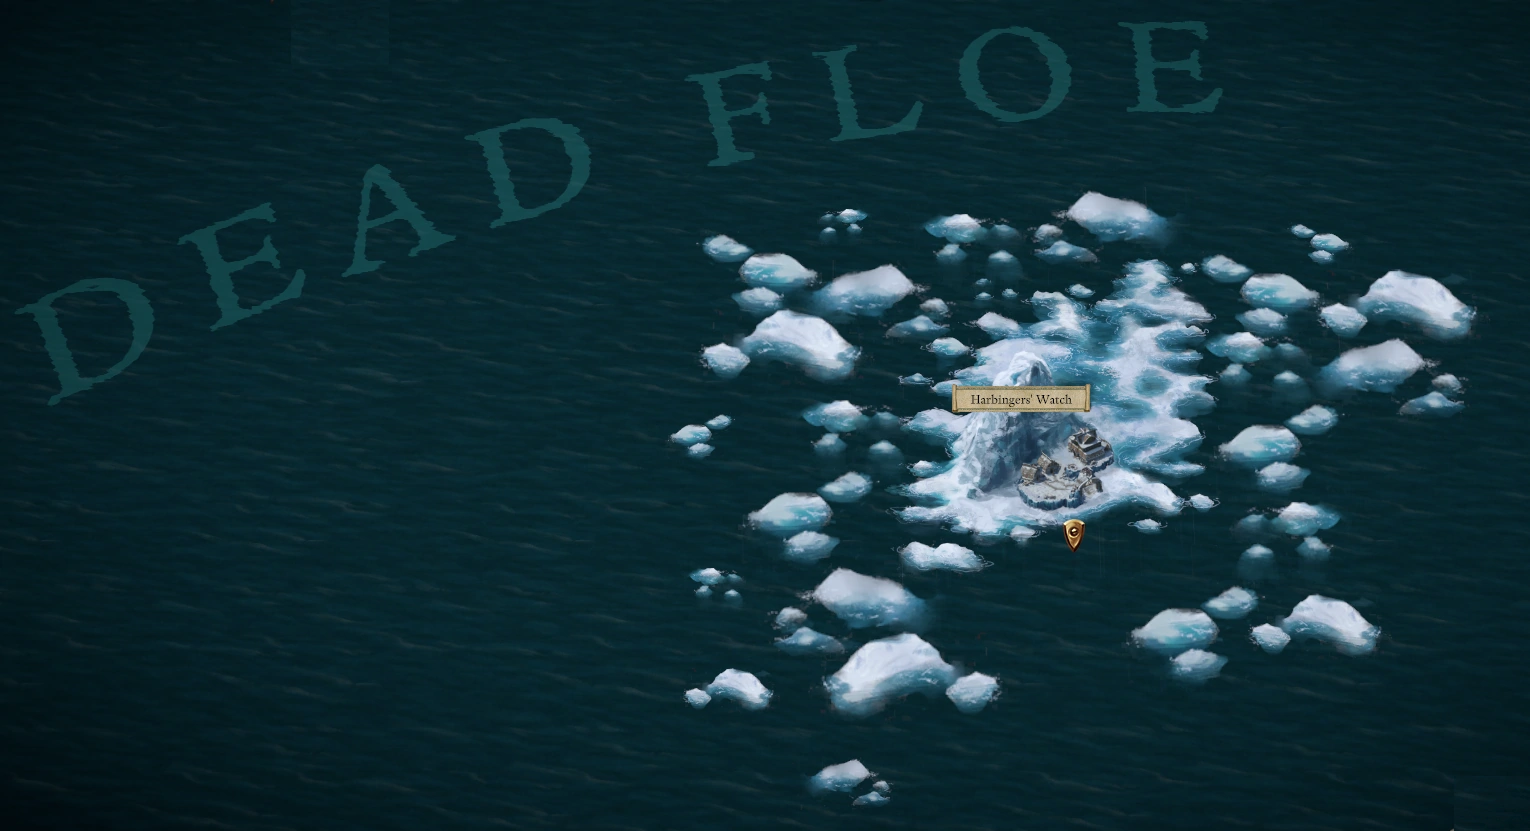
Source: Wiki
A stretch of waters containing the Harbringer’s Watch. The temperatures here are nothing to scoff at. Harbringer’s Watch is built upon the edge of a glacier and features a religious cult. You will be encountering the following quests here:
- The Higher-Ups
- The Last Pilgrimage
- To Rise and Decline
Navigating Through Deadfire Archipelago

Pillars Of Eternity 2: Deadfire
To sum it all up, you will be going through the following locations while playing Pillars of Eternity 2: Deafire:
| All Deadfire Archipelago Locations |
| Abovedeck |
| The Adra Realm |
| Arena Sub-level |
| Arkemyr’s Manor |
|
The Ashen Bridge
|
| Ashen Maw |
| Balefire Beacon |
| Bardatto Estate |
| Beach |
|
Bekarna’s Observatory
|
| Belowdecks |
|
Bent Bough Forest
|
| Bentbranch Bog |
| Biha’s home |
| Bleakrock Shrine |
| Boa Hika Pass |
| Boathouse |
| Boot-suck Bog |
|
The Bridge Ablaze
|
| Briny Grotto |
| Cannon rampart |
| Captain’s Cabin |
|
Cave of Threshing
|
|
Cavern of Xaur Tuk-Tuk
|
|
Chieftain’s Lodge (Sātahuzi)
|
|
Chieftain’s Lodge (Tikawara)
|
| Cignath Mór |
| City Streets |
| Cockerel Forest |
|
Collapsed Coal Mine
|
|
Corroded Wasteland
|
| Crookspur |
| Crookspur Island |
| Crossroads |
|
Cuitztli’s Exotic Herbs
|
|
The Dark Cupboard
|
| Deadlight Court |
| Deadlight donjon |
|
Deadlight dungeon
|
| Delver’s Row |
| Dereo’s lair |
| Desert |
| Dining hall |
|
Drowned Barrows
|
|
The Drowned Kingdom
|
| Dunnage |
| Dunnage House |
|
The Endless Queries
|
|
Engineering workshop
|
|
Engwithan Digsite
|
|
Engwithan waystation
|
| Enoi’s home |
|
Fleet Master’s Office (Hasongo)
|
|
Fleet Master’s Office (The Brass Citadel)
|
|
Fleet Master’s quarters
|
| Flooded cave |
| Foothills |
| Forest |
|
Forgotten catacomb
|
| Fort Deadlight |
|
Foundations of the Ashen Maw
|
| Glowing Outcrop |
| Gorecci Street |
|
Governor Clario’s Estate
|
|
Grand Promenade
|
| The Gullet |
|
Hall of Reconfiguration
|
|
Hall of the Unseen
|
|
The Halls Obscured
|
|
Harbingers’ dwelling
|
|
Harbingers’ Retreat
|
|
Harbingers’ Watch
|
| Hasongo |
|
The Heart of Mystery
|
| The Hole |
|
Huana longhouse
|
| Hōhina Ravine |
|
Imperial Command
|
| Iolfr’s Raiments |
|
The Jagged Keep
|
| Jungle |
| Junvik village |
| Kahanga Palace |
|
Karatapu Channel
|
| Kazuwari |
| The King’s Coffin |
| Kitchen |
| Kohopa’s Fang |
|
The Kraken’s Eye
|
|
Kua o Rikuhu Islands
|
| Kuaru hut |
| Kângati Islands |
|
Kābara Reku Shrine
|
|
Kōhatekana Expanse
|
|
Lady Epero’s Estate
|
|
Lair of the Ancient
|
| Lifter’s Refuge |
|
Lighthouse (Deadfire)
|
|
Luminous Adra Mill
|
|
Luminous Bathhouse
|
| Magran’s Teeth |
| Magran’s Temple |
| Maje Island |
|
Mara-Mara Trench
|
|
Marihi’s Metalwork
|
|
Maukotu’s Canopy
|
| Mokeha’s lodge |
| Mortar’s Wrath |
| Motare o Kōzi |
| Muhai’s Estate |
|
Murkwater Lagoon
|
| Mói Gweath |
| The Narrows |
| Neketaka |
| Neketaka Island |
|
Neketaka Streets
|
| Neriscyrlas’ Lair |
|
Oathbinder’s Sanctum
|
|
Ofecchia Channel
|
| Ofecchia Island |
| Officers’ Lounge |
| Old City |
| Ondra’s Mortar |
| Ondra’s Spire |
|
The Oratory of Wael
|
| Ori o Koīki |
| Osa Channel |
|
Outcast’s Respite
|
| Outcrop on High |
| Periki’s Overlook |
| The Pickled Eel |
| Pitli’s sanctuary |
| Plains |
| Poko Kohara |
|
Poko Kohara Ruins
|
| Port Maje |
| Port Maje harbor |
| Port Maje Jail |
| Powderhouse |
| Pāhowane |
|
Quarantined Section
|
| Queen’s Berth |
|
Queen’s Berth district home
|
| Radiant Court |
| Raoa o Hāra |
| Razai Passage |
|
Realm of the Beast of Winter
|
| Rebūtara Pass |
|
Restricted Section
|
| Rikuhu’s Maw |
| Rinco’s Home |
|
Ruins of Amira’s Roost
|
| The Sacred Stair |
| Sandswept ruins |
|
Sanza’s Map Emporium
|
| Sayuka |
| School of Fish |
| The Scriptorium |
| Sea (Prologue) |
|
Sea Cave (Crookspur)
|
|
Sea-Lashed Crypt
|
| Secret dock |
|
The Sentinel Wall
|
| Serpent’s Crown |
| Shadowed Vale |
| Shanty Street |
|
The Shattered Passage
|
| Shipwreck |
| Sissak’s Nest |
|
Spire of the Soul-Seers
|
| Splintered Reef |
| Spun Terrace |
| Storage tower |
| Storm |
| Stranded Ship |
|
Subterranean Temple
|
| Sunepū Beach |
|
The Sunken Crown
|
| Swamp |
| Sātahuzi |
| Takano’s estate |
| Tangaloa Island |
| Tangaloa’s Maw |
|
Te Hīka Fishing Pools
|
| Tehiwai Islands |
|
Temple of Berath (Neketaka)
|
|
Temple of Decline
|
| Temple of Gaun |
|
Temple of Revelation
|
|
Temple of Tangaloa ruins
|
|
Temple of Toamowhai
|
| Teo Ramunga |
|
The Assembly of Echoes
|
| The Black Isles |
|
The Brass Citadel
|
|
The Burning Shoals
|
|
The Central Stacks
|
|
The Crystal Desert
|
| The Dead Floe |
|
The Deck of Many Things
|
| The Enclosures |
|
The Hanging Sepulchers
|
| The In-Between |
|
The In-Between (The Forgotten Sanctum)
|
|
The Rimebound Temple
|
|
The Vailian Trench
|
| The White Void |
| The Wild Mare |
|
The Windless Wastes
|
| Thelys’ home |
| Tiebe o Waiapu |
| Tikawara |
| Tikawara Shrine |
|
Toaku Biwha Trail
|
|
Toamowhai’s Den
|
|
The Treasure Trove
|
| Ukaizo |
| Ukaizo Harbor |
| Undercroft |
|
The Upper Bowels
|
| Uto’s gunsmithy |
|
Vailian Trading Company Headquarters
|
| Valera Estate |
| Vilario’s Rest |
| Wakara Reef |
|
Watershapers Guild
|
|
Whakupoko Lowveld
|
|
Workshop (Sayuka)
|
| Wāpau Jungle |
Conclusion
In essence, the Pillars of Eternity 2: Deadfire map is nothing to scoff at. It features several expanses – with each area possessing its own unique history and traditions. While most of the major NPCs have been mentioned in this guide, there are many minor characters that are still in uncharted lands.
Do let us know about your experience playing Pillars of Eternity 2 in the comment section down below!