

Borderland 3 has plenty of side quests on each planet that you can check out. In this Borderlands 3 guide, we will walk you through all the side quests available on Sanctuary. We will cover how you can unlock different side quests on Sanctuary, how to complete them, and different steps required in getting additional rewards in Borderlands 3
Borderlands 3 Sanctuary Side Quests
The following are all the side quests that you can complete on Sanctuary:
Just a Prick
For starting the mission, you have to converse with Tannis when you see an exclamation point over her head. Once you have completed the main task – Hostile Takeover, you should be able to get the quest.
Tannis is going to ask you to look for Health Hypo, which are 8 healing syringes, on all the decks of Sanctuary. You can simply get to these syringes as all of them will be marked by the game. Be careful while jumping on to the pipes and moving towards the edge until you figure out that there is an item that you can pick up.
Put the collected syringes on the metal table by getting back to the clinic. Once this mission is completed, you will get credits and XP as rewards.
Invasion of Privacy
You can start the mission by talking to Ava when you see an exclamation mark over Ava’s head. After you have completed The Impending Storm, which is the main task, only then the quest will become available.
The things Ava left behind on Athens, you will have to recover those for her in order to get back to the planet. In the start of your mission, you have to get to the areas where there are different items that belong to Ava. These items will not be guarded and will be indicated on the map by the game.
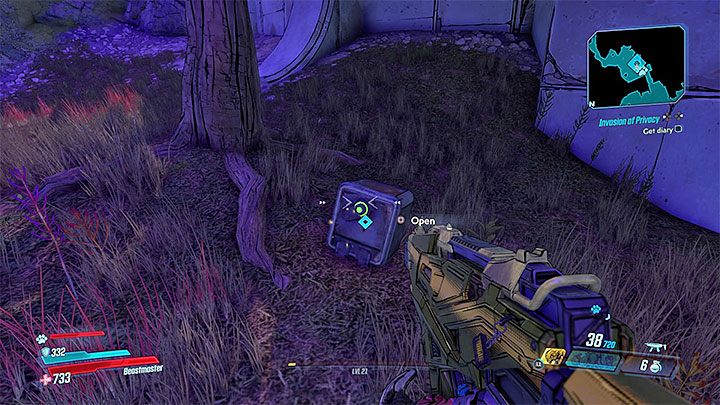
The other goal is to get the diary of Ava back. From here onwards, expect to come across different fights with the enemies in the area you will re-visit. After opening the container, you will know that the diary of Ava has been stolen.
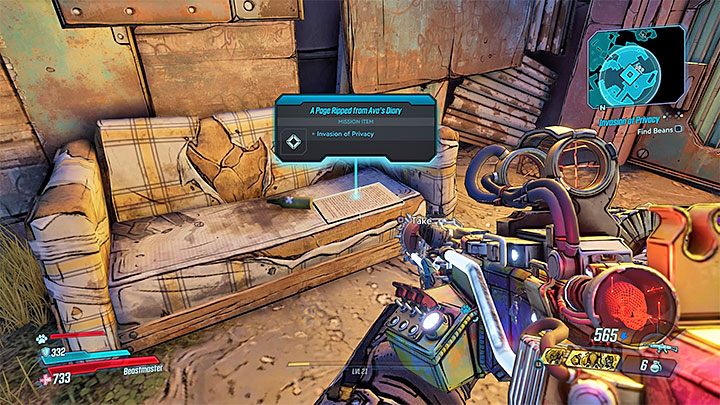
You will have to get to all the places where different pages of Ava’s diary are and find them. Everytime you kill the enemies in a particular location, look in the entire area for finding the mission item.
The search of the diary will bring you to the cemetery, which is Dido’s Remorse’s location. Be careful, as there is going to be a large number of enemies which will also include Beans. Beans is not a very difficult opponent so be careful when fighting with the other enemies such as Heavy and NOG.
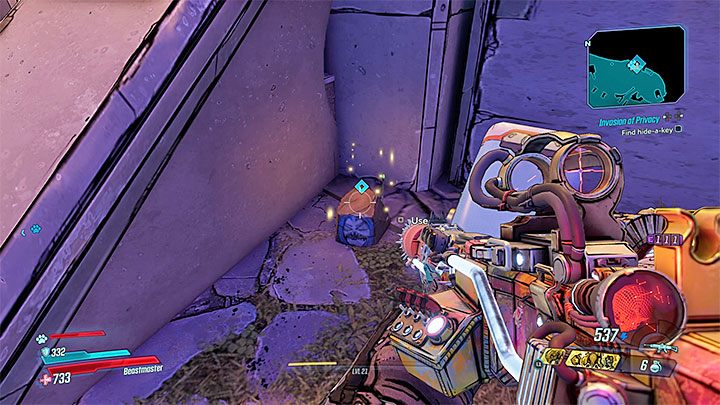
Get to the small boulder which will be marked by the game once you have won the battle.
A Key to the Monks’ Secret Cache will be revealed when the boulder is moved. To get to the monks’ secret hiding place, you have to start moving towards the cliff where a ladder will be used for going down. You will be led to the red chest through a narrow path in the mountain. From the weapons depot, you can get a random loot.
Get back to the Sanctuary and move towards Ava’s cabin. Put the items you have recovered in the cabin, every spot where the stuff needs to be dropped will be highlighted. XP and credits are the rewards you are going to get after you have completed the quest.
The Kevin Konundrum
Converse with Claptrap for starting this mission. Follow Claptrap to the cargo hold once you have talked to him. Place Kevin’s Chilly freezer gun, after taking it out of the cabinet and put it in one of the slots that is active.
Once you gather all of the Kevins, go to Tannis’ specified container. Put the Kevins you have gathered in the container so that these can be launched into space. You will get XP and credits as a reward after completing the quest. It is up to you if you want to keep the freezing weapons or sell the ones that were used in the quest.
Pandora’s Next Top Mouthpiece
For starting the mission, you have to converse with Ellie once you have unlocked the Blood Drive quest in the main story (get back to the planet of Pandora in order to follow the storyline).
Ellie is going to tell you all about the elections that are coming up for the successor to the Mouthpiece boss that was already defeated. Your job is to stand in between the thugs’ plan. On the planet Pandora, get to the region of Ascension Bluff. You have to be at the location where there are records being kept.
You will come across a big billboard and you will find Information ECHO recording under it.
Three objectives are going to be in the logbook and they can be dealt with any order of your choice:
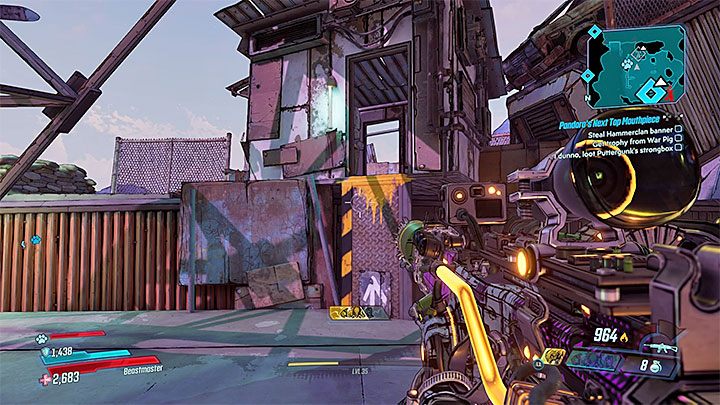
- On a pole with high voltage, there is The Hammerclan Banner flag located. Kill your opponents and climb from where the yellow paint is visible. When you get to the balconies above, jump carefully on the cranes.
- War Pig’s Steering Wheel can be yours if you destroy a War Pig vehicle.
- At the Puttergunk’s Perch camp, you can get your hands on the Prize Gunk of Puttergunk. It will be in a tiny hut. For opening the hut, you have to turn and hit the target plate.
Go to the Holy Broadcast Center with your trophies and don’t forget, you have to kill all the ordinary enemies that come along your way. Get to the container that is indicated and throw the collected artifacts into it.
A new Mouthpiece will appear in the arena, go there, This enemy has the exact same attacks as his predecessors that were defeated in the quest of Cult Following. Refer to the Battles with the Bosses section guide if you want a reminder on how you can win the battle.
Mouthpiece must have dropped some loot, collect it and get to the organs that are marked in the game and have a talk with them. You will be able to unlock a hiding place of Mouthpiece which will include a new big chest with loot. Converse with Ellie by going back to the Sanctuary. You will get credit and XP as rewards for completing the mission.
ECHOnet Neutrality
For starting the quest, you have to converse with Claptrap after the Blood Drive mission is unlocked (go back to planet Pandora).
In the region of Devil’s Razor, you can fast travel to Roland’s Rest camp. You have to meet Edgren in this place. This character will be in a room that has a lot of equipment, which can be reached through a container that will be open.
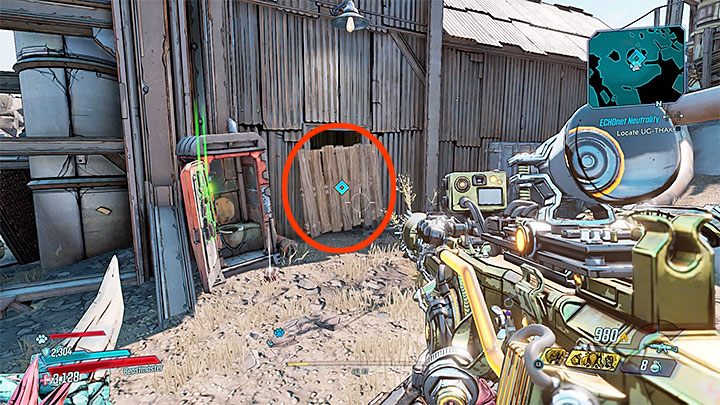
Move towards ECHO Repeater Center. Start dealing with the thugs that are surrounding you when you get to the ECHONet Hub 37. Here, you will have to find the UG-Thak device. Look for the planks that are visible. Get rid of them and get inside the room that has the device.
A firewall protects the device, so shooting at it will only result in failure. New COV fanatics will appear in the camp, you also have to deal with them. Turning five valves is going to be the next task that will be given to you, it can be completed in any random order.
Get back to the room again which has the UG-THAK. You can finish it this time. Get back to Edgren. The rewards for the completion of this mission includes a sniper rifle, XP and credits.
Baby Dancer
For starting this mission, you have to converse with Claptrap. In Pandora’s Devil’ Razor region, you have to meet Claptrap at the Dusty Acres. Go with Claptrap so that you can get to the hut on the hill and also use the bell. Look for the events before attacking anyone and wait until you get inside. Converse with Baby and start dancing – run, crouch, jump and so on. The game is not going to force any particularly specific moves.
For turning the music on, interact with the radio. You will be joined by Claptrap. You have to wait for the song to end. After the song ends, converse with Claptrap. You will get credits, XP points and SMGs for completing this simple mission.
That is all for our Borderlands 3 Sanctuary Side Quests guide. If you are interested in learning more about the game then you can check out our Athenas side missions guide.