Borderlands 3 has plenty of side quests that you can check out. In this Borderlands 3 guide, we are going to go over all the side quests that you can check out on Necrotafeyo. We are going to go over how you can start these side quests and what exactly you need to do in order to complete them.
All Side Quests On Necrotafeyo In Borderlands 3
The following are all the side quests that you can complete on Necrotafeyo In Borderlands 3:
Transaction-Packed
For starting the mission, check the bulletin board by getting to the exclamation point in Desolation’s Edge region.
Go to the location where there is Mysterious Cartridge. Converse with Mickey Tricks’s hologram and then get to the place where there is the first hotspot. This quest will occur in AR (augmented reality), so the dangers that you will encounter will be very real.
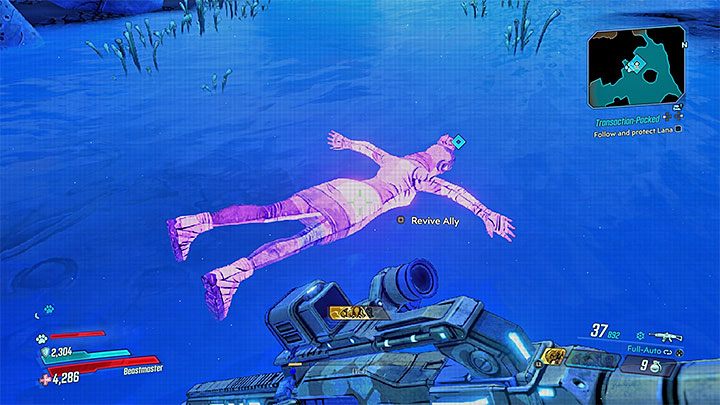
Go after unfinished Lana Sh’ani without worrying about her health because she is immortal and cannot die. You need to focus more on not letting the character die. Incase Lana falls, keep the key to resurrection with you so that she can be pulled back up on her feet.
After you have reached the VR board, start shooting the button that is green and has a check mark for making “microtransactions” and buy upgrades that are only available for a single credit. Continue protecting Lana and other than destroying the VR enemies, also destroy the small portals. You can start making more purchases again by shooting the green button.
Get to the place with the second and another hotspot after you have talked to Mickey Tricks. You will have to begin by jumping on the upper shelves to finally land on the shelf that holds the Lek’tosh Crystal.
You have to collect 100 energy sources which is going to be your task but you definitely can also go for the shortcut by paying for another unique microtransaction – by shooting again at the green button. Destroy the portal after the energy resources are transferred to Lana.
Get to the third access point which is also going to be the last one after you have talked to Mickey Trix. The duel is going to start against the mini-boss RAK’nagob, Destroyer of Worlds after having another conversation. Using one more microtransaction will come handy because the boss will slowly become weak. You can kill the boss faster if you pay by having a go at the green button as all your attacks will gather significant power and that will result in the boss dying quickly.
After you have defeated the boss, finish the last portal, and then converse with Mickey Tricks. After you have completed this virtual reality mission, you will get a sniper rifle which is very rare, credits and XP.
Cannonization
For starting this quest, you have to talk to Grouse by getting to the exclamation mark in the Desolation’s Edge region.
Head towards the temple by taking the energy trap with you. Once you have arrived there, step outside of the car and put the trap in the particular location. It must be filled with 6 souls. Simultaneously, attack the Guardians that will appear in the nearby area. Try killing your opponents when they are standing closer to the trap. After the trap is filled with 6 souls, immediately leave the area after you have picked it up. You can ignore the rest of the enemies.
To destroy 1 Cyclone and 1 Outrunner is the other part of the mission. Take aggressive actions against the vehicles you come across while you are traveling around the marked area. After each of the vehicles is destroyed, step out of the car and pick the parts up that are lying around on the floor. You have to get the Cyclone Stabilizer and the Outrunner Shock Absorber.
Get to the area from where you started the quest and hand over the collected parts. Also, place the trap inside the device that is on the wall. Take a few steps back and wait for Dark Cannon, which is a one of its kind SMG E-Gone, to appear. Credits and XP are the rewards you are going to get for completing this quest.
Homeopathological
Converse with Sparrow after you have gotten to the exclamation point in the region of Desolation’s Edge.
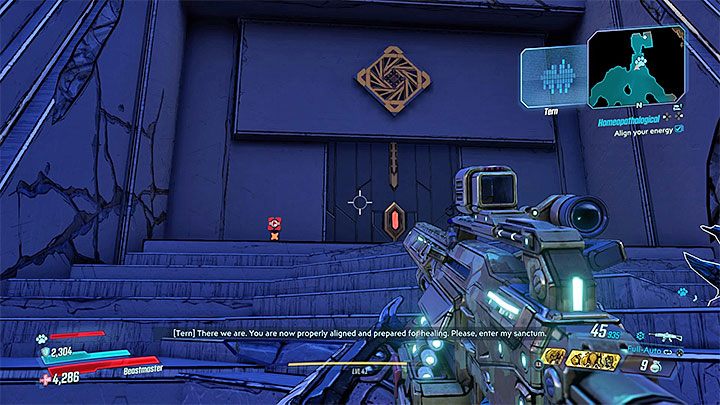
Until you have reached Tern’s office, keep following the marker. On the wall, there will be an intercom, use it. For equalizing your energy, stand in the highlighted area on the minimap.
Try lying on the couch. Then press the melee attack button after you have gotten to the paint container. Perform the melee attack once more because you need to draw something on the wall. When you are done drawing, have a conversation with Tern. Take one weapon with you after you have opened up the red box.
Tern is going to attack you in the next therapy session. It is up to you if you do not want to react to the attacks (this is an optional objective). The other option works itself, if you play like a Beastmaster your pet is going to say something in aggression. You will not be punished after you have hit the bot.
Get back to Sparrow with the Memory Core. XP, credits, and Amber Management – an assault rifle – are going to be the rewards you will get for completing the mission.
Bad Vibrations
Converse with Grouse, by getting to the exclamation mark in Desolation’s Edge region.
Pick up Beacons and Explosives from the table. You can install beacon number one next to where you currently are. The other two will go through a long journey and eliminating or dodging monsters that will appear in the surrounding areas.
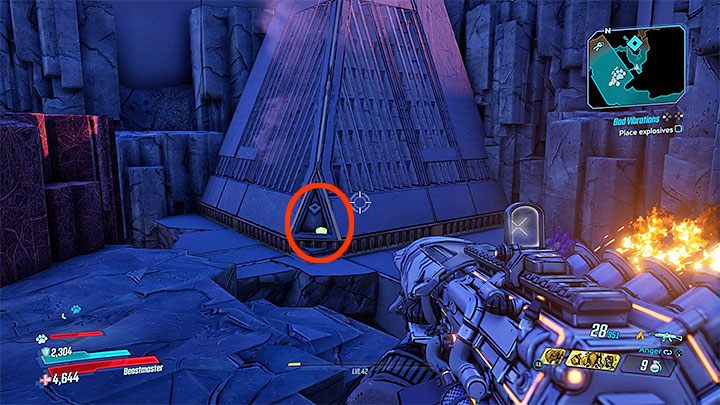
Another objective of the quest is to go to the place where explosives are to be planted – it will be one of the pyramidal structure’s corners. Throw the explosives off with any weapon of your choice to cause a hole in the formation. Once you have installed it at a safe distance. Jump inside it.
It can be found in The Chancellor’s Throat. Head towards the earthquake’s epicenter which is marked. On your way, regular monsters will attack you again. Listen to the conversation on the radio once you have got to the blockade and then place the explosives in the two specified locations.
You have to now get to mine from where the steam is coming out and you will be transferred to Quietus Pike. You can search around the area in order to find loot or you can immediately get back to Grouse for finishing the mission. XP and credits are going to be the rewards you will get for completing the mission.
It’s Alive
For starting the quest, you have to go to the exclamation mark in the Desolation’s Edge region and have a chat with Sparrow there.
On the map, camp Maliwan will be indicated. Go there. When you are fighting with the soldiers of Maliwan, you will get different objectives that are to be collected, such as heavy armor, Flash Trooper Backpacks, Swords, Death Leasers, Flamethrower, and Acid Tanks. A stronger enemy, Dark Corroder Heavyweight owns the last item.
Fast travel to the place that is safe and where there is Sparrow and there you have to look for the AI Chip in the area that is marked.
For installing all the assembled parts on the damaged bot, you have to go back to the research center. By pressing the melee button repeatedly, every part can be inserted inside the bot.
For initiating New Friens, use the lever. Get to him for installing the AI Chip. After some time, the machine will turn on you, unfortunately. You have to kill Abomination (for weakening the armor, you have to use nice weapons). After your experiment has failed, go back to Sparrow. A legendary Transformer shield, credits and XP are going to be the rewards for completing this quest.
Fire in the Sky
For starting this mission, get to the exclamation mark in Desolation’s Edge region only after you have completed the main storyline. Converse with Sparrow.
You start by collecting 3 rocket parts named Rocket Satellite, Rocket Thrusters, and Rocket Antenna. Also, pick Detonator up from the floor. Move with the quest items that you have collected to the Tazendeer Ruins region and then head to the old base. Eliminate the Maliwan soldiers from different abandoned areas of the base.
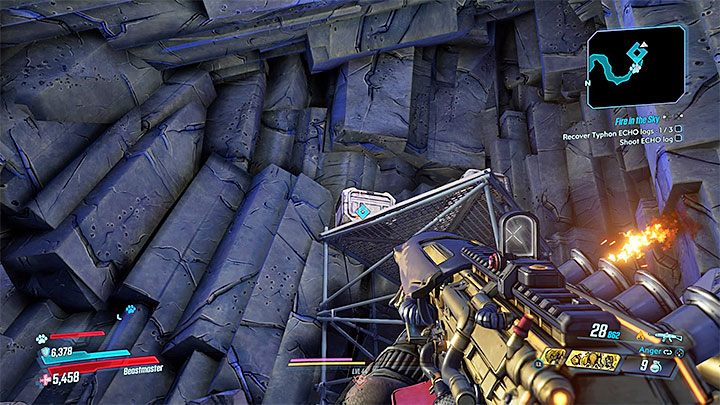
Acquiring 3 Typhon ECHO Logs is going to be the next step. On the uppermost shelf, you will find the other logs. If you want it to fall down, you will have to shoot it.
A mini-boss – Omega Mantakore – will appear once you have reached the specified location of the third log. This mini-boss spits out acid projectiles. Get to the safe spot so that you are fully protected from this mini-boss’ attack. The caustic projectile will break before it gets to your character if you are standing in that safe spot. After you have killed the mini-boss, check the loot the boss has dropped in which you will find a third diary.
Now, you can go to the place where rocket assembly takes place. Click on the button that says interaction for building it from the parts that were earlier assembled. Put the audio logs into the rocket and jump onto the nearby building’s roof. Tap the detonator after you have it set. The rocket will fall apart after it has taken off, only then go back to Sparrow. You will get XP and credits as a reward for completing this mission.
These are all the side quests that you can complete on Necrotafeyo in Borderlands 3. If you are interested in learning more about the game then you can check out our side quests when you come back to Pandora.