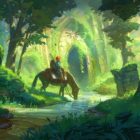
There isn’t any shortage of dungeons in the Zelda Series. While most of them are supposed to guard major story points, others can be placed to grant special weapons and effects. The Legend of Zelda: Breath of the Wild: Houses both kinds of dungeons with creative traps and spooky enemies.
What makes the dungeons in The Legend of Zelda: Breath of the Wild so unique are the way the traps are placed, along with all the predicaments they make you solve. Add a sense of urgency to the mix, and your adventures can go from tame to chaotic real quick!
Needless to say, each dungeon comes with a set of solutions that a player can use in order to clear it. Besides, the rewards there are pretty sweet, so it’s essentially a no-brainer.
So, what makes these dungeons so unique in their workings, and how can you benefit from them? Let’s find out.
All Dungeons In The Legend Of Zelda: Breath Of The Wild
The Legend of Zelda: Breath of the Wild houses a total of five Divine Beast-based dungeons along with three basic dungeons. The main aim of them is to provide a swift transition between the playthrough and the boss battles.
No dungeon in The Legend of Zelda: Breath of the Wild is easy to solve. You need to be at the top of your game in order to have a remote chance of beating them.
Having said that, here are all the Dungeons present in The Legend of Zelda: Breath of the Wild series, along with the method of beating them:
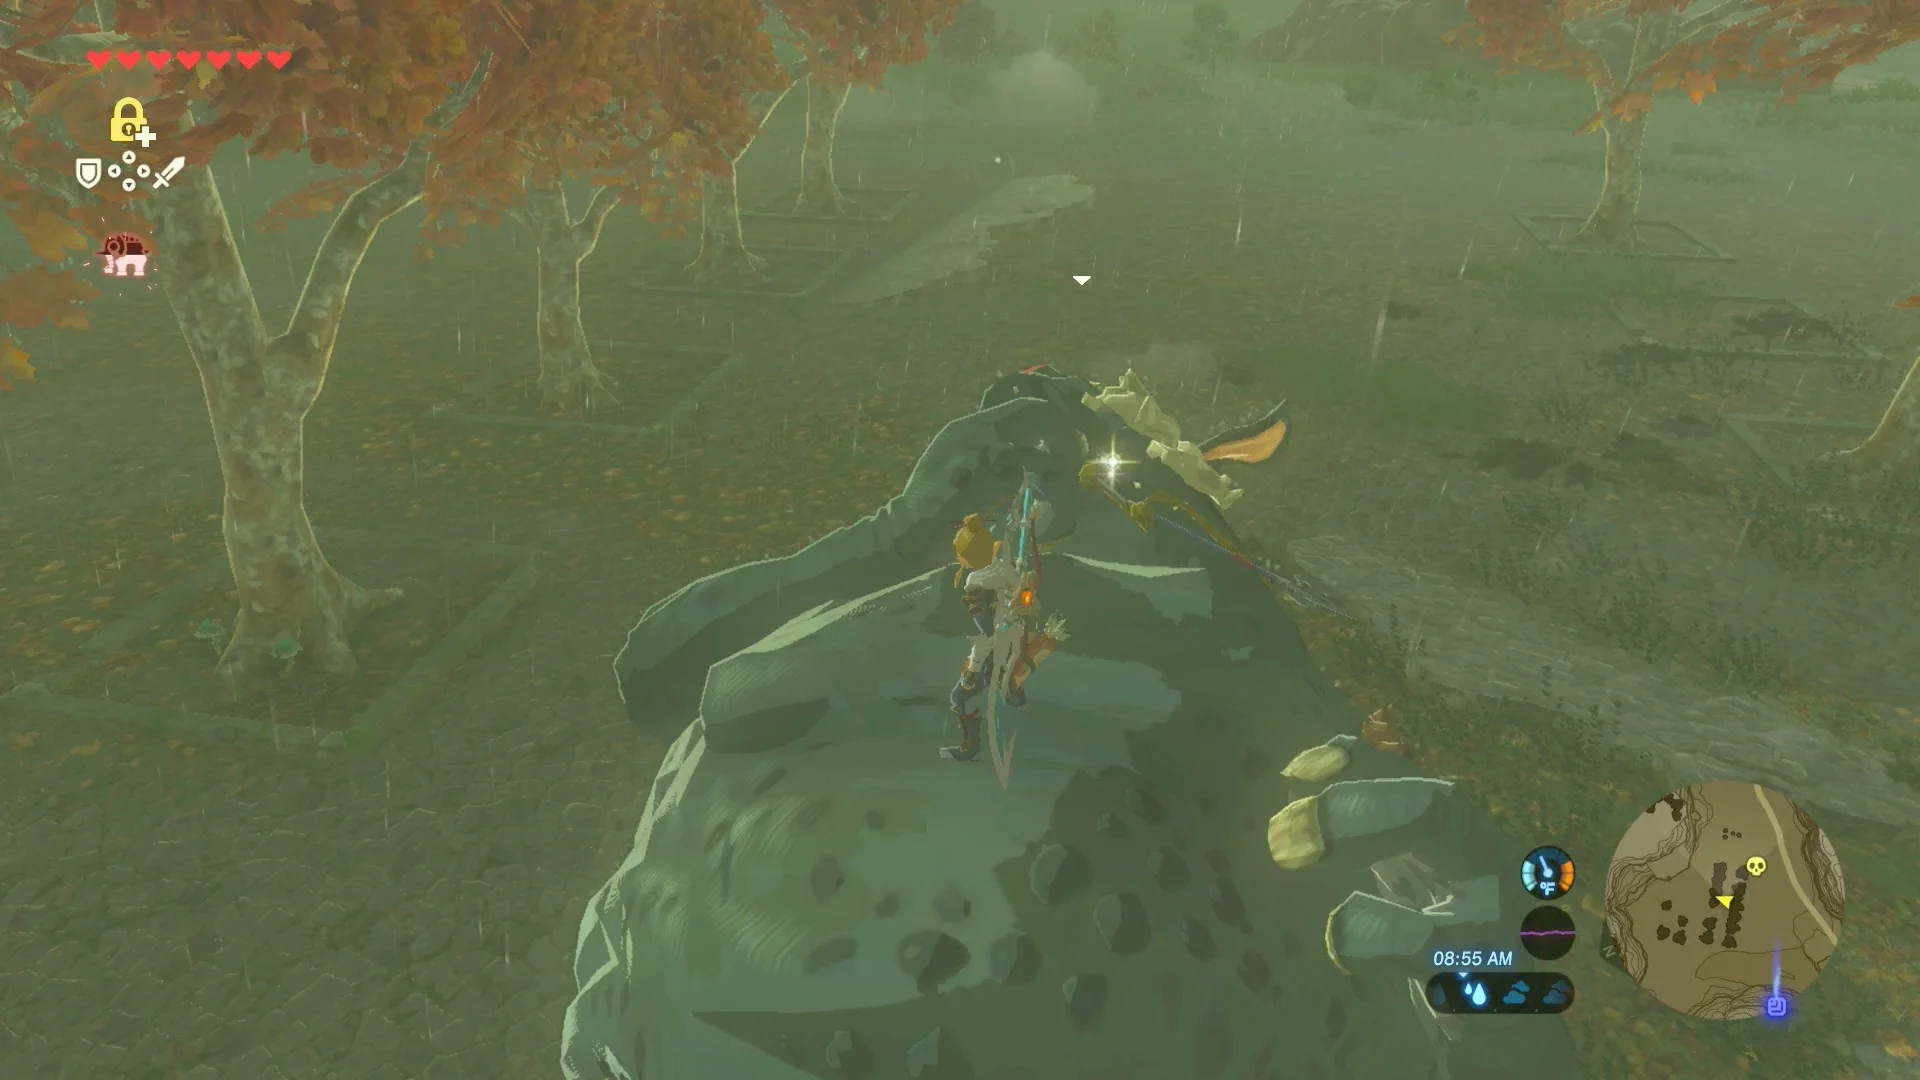
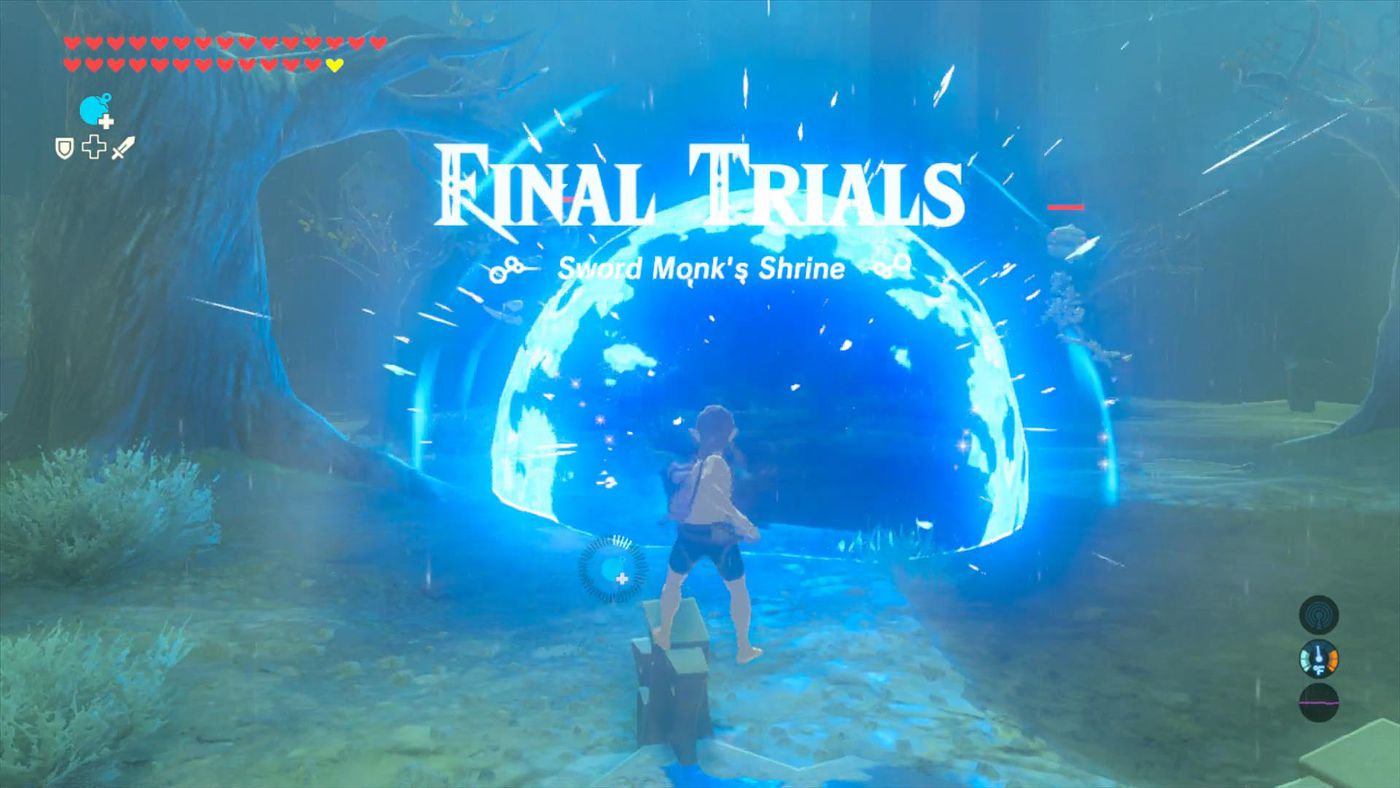
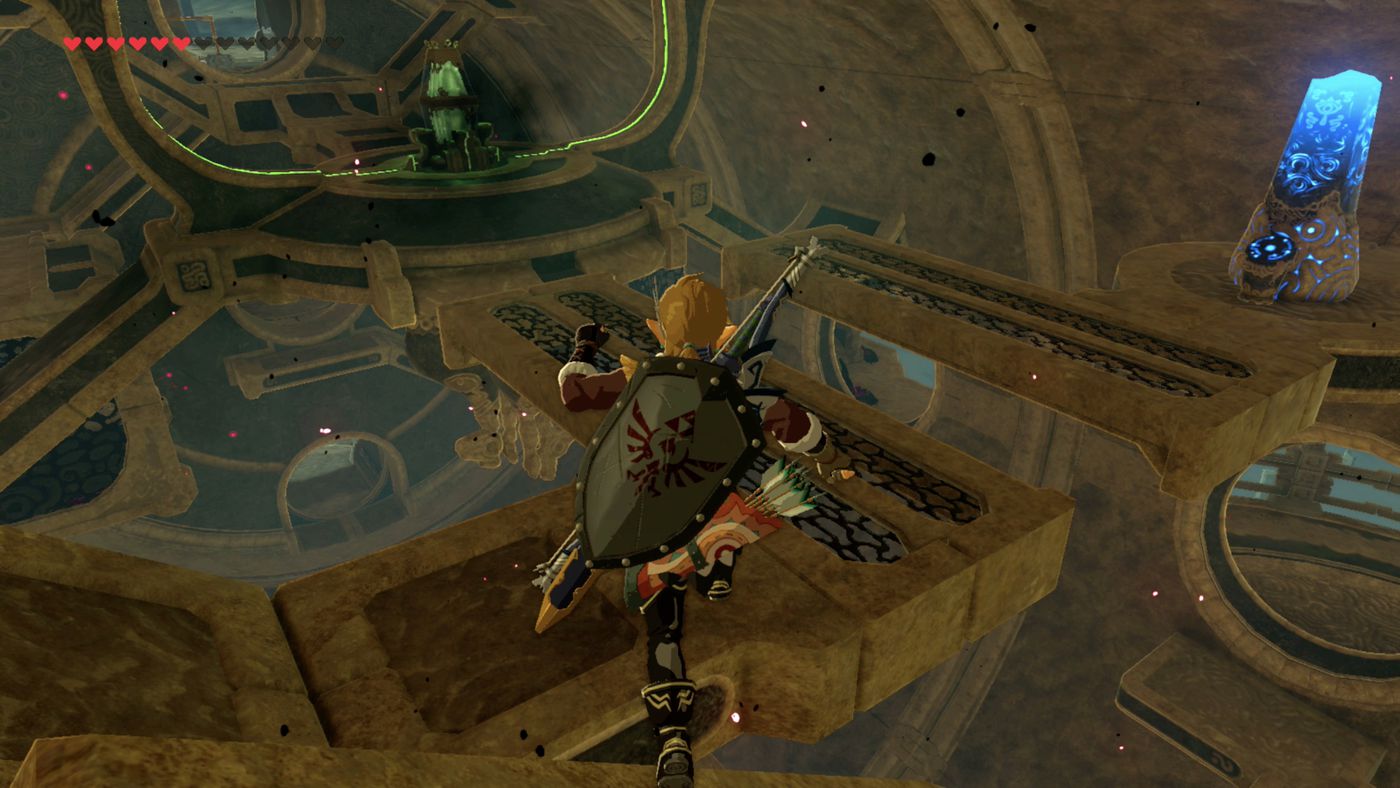
1 – Trial of the Sword
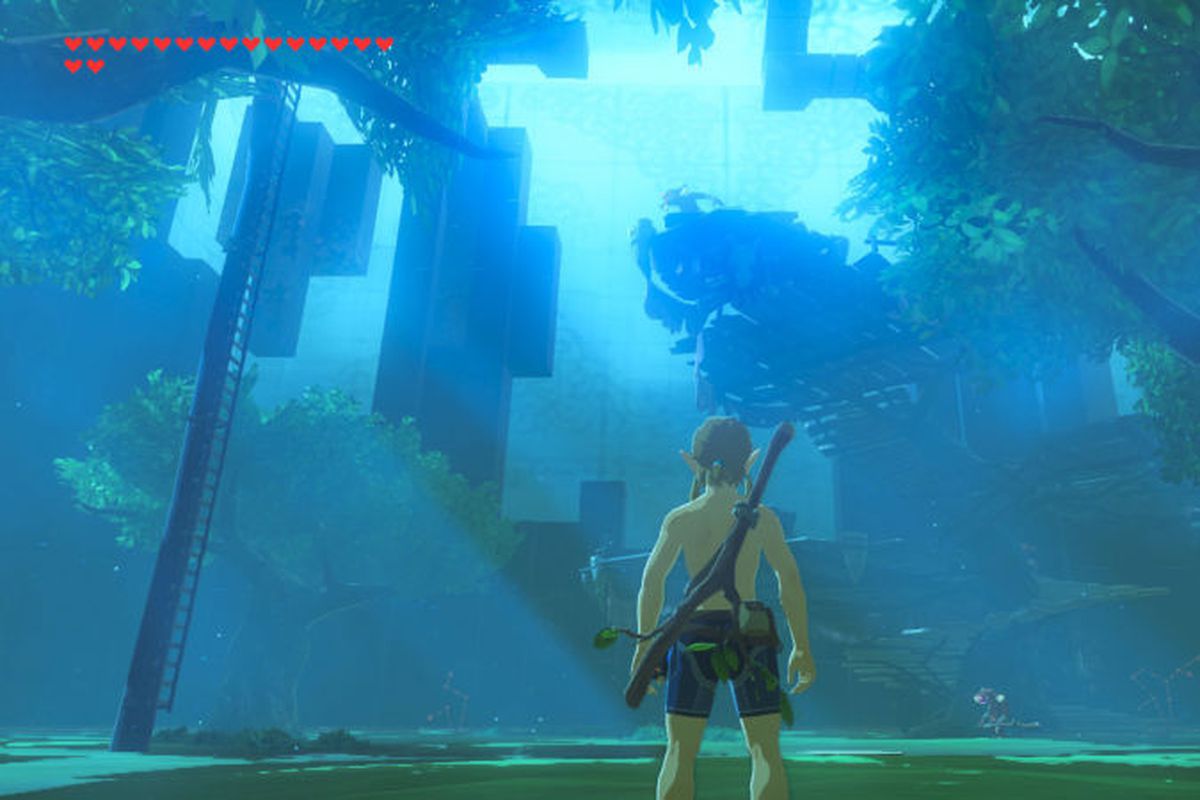
Legend Of Zelda: Breath Of The Wild | The Trial Of The Sword | Source: The Verge
The Trial of the Sword is a DLC – based dungeon that promises a unique enhancement to Master Sword once cleared. However, you need to own The Master Trials DLC pack in order to unlock this area.
With that being said, this one is generally considered a mini-dungeon instead of a complete one as its main goal is to permanently awaken the Master Sword; nothing more, nothing less.
How To Access?
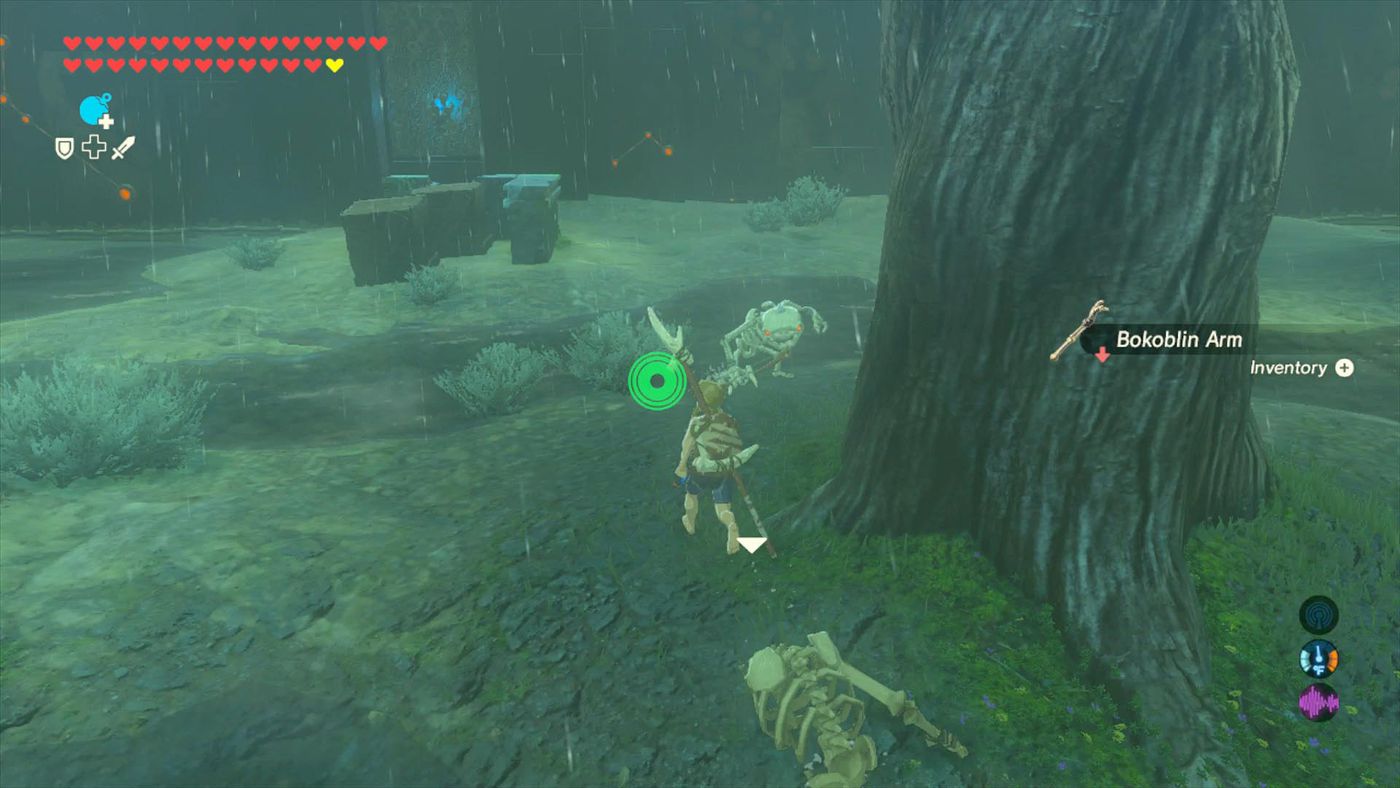
The Trial of the Sword can be accessed once you reach the Korok Forest. You’d have to place Master Sword in its Pedestal; in order to access the trial. This only works when Master Sword has sufficient energy.
Otherwise, nothing would happen, and you’d be stuck in the forest for nothing.
Once you’re in the trial, you would have to challenge countless floors of enemy onslaughts without the following items:
- Weapon
- Shield
- Bow
- Arrow
- Armor
- Material
- Food
Once you’ve been stripped of practically all of your belongings, it’s time to start the trial and challenge the greater floors.
Trial Limitations
Legend Of Zelda: Breath Of The Wild | The Trial Of The Sword | Source: The Verge
Aside from the equipment, you will also be unable to use any Champion abilities. These include almost everything. We advise you only challenge this area after attaining the complete amount of hearts since you will only have the same number of hearts as when you entered this area.
Therefore, even if you go back and collect more, it will not affect your in-dungeon progression. Now, there are a total of three stages in the Trial of the Sword.
After the completion of each stage, you will be able to permanently port to that checkpoint even if you die without completing the trial.
If you die in between the floors without clearing the trial, then you sadly won’t be able to start from the very floor. Instead, you will have to tread that difficult path once again in order to reach your previous stage and hopefully surpass it.
Once you die, any items gathered in the challenge will be lost. Therefore you need to be very calculative in how you want to approach a said trial. With that being said, there are a total of 54 floors in this trial, so you can think of it as a long-term goal you have to surpass.
Trial Stages
As mentioned, the trial is mainly divided into a total of three stages that house a certain number of floors in between them. You can check the in-depth guide regarding these floors down below:
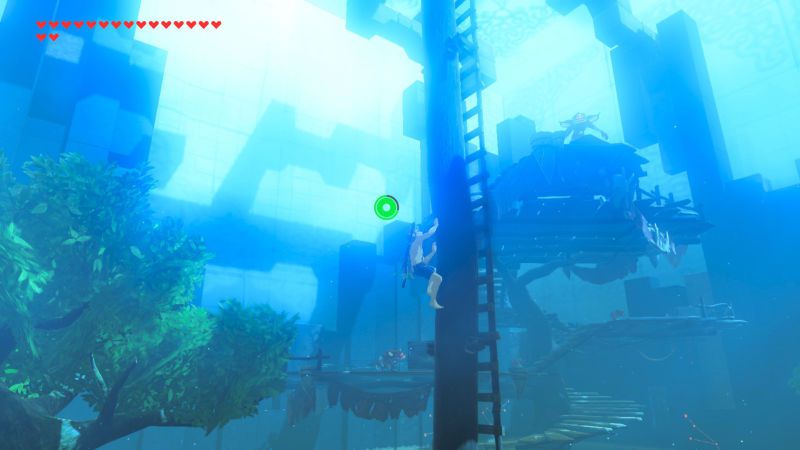
Beginning Stage
This stage mainly refers to the first 13 floors of the Trial of the Sword.
While these are relatively easier to complete/stomp, you’d have to ensure your safety since getting stripped of all your weapons, equipment, and abilities isn’t a small nerf to your overall fighting capabilities.
With that said, the first seven floors of this stage mostly contain Trees, Rocks, and Grass. The fights in these areas are pretty stealth-based but can vary depending on the location and type of the enemy.
Trial of the Stone Talus
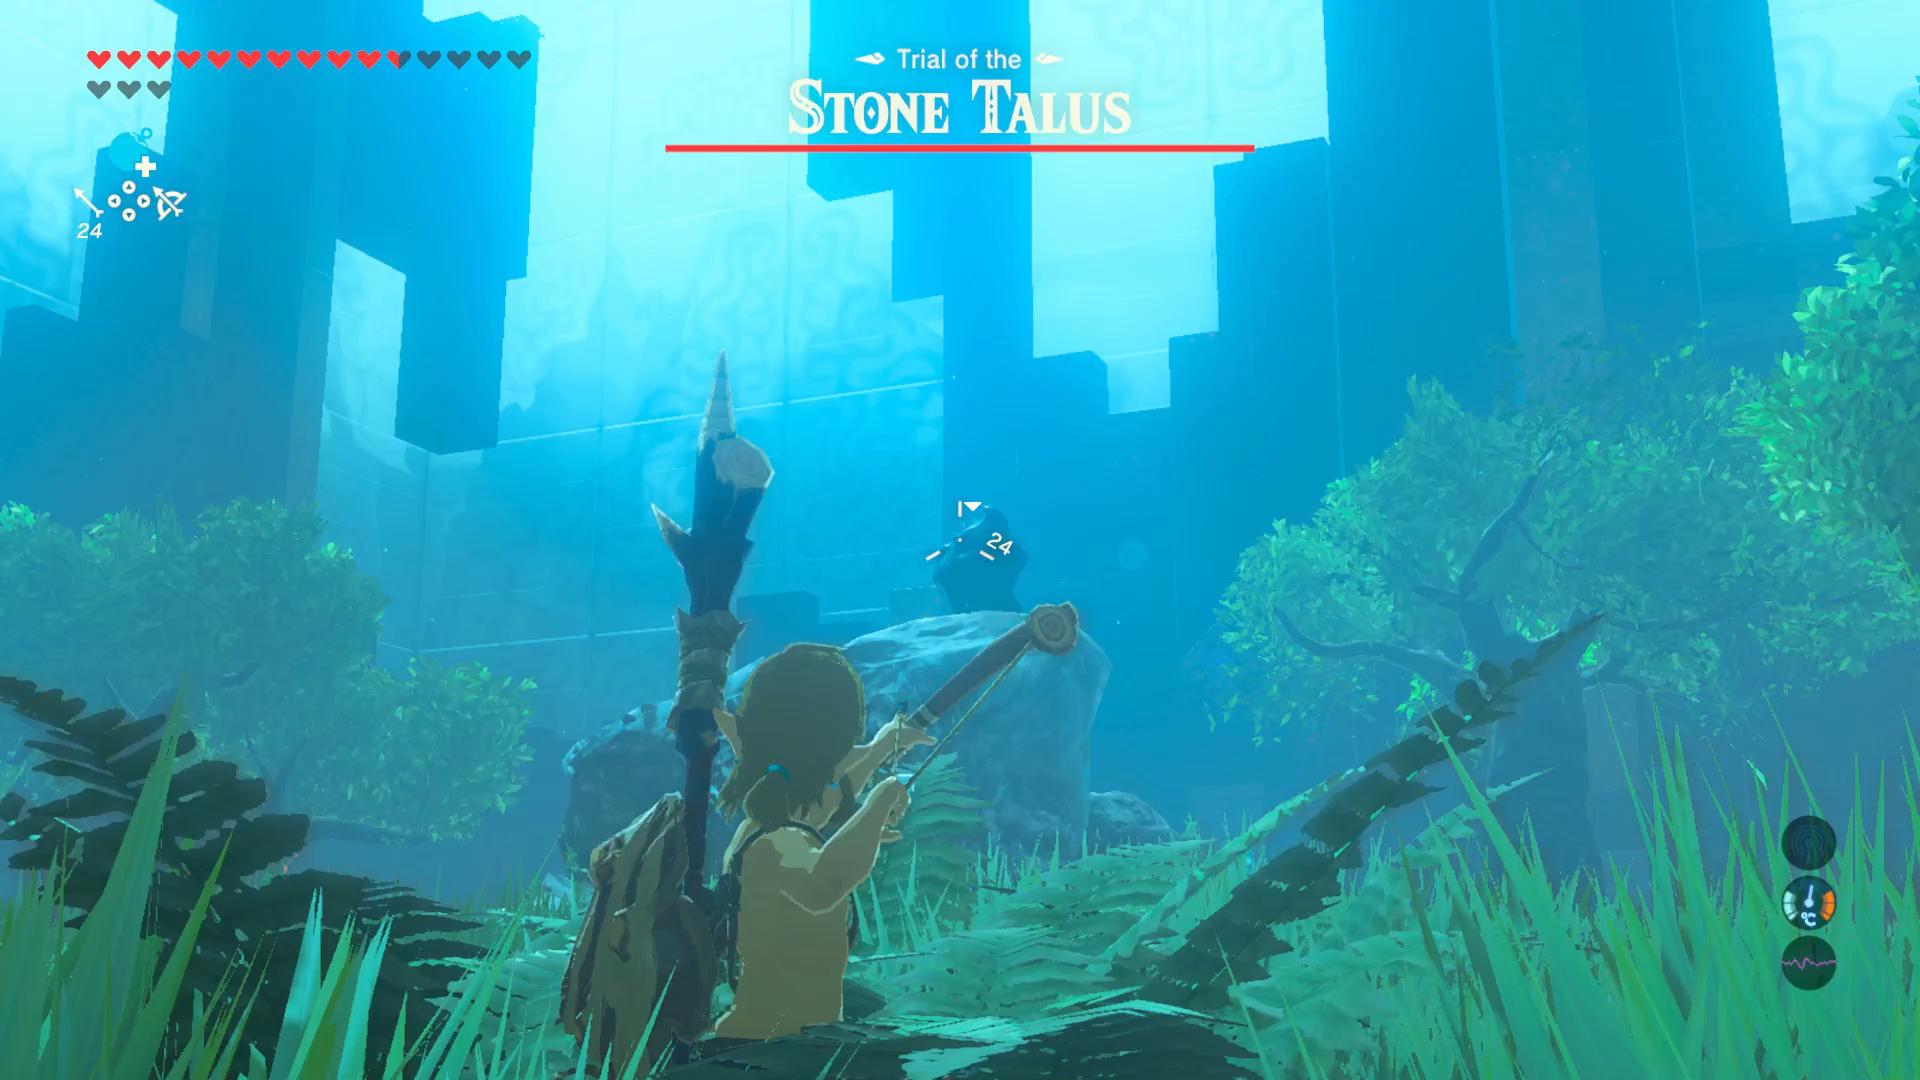
Legend Of Zelda: Breath Of The Wild | The Trial Of The Sword | Source: The Verge
You’d generally want to preserve as much of your fighting ability here as possible since the acutal challenge awakens once you’re past them. The sixth floor generally contains the Trial of the Stone Talus, which is equivalent to a mini-trial within the actual trial.
Just be careful since a Stone Talus can only be effectively defeated once you fire on the Ore Deposit on its back by climbing onto its big body. Once defeated, they will drop a considerable amount of gems, so make sure to clear the remains before moving ahead.
Once you reach the seventh floor, you will be able to rest amidst the Cooking Pot along with a Fairly. There will be a total of three treasure chests rewarding you for your efforts of making it this far. After this floor, the greenery fades, and water takes its place.
Trial of the Hinox
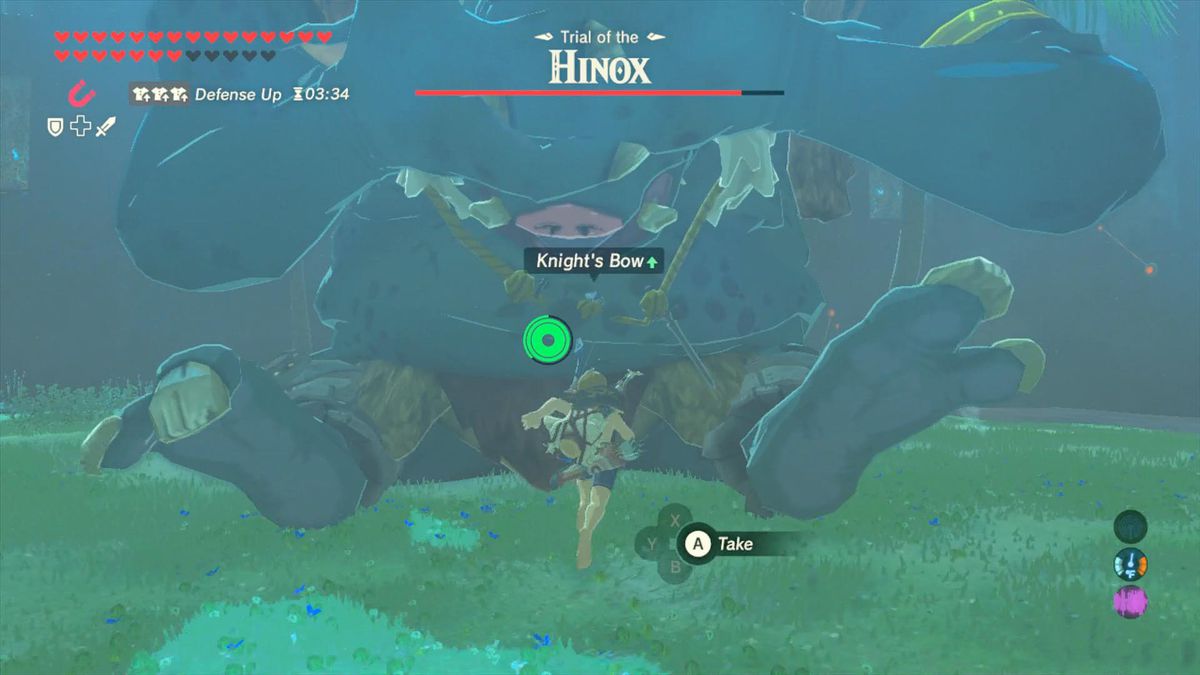
Legend Of Zelda: Breath Of The Wild | The Trial Of The Hinox | Source: Polygon
This trial starts once you reach the twelfth stage. Hinoxes are recurring in the Legend of the Zelda series. However, their attributes are subject to change depending on the game you’re playing. In Legend of the Wild, they come in a total of three varieties:
- Red
- Blue
- Black
This classification is largely dependent on strength and is often considered the largest enemy to be found in the overworld. The Hinoxes are able to shoot various projectiles at enemies trying to escape. Therefore, they are both melee and ranged, depending on your fighting strategy.
Their weak spots are their eyes, so make sure to shoot in them whenever possible. However, they are intelligent enough to cover them with their hands, which accounts for a free-hitting opportunity from your end.
Ancient Shrine
Once the trial of the Hinox has been cleared, you will be heading to the final floor, after which the first checkpoint will be unlocked. The Ancient or the Sword Monks’ Shrine is where the first limiter in the Master Sword’s power is lifted.
Once Link finishes the interaction with an ancient voice delivering him this news, a pedestal spawns at the end of the staircase up front. After heading inside, Link will be transported back to the Korok Forest, thereby marking the end of the Beginning Trial.
Enemies Within The Beginning Trials
Throughout the beginning floors, you will be facing the following enemies, so prepare accordingly:
|
Floor |
Enemies |
|
1 |
Bokoblins (x3) |
| 2 |
Big Fire Chuchu (x1) Bokoblins (x4) |
| 3 |
Chuchu (x1) Fire Chuchus (x4) Big Fire Chuchus (x4) |
|
4 |
Bokoblins (x5)
Blue Bokoblins (x3) |
| 5 |
Moblins (x2) Blue Bokoblins (x3) |
| 6 |
Stone Talus (x1) |
|
7 |
Resting Spot |
| 8 |
Big Electric Chuchu (x1) Lizalfos (x2) Blue Lizalfos (x2) |
|
9 |
Water Octoroks (x2)
Electric Wizzrobe (x1) |
| 10 |
Blue Lizalfos (x1) Black Lizalfos (x2) |
|
11 |
Bokoblins (x4)
Blue Bokoblins (x3) Black Bokoblin (x1) Black Moblin (x1) |
| 12 |
Blue Hinox (x1) |
| 13 |
Master Sword |
Once everything has been defeated, you will be able to head back to the trials and start clearing the middle trials with the same limitations.
Middle Stage
This stage contains the next seventeen floors present within the Trial of the Sword. The first four are shrine-themed, whereas the fifth floor acts as a resting point for you – with an identical cooking pot and Fairy, along with three treasure chests like on the seventh floor.
From there on, your main goal will be to speedrun your way through the dark forests present from the 6th to the 10th floor. Once you’re done with clearing all the enemies within that vicinity, it’s time to initiate another trial.
Trial of the Hinox
Legend Of Zelda: Breath Of The Wild | The Trial Of The Hinox | Source: IGN
Much like the previous trial, this one also involves taking down a Hinox. However, this one is a rank higher than the previous one and is, therefore, much more deadly in comparison. Needless to say, your battle strategy would remain the same.
Just keep on targeting its eye as much as possible until it falls. Since this battle will be much more difficult than the previous ones, you will be rewarded with an immediate stop present on the 11th floor.
It features the same scenery as floor seven of the Beginner stage and floor five of the middle one. However, you will be greeting two fairies instead of one.
Fighting The Guardian Scouts
Legend Of Zelda: Breath Of The Wild | Guardian Scouts | Source: Polygon
From floors 12 to 16, you will be facing different Guardian Scouts in a shrine-themed environment. These come in a total of four different forms and can – at times – be a bit difficult to take down depending on their guardian gear.
Luckily, you can just use the updraft created by their lasers burning the ground in order to paraglide your way on top of them in order to land the finishing blows. These Guardian Scouts will increase in ranks and difficulty the more you climb the Tower of Trials.
Therefore, it’s recommended you take full advantage of the resting zones in order to be at the top of your game while facing harder foes.
Final Floor
Once you reach the seventeenth floor, it’s time to place the sword on the pedestal to repeat the events of the beginner stage and activate the checkpoint. The pedestal on this floor will be connected with the pedestal of the beginner stage, thereby acting as a checkpoint gate for you.
Once that is done, you can return to the regular world and continue your journey until you’re strong enough to challenge the final stage. If you’re confident of clearing them, then going at it immediately is also an option.
Enemies Within The Middle Trials
You will be facing the following enemies during your ascent to the Middle Trial grounds:
|
Floor |
Enemies |
| 1 |
Bokoblins (x5) |
| 2 |
Bokoblins (x2) Blue Bokoblin (x1) Fire Wizzrobe (x1) Meteo Wizzrobe (x1) |
|
3 |
Bokoblins (x4)
Blue Bokoblins (x3) |
| 4 |
Decayed Guardian (x1) |
|
5 |
Resting Spot |
| 6 |
Fire Keese (x5) Big Electric Chuchu (x1) |
|
7 |
Fire-Breath Lizalfos (x2)
Blue Lizalfos (x2) |
| 8 |
Meteo Wizzrobe (x1) Black Bokoblins (x3) |
|
9 |
Decayed Guardian (x1) |
| 10 |
Black Hinox (x1) |
|
11 |
Resting Spot |
| 12 |
Guardian Scouts I (x6) |
|
13 |
Guardian Scouts II (x3) |
| 14 |
Guardian Scouts I (x4) Guardian Scouts II (x2) |
|
15 |
Guardian Scouts III (x2) |
| 16 |
Guardian Scout IV (x1) |
|
17 |
Master Sword |
Once you’ve cleared the middle stage of the trial, you can head back to initiate the final stage whenever you want.
Final Stage
This stage contains the most trials out of the three and is admittedly the hardest stage to clear in the Trials of the Sword. You will be battling your way through a total of 24 floors, with the first five being set in thunderstorm weather within the jungle.
You will be facing an awful lot of Stal enemies here. Luckily, the first four stages only act as a warmup of what’s to come in the fifth one, so they’re nothing too difficult.
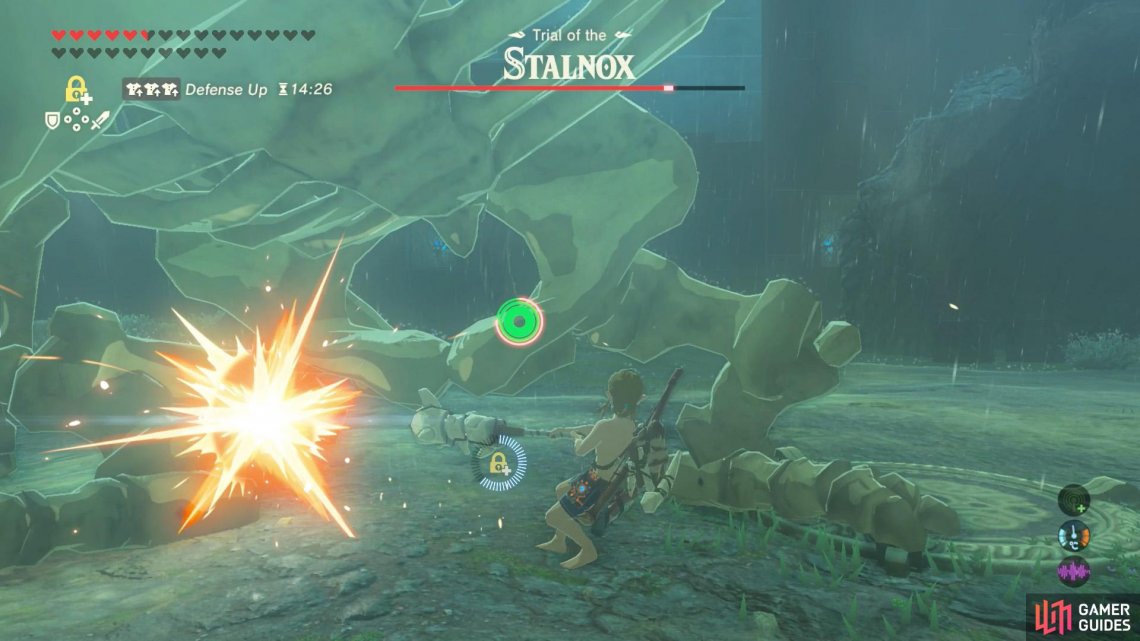
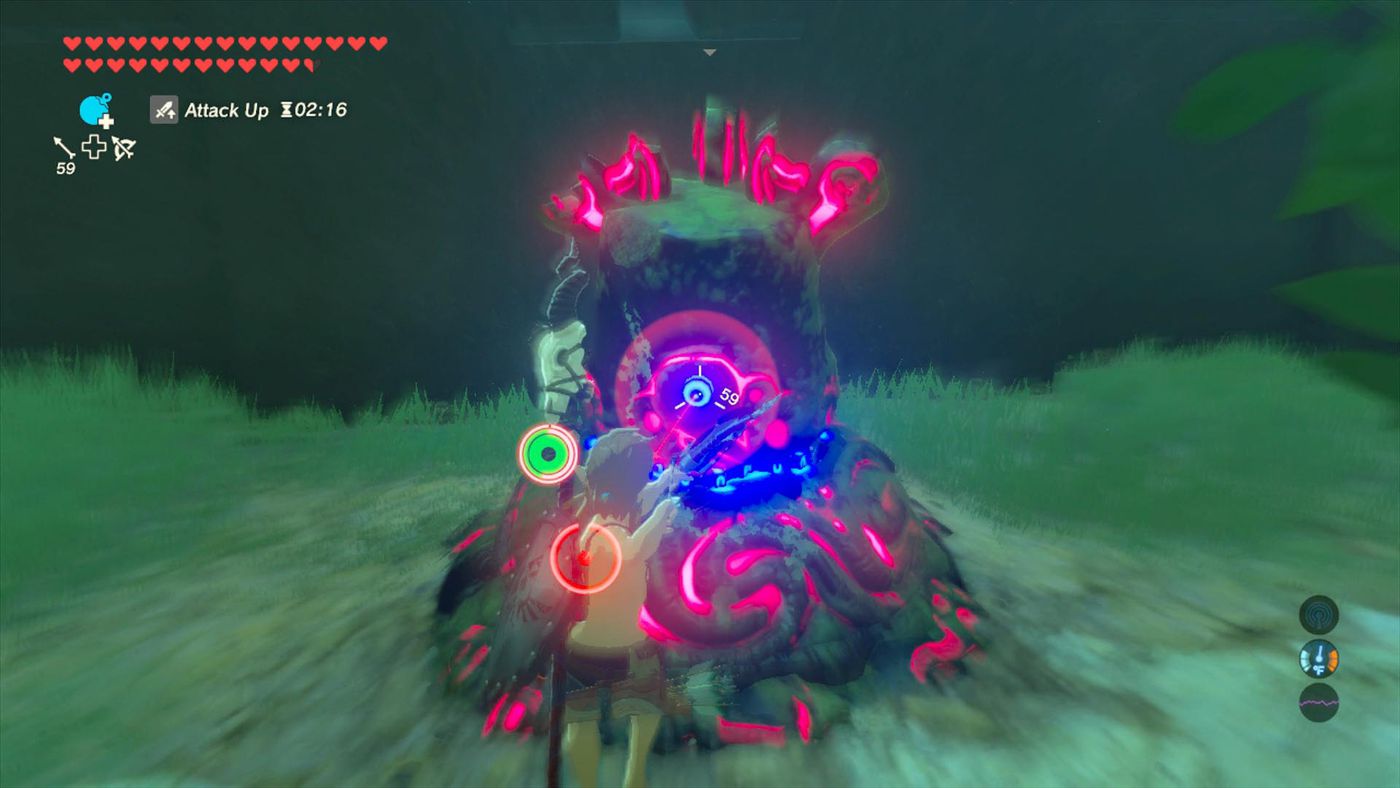
Trial of the Stalnox
Legend Of Zelda: Breath Of The Wild | The Trial Of The Stalnox | Source: Gamer Guides
This trial is located on the fifth floor, where a giant Stalnox pursues Link in an attempt to pound him to the ground, leaving nothing behind. It’s an intelligent enemy and can use trees and other objects to pick up and throw, thereby making it pretty much a hybrid in its attack patterns.
A Stalnox is essentially a pile of bones in the daytime. However, transition that into nighttime, and you’re facing a monster that’s able to take his bones out to throw as projectiles and vice versa.
Make sure to stay away from bomb barrels. Otherwise, you’d be in the middle of fireworks whether you want it or not.
Luckily, attacking in its eye is enough to stun the boss for a couple of seconds, thereby allowing Link to counter-attack with the help of his equipment-less attire. Once defeated, Stalnox can be the source of some pretty rare weapons.
Trial of the Igneo Talus
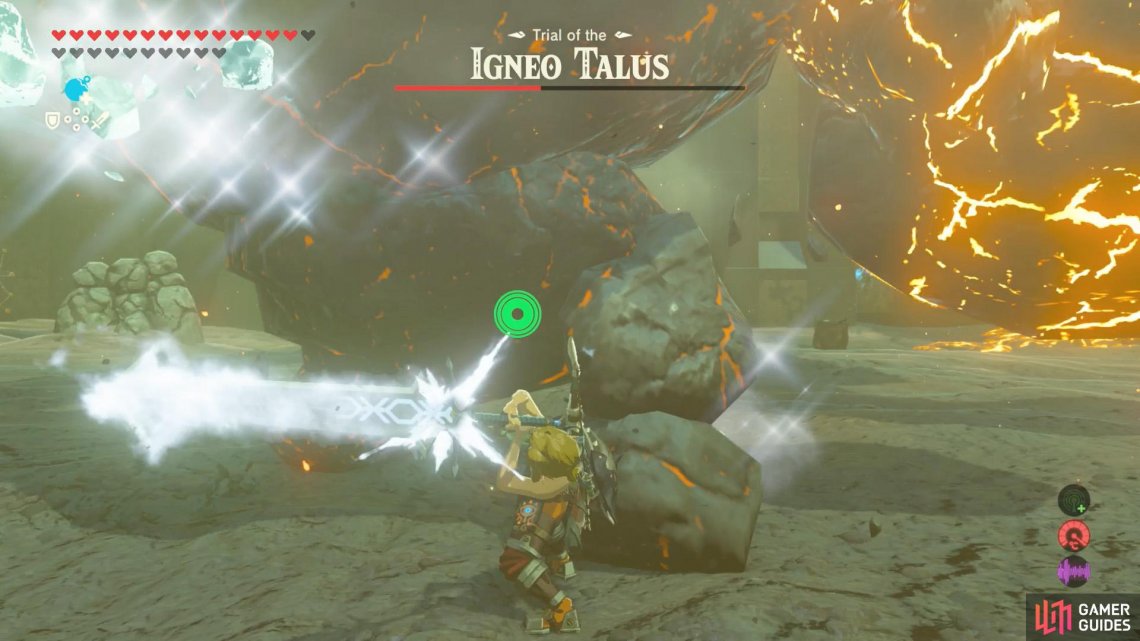
Legend Of Zelda: Breath Of The Wild | Trial Of Igneo Talis | Source: Gamer Guides
From Floors six to eleven, you will be facing a bunch of volcano-themed enemies within the volcano environment, acting as a warmup for your next trial. Once you’re done with the warm-up, it’s time to take on the Igneo Talus with what’s left of your health bar.
The Igneo Talus attacks identically to the base Talus. However, any direct contact will cause you to catch fire, thereby getting tick-based damage for free. Only the Flamebreaker Armor can withstand this kind of fire, or you could just cool it down with the help of ice elemental weapons.
Unfortunately though, this is the Trial of the Sword, so you will have to get creative in how you want to deal with the Igneo Talus.
Hit the piece of protruding ore on his body until his health bar is depleted. While that’s easier said than done, damaging other parts of his body won’t be effective.
Once you defeat the Trial of the Igneo Talus, you will be allowed to rest on the twelfth floor along with the usual cooking pots, two fairies, and three treasure chests.
Trial of the Frost Talus
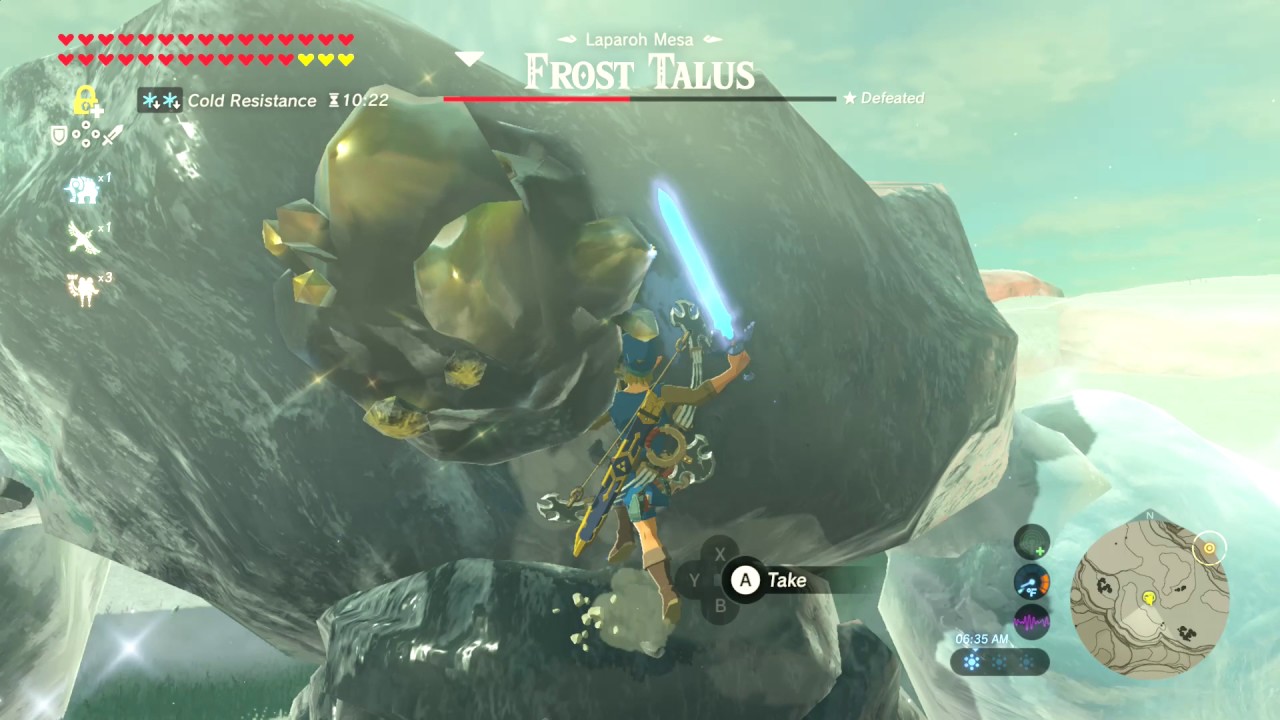
Legend Of Zelda: Breath Of The Wild | Trial Of Frost Talis | Source: ConvictedBattler
The floors from 13 to 17 are based on ice-themed enemies that house ice-elemental enemies.
While the floors till 16 can be considered as a warm-up for the sixteenth floor, the ice-based enemies are generally harder to deal with since their attacks apply needless effects that reduce your battle prowess.
The sixteenth floor contains the Trial of the Frost Talus, which is essentially just another boss fight with a talus where you have to take down the protruding ore deposit to kill them.
Unfortunately though, the Frost Talus are coated in thick sheets of ice. Therefore, it’s pretty hard to climb on their backs.
You will have to use fire-based attacks in order to deal damage. However, this can – at times – be easier said than done since you’re stripped of almost all of your equipment.
Once you’ve taken down the Frost Talus, the trial will conclude, thereby allowing you to reach the resting spot on the 18th floor.
This resting floor will contain a total of three fairies, a cooking pot, and three chests containing the entirety of the Royal gear. Don it, and get ready for guardian battles coming your way!
Battles With The Guardians
Legend Of Zelda: Breath Of The Wild | Guardians | Source: Polygon
From floors 19 to 23, you will be facing a bunch of guardians that will increase in rank the higher you ascend. These ones are no joke in terms of sheer numbers and battle powers.
Therefore, we recommend you take a break before taking them on since all of your efforts up to this point will be laid to waste if you die here. Once the bloody battle concludes, head to the twenty-fourth floor – where you will be returned to the Shrine of Sword Monk.
Enemies Within The Final Trials
You will be facing the following enemies during your ascent to the Final Trial grounds:
| Floor | Enemies |
|---|---|
| 1 | Stalkoblins (x4) |
| 2 | Electric Keese (x2) Stalizalfos (x3) |
| 3 | Big Electric Chuchus (x2) Stalmoblins (x5) |
| 4 | Stalkoblins (x7) |
| 5 | Stalnox (x1) |
| 6 | Resting Spot |
| 7 | Big Fire Chuchu (x1) Rock Octorok (x1) Igneo Pebblits (x2) |
| 8 | Fire-Breath Lizalfos (x3) |
| 9 | Meteo Wizzrobe (x1) Black Moblin (x1) Fire-Breath Lizalfos (x2) |
| 10 | Black Moblins (x3) Fire-Breath Lizalfos (x1) |
| 11 | Igneo Talus (x1) |
| 12 | Resting Spot |
| 13 | Frost Pebblits (x2) Big Ice Chuchu (x1) Blue Bokoblins (x2) Black Bokoblin (x1) |
| 14 | Big Ice Chuchus (x2) Ice-Breath Lizalfos (x1) Blue Bokoblins (x4) Silver Moblin (x1) |
| 15 | Black Moblin (x1) Blizzrobe (x1) Blue Bokoblins (x2) Silver Bokoblin (x1) |
| 16 | Frost Talus (x1) |
| 17 | Blue-Maned Lynel (x1) |
| 18 | Resting Spot |
| 19 | Decayed Guardians (x6) |
| 20 | Guardian Stalker (x1) |
| 21 | Guardian Skywatcher (x1) |
| 22 | Guardian Stalker (x1) Guardian Skywatcher (x1) Guardian Turret (x1) |
| 23 | Bokoblins (x8) White-Maned Lynel (x1) Guardian Turret (x1) |
| 24 | Master Sword |
Events Of The Sword Monk’s Shrine

Legend Of Zelda: Breath Of The Wild | Trial Of Sword Monk’s Shrine
Since you’ve completed all the challenges set forth by the area, it’s time to get your reward. In this area, Link will meet the projections of seven unnamed monks that conclude that Link is worthy of receiving the appropriate reward.
After that, they will awaken Master Sword to unleash its full potential. You will now be able to use the awakened state for longer periods of time. Once the unlocking process has been finished, the monks will vanish into the light as a sign of having fulfilled their duty from long ago.
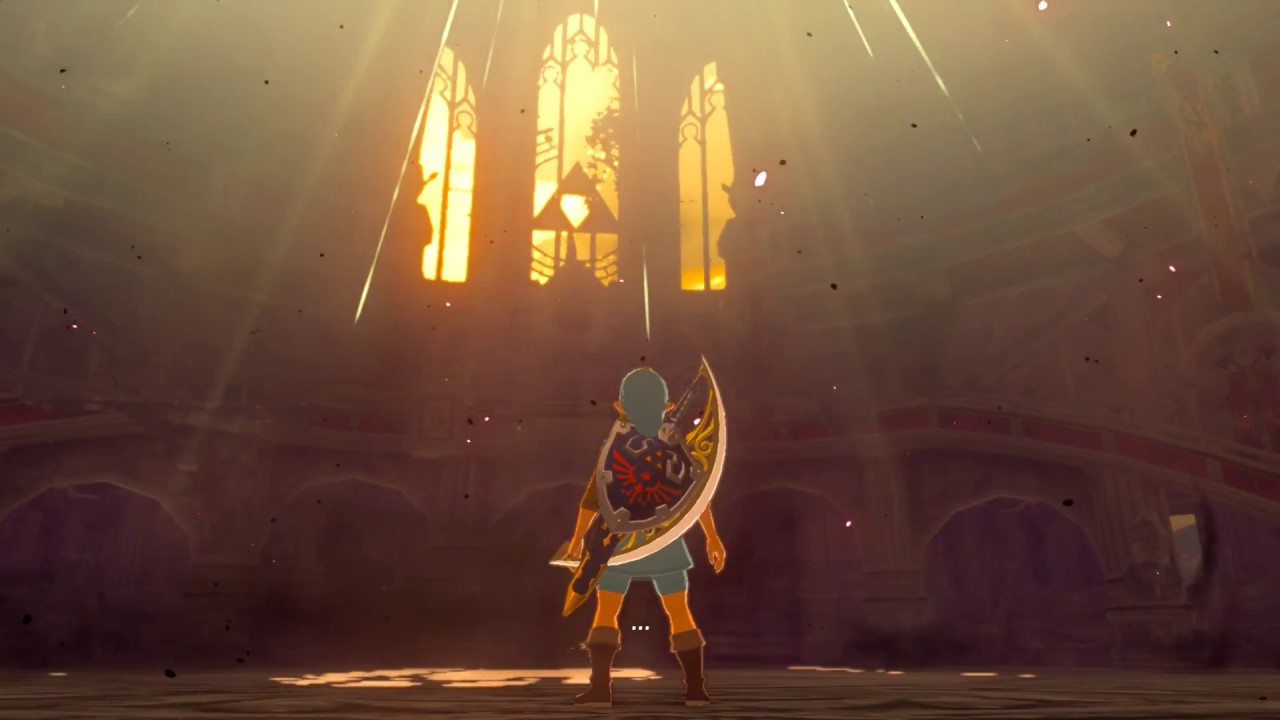
2 – Hyrule Castle
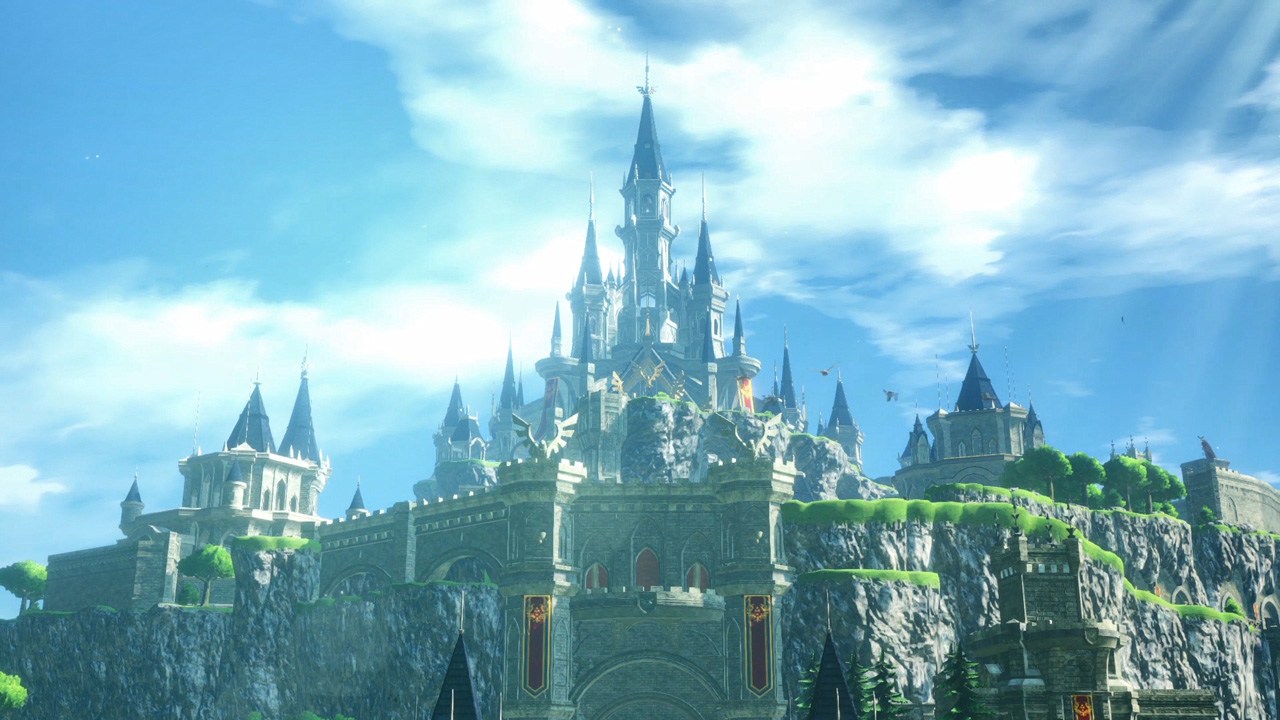
Legend Of Zelda: Breath Of The Wild | Hyrule Castle | Source: Zelda Dungeon
The Hyrule Castle is considered the final dungeon housing the Calamity Ganon. This is where the final fight will take place. However, you will have to do a bit of scurrying by yourself in order to clear the dungeon first.
With that said, the Hyrule Castle was initially supposed to be a peaceful place where King Rhoam would rule over his subjects just a hundred years ago. However, the delay in Zelda’s powers and the awakening of the prophecy caused the Calamity Ganon to overtake this place as his base.
Princess Zelda, by her lonesome, took on the responsibility to keep the Calamity Ganon sealed until her knight – Link, was back up in the Shrine of Ressurection to put a stop to the Calamity Ganon once and for all.
Fighting your way to the final battle seems like a fitting climax of the show. However, reaching there is an absolute nightmare due to the Calamity Ganon and his evil energy.
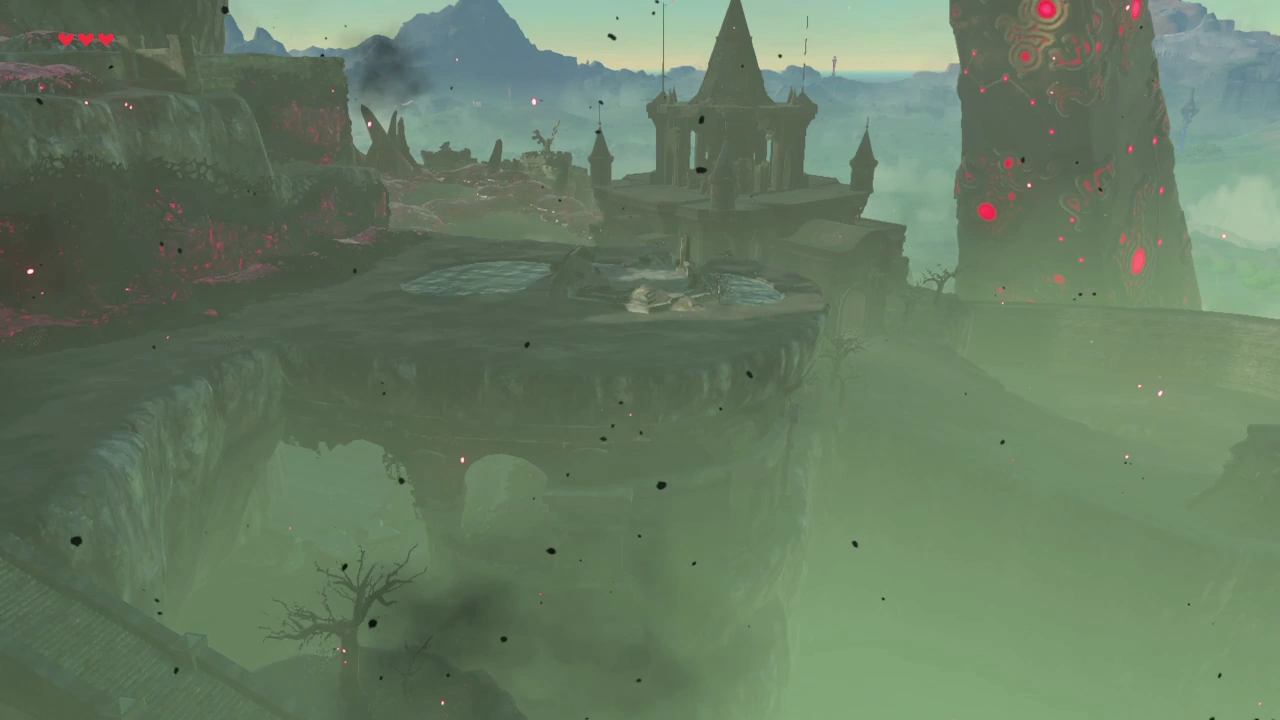
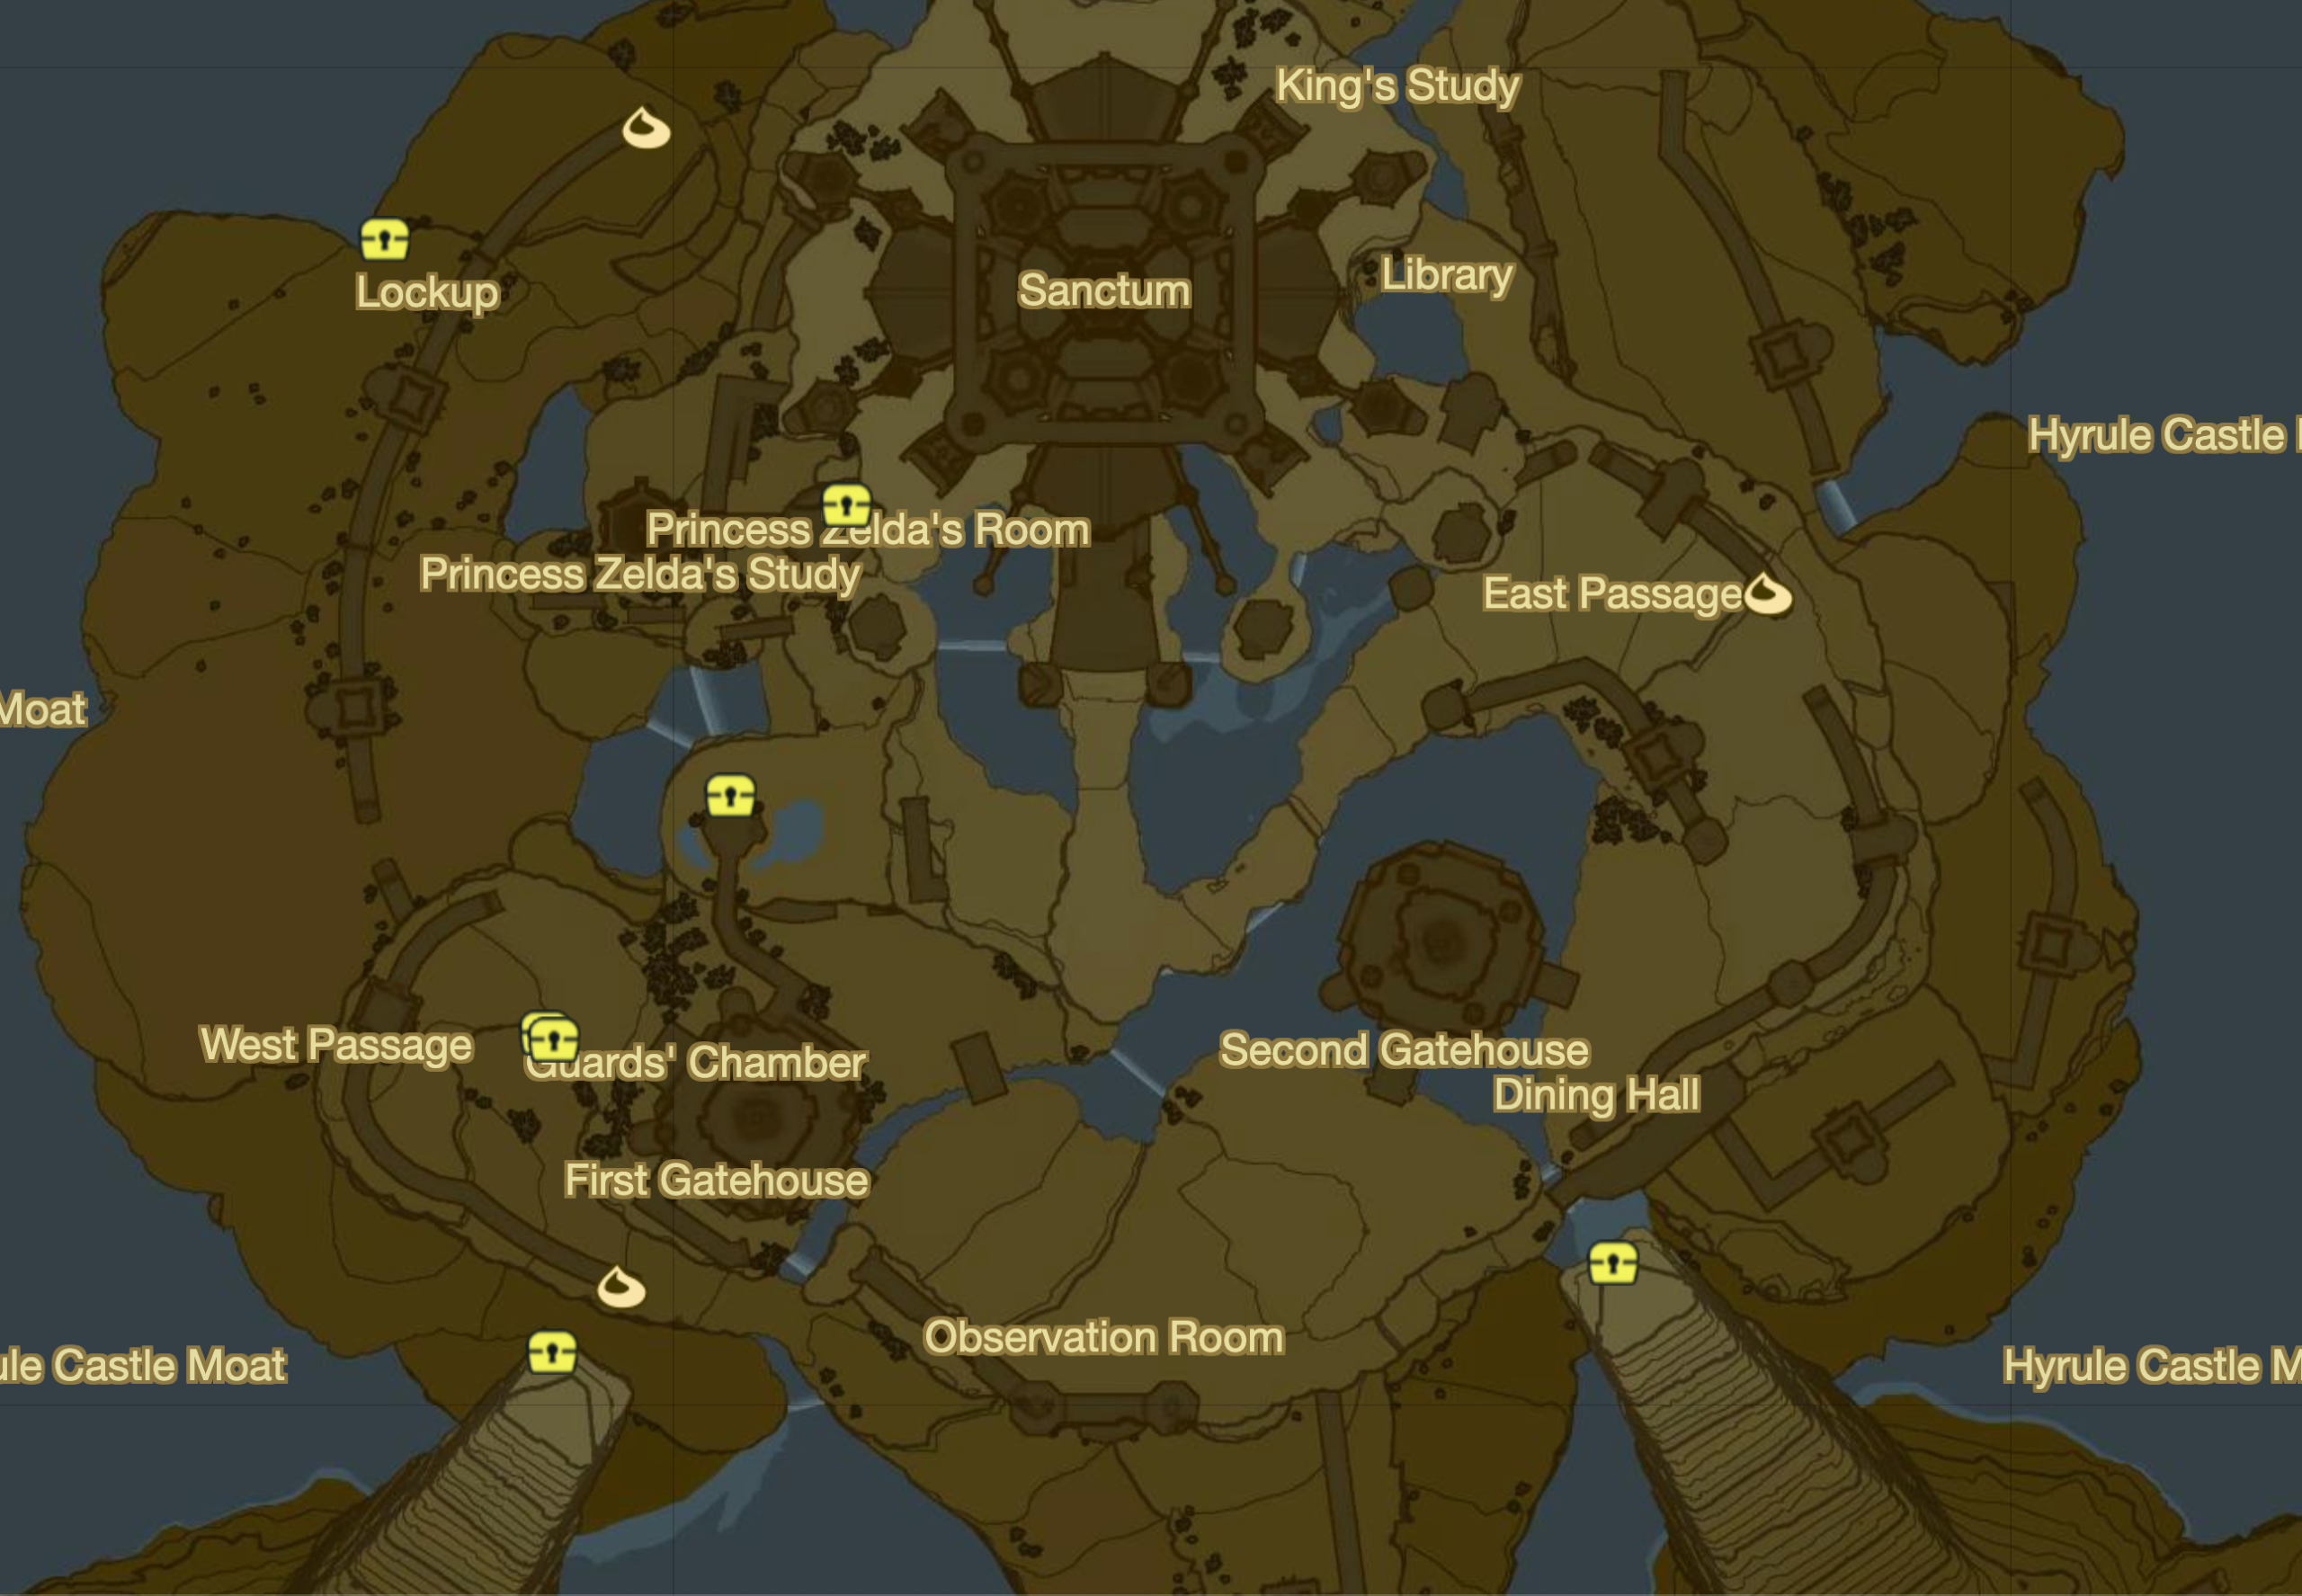
Entering The Hyrule Castle

Legend Of Zelda: Breath Of The Wild | Hyrule Castle | Source: Zeldapedia
Unlike most areas in The Legend of Zelda: Breath of the Wild, the Hyrule castle can’t be barged into since it’s surrounded by entraption mechanisms like Moat and Ganon’s goons. Luckily, there is a portion of land that connects directly to the castle gate.
In order to access that piece of land, you will need to move towards the southern side of the Hyrule Castle Town Ruins.
Be careful, though; this area is surrounded by desolate terrains and destroyed buildings. Plus, Ganon’s miasma is quite thick in the area, so just rush your way to the Sanctum.
The Path To The Courtyard
This is the place where the fight with Calamity Ganon will take place, so you should be at your best in order to take the victory in one go. The fights in The Legend of Zelda: Breath of the Wild are not that hard, so you will manage just fine as long as you’ve cleared the previous quests.
Once you’re there, a cutscene will ensue where the Calamity Ganon will be seen twirling its tail around the castle and jumping back to the Sanctum in a burst of light.
Legend Of Zelda: Breath Of The Wild | Hyrule Castle Courtyard | Source: Wiki
After that, look towards the right side of the Hyrule castle in order to find a tower. Climb it, and open the chest containing five Bomb Arrows. Upon climbing a bit higher, you will also find a chest containing a similar amount of ice-attributed arrows.
Once you’re done with the arrow collection, move your way to the western side of this tower until you find a decayed Guardian.
You will know you’re heading in the right direction once you discover a straight line of malice blocking your way. Head inside the doorway to welcome yourself into the castle’s interior.
Keep walking ahead until you’re inside the Hyrule Castle Courtyard, just on the opposite side of the malice this time. Luckily, you can damage it and kill it to stop it from interfering with your plans. To do so, you will need to specifically target a Glowing Eyeball near it.
Navigating Through Malice
Once the malice has been defeated, continue on the road to find a Rusty Shield alongside a Royal Bow near a Guardian Turret within the second layer. Continue onwards with your journey while reaching the First Gatehouse.
You will be restricted from entering it by a huge blob of malice. Ignore it and take the nearby pathway, and head towards the small bridge. Nimble-toe your way through the remains of the landslide and the Decayed Guardian until you reach a cross-section.
Choose the unmarked pathway (left), and keep on running while looking out for your surroundings. Once you reach the outer edge of the pathway, Link will be able to spot a pool of water where a metallic chest is hidden.
Dive underwater in order to reach it and store the Bomb Arrows in your inventory. There are a bunch of landslides within the Hyrule Castle as an aftermath of the battle with Calamity Ganon. Keep on moving forward until you find another one.
Be vigilant while approaching it, or you might get crushed under the Guardian falling from above. Keep on walking as closely as possible near the narrow land until you pass through the Dining Hall. From here, just move forward, and you’ll eventually end up on the opposing side of the blob of Malice.
As always, look for a glowing eyeball, and shoot it to get rid of the blob. Now, continue moving forward until you reach the Second Gatehouse.
The Journey Towards The Sanctum
Legend Of Zelda: Breath Of The Wild | Sanctum | Source: ConvictedBattler
You will be finding an awful lot of stone walls at the beginning of the Second Gatehouse. Just navigate your way through them until you reach a wall adjacent to a curved road.
Look around it in order to locate and climb a tower containing a treasure chest that can be opened to gain a total of five Bomb arrows.
Continue your journey on that very tower to find another treasure chest at the very peak. Open it and grab the five Shock Arrows, and be on your way.
Once you’re back on the road, continue onwards to find the final malice obstruction that can be cleared by hitting the eye in between the two shorter towers.
Heading further on this road will end you up at the entrance of the Sanctum. From there one, it’s all about summoning Ganon and challenging it to curb the evil that has been plaguing Hyrule for years.
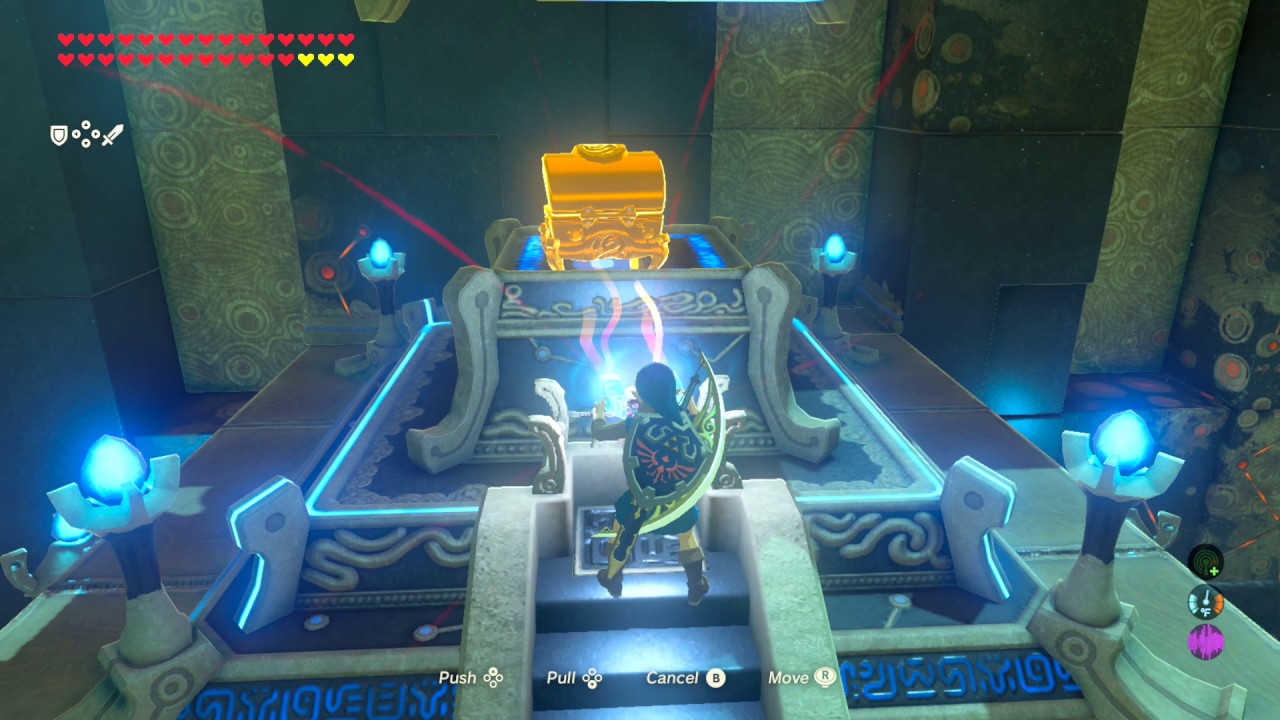
Treasure Chests In Hyrule Castle
Legend Of Zelda: Breath Of The Wild | Hyrule Castle
Heading towards the Sanctum is pretty arduous in its own regard, but the journey itself isn’t fruitless. However, you can add further value to this travel by picking up random treasure chests hidden across the entirety of Hyrule Castle.
With that said, here are most of the unmarked treasure locations in Hyrule Castle:
Location #1: Bridge Tower
There is a bridge between Princess Zelda’s room and study. While moving on it, locate a small tower nearby, and climb on its roof to find a stone chest containing five ice arrows.
Location #2: Water Pond
Now, move towards the bottom of that very tower in order to reach the side of the Hyrule Castle Courtyard. Continue until you reach a pool of water, then use Magnesis to pull out a metallic treasure chest. Enjoy the 10 Ice Arrows inside!
Location #3: Twin Towers
From the water body, move along the edges of the stone wall until you find two medium-sized towers. Head towards the top of both of them in order to find two stone chests containing five bomb arrows each.
Location #4: Water Pool
From the left of the second tower, you will be able to scout a larger water body. Move towards it, and hurl the treasure chest out to find five ice arrows.
Location #5: Dried Waterfall
From the large lake, continue moving with the stone wall until you reach a dried waterfall in the Lockup and the Docks. There will be a cracked rock in the way, holding a stone treasure chest. You can expect five bomb arrows to drop from it.
Location #6: Ledge Tower
Once you head towards the ledges of the cracked rock, make sure to look for a tower nearby. Just glide to its roof in order to find a treasure chest containing five fire arrows.
Location #7: Connected Walls
The tower is connected with the interior walls; make sure to inspect them to find another cracked boulder nearby. This one contains five shock arrows.
Location #8: Cracked Boulder
This third and final cracked boulder of the area can be found on the southeast of the same stone wall. Once found, open it to find Dinraal’s Scale.
Location #9: East Passage
On the entrance to the east passage, you need to look at the Ledge underneath to find a cracked boulder. Under the cracks, there will be a stone treasure chest containing the Solver Rupee.
Location #10: Wall Tower
Moving along the eastern passage, climb up the corresponding tower in order to find a chest containing three Ancient Arrows.
Location #11: Library
There’s a cracked boulder near the external walls of the library. Search through it to find a treasure chest containing a Ruby.
Location #12: Northern Water
On the northern side of the Library, there’s a water body containing a Circle of Lily Pads. Start jumping on them until a Korok comes out to give you some seeds.
Consequently, there’s a metallic treasure chest in these waters that can be pulled out with magnesis. It contains a total of five Ice arrows.
Location #13: Land Bridge Tower
There is a stone chest on top of the tower near the land Bridge. Open it in order to find five shock arrows.
Location #14: Giant Slab
There’s a giant stone slab just towards the northern wall of this tower. You will need to go underneath it to find a Silver Rupee. Once done, look for another cracked boulder in the vacancy and open the chest inside to find a Gold Rupee.
Location #15: Cliff Tower
There is a tower leading to a cliff on the southern side of this gigantic slab. You know the drill by now, climb the tower’s roof to find a stone chest containing five fire arrows.
Areas Within Hyrule Castle
Legend Of Zelda: Breath Of The Wild | Hyrule Castle | Source: Polygon
The Hyrule Castle is gigantic, no doubt about it. It has been a historical monument that has seen everything from ruination to prosperity. While the current state of this marvel is way past its prime, it still holds a multitude of smaller structures that are worth looking into.
Having said that, here are all the marked areas present in the Hyrule Castle:
|
Area |
Description |
|
Astral Observatory |
This is the location where Link’s final battle against Calamity Ganon will take place. You will fall down to this room along with Ganon once he makes his experience. |
|
Dining Hall |
This is a particularly lengthy room primarily used for hosting feasts. |
| Docks |
Located at the rear end of Hyrule Castle, the Docks are just one of the many entrances., |
|
First Gatehouse |
One of the two gatehouses that are mandatory to be crossed in order to reach the Sanctum. |
| Guard’s Chamber |
A particularly lengthy room once used to house the Hyrule Castle Guards. |
|
Hyrule Castle Corridors |
The connecting bodies of the various rooms present within the Hyrule Castle. |
| Hyrule Castle Courtyard |
A wall-enclosed space that takes up most of the exterior of the Hyrule Castle. |
|
Hyrule Castle Gate |
The primary form of entrance to the Hyrule Castle. |
| Hyrule Castle Underground |
A location consisting of two separate passages and an area that house two sub-bosses of the game series. |
|
East Passage |
One of the two passages of the Hyrule Castle Underground that possesses a Stone Talus, |
|
Lockup |
Located in the northwest corner of the Hyrule castle, this area contains a Stalnox – ready to be killed. |
| West Passage |
One of the two passages of the Hyrule Castle Underground that’s further segmented into two portions, with the sole connection being the Mine Cart rail. It has been abandoned for a while now, so there might be dangers lurking inside. |
|
King’s Study |
The secret room containing the personal journal of the Great King Rhoam. |
| Library |
A multi-layered library spanning across the Hyrule Castle. |
|
Observation Room |
An inaccessible room that can only be reached after clearing the malice eyeballs in the Reception room. Its main purpose is to overlook the town of Hyrule. |
| Princess Zelda’s Room |
As the name suggests, this used to be the private room of the Princess of Hyrule. Since then, though, it has been ruined into shambles. |
|
Princess Zelda’s Study |
This is a tower connected to Princess Zelda’s Room. Link can read her research notes here. |
| Reception Room |
This is the main room of the Hyrule Castle that’s intended for receiving guests. |
|
Round Spiral Staircase |
This staircase connects the castle interior to the garden. |
| Sanctum |
This is the highest area in the castle spanning a total of four levels. |
|
Bell Tower |
This is the Sanctum’s highest floor. |
| Champions’ Hall |
The room containing a viewing angle for the Ganon’s cocoon. |
|
Sanctum Observation Room |
Sanctum’s third floor that’s intended for observation. |
| Throne Room |
The first level of the sanctum where Link meets up with the Calamity Ganon. |
|
Second Gatehouse |
The latter of the two gatehouses that Link must pass through in order to reach the sanctum. |
| Square Spiral Staircase |
A staircase connecting two levels of the Hyrule Castle Corridors. Link can find several good weapons here. |
|
Water Pump Room |
As the name suggests, this area is responsible for circulating water throughout Hyrule Castle. |
Once you’re done exploring the entirety of the Hyrule Castle, it’s time to take on the final battle, which will decide the fate of Hyrule.
Beating Calamity Ganon
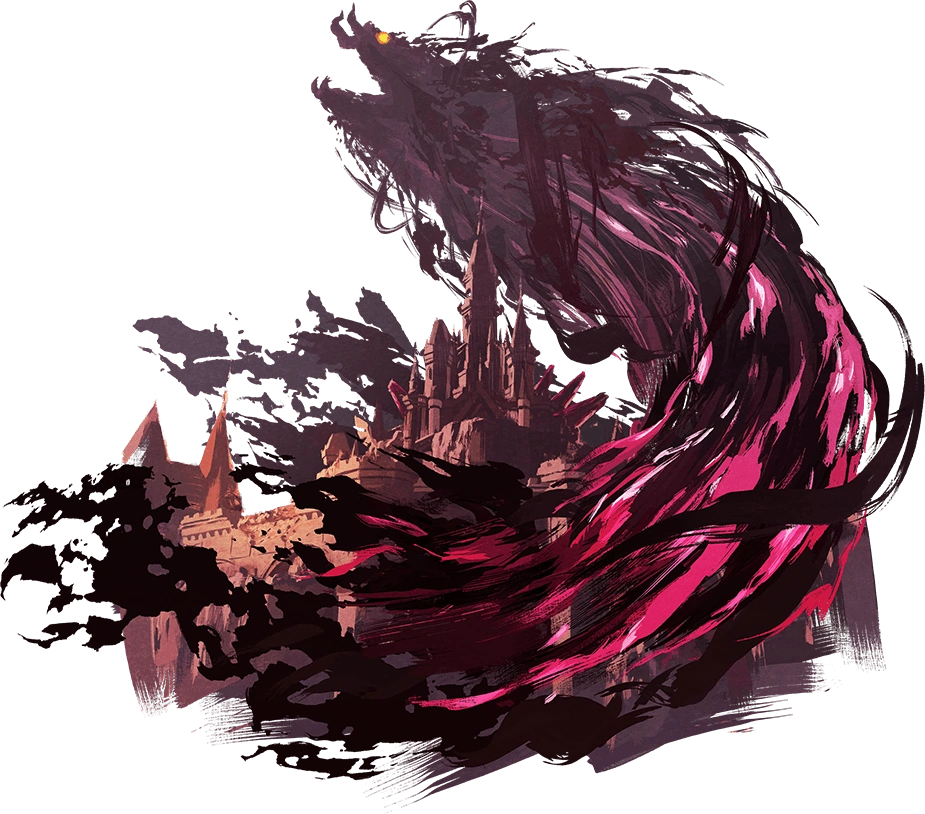
Legend Of Zelda: Breath Of The Wild | Calamity Ganon
The Calamity Ganon – much like most bosses in The Legend of Zelda: Breath of the Wild, is a gigantic being made of pure malice. Once spawned, it will run around the castle walls attaching itself with the help of its multiple limbs.
The Calamity Ganon features two unique sets of attack patterns that shift depending on his positioning. In general, you will be facing one of the following attack types from Calamity Ganon:
Ground Mode
Ganon will swip[e his limbs across the arena while dealing fire-based damage. The impact will also create an updraft that can be used to stay afloat or relocate at a better angle.
These kinds of attacks are the most deadly out of the bunch and can take you down instantly if you don’t have your guard up. Just keep your distance and focus on his body language in order to gauge when an attack is coming.
The Ground Mode is a mix of both melee and the spear. Therefore, no place is safe; you just have to dodge effectively and leave the rest to fate. Calamity Ganon is also equipped with a Guardian-like laser that works as a double-edged sword.
Since this attack is deflectable, you can use it to deal massive amounts of damage to Calamity Ganon. Having said that, your Master Sword isn’t just for show, either. Therefore, try to leverage its chip damage before the Calamity Ganon transitions into Wall mode.
Wall Mode
Once Ganon hits a certain health threshold, his Ground Mode will shift into Wall mode, thereby causing him to stick to the nearby walls while hurling short laser-based projectiles that are hard to deflect and dodge.
While most of them are pretty dodgeable, attaining a perfect dodge ratio here is near impossible. Therefore, just try to shield yourself whenever possible and hope for the best. There will be a lot of Rune attacks along with tornados and lightning rods coming your way with supersonic speed.
Try to dodge as much as possible since your main goal here is to survive with as much health as possible. You will get plenty of chances to finish him off, so bid on it instead of going overboard on every small window.
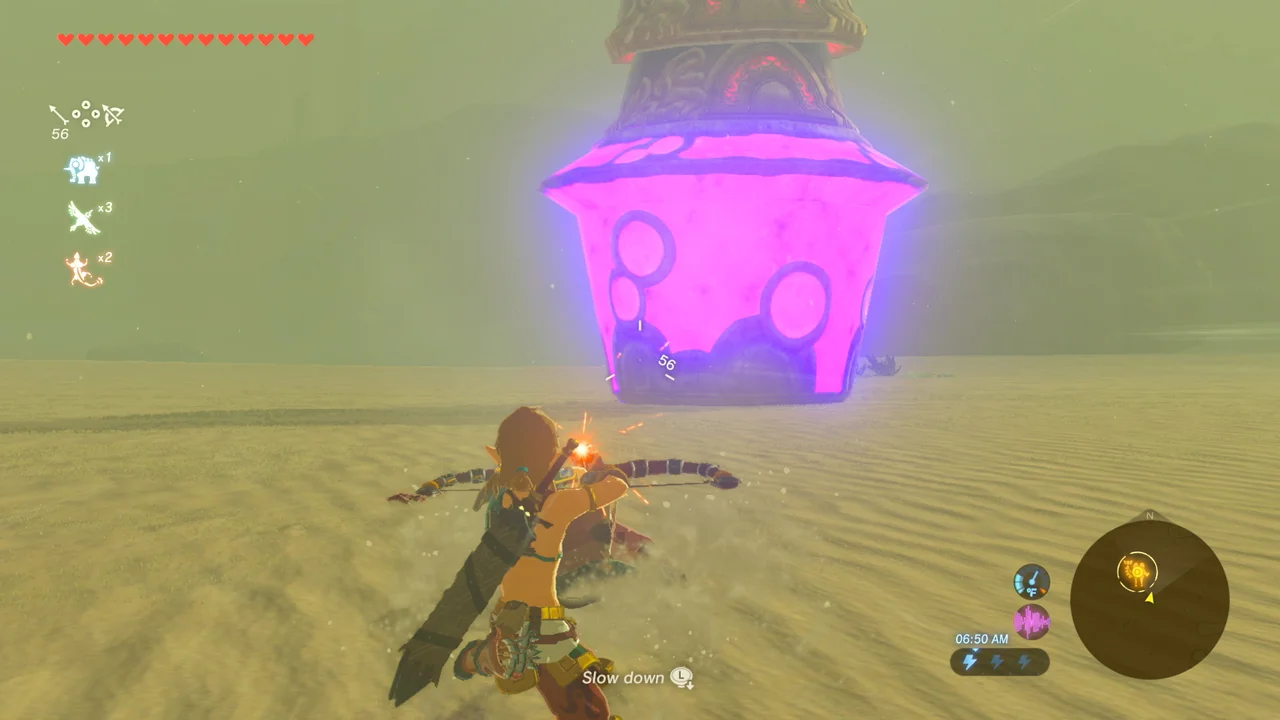
3 – Final Trial

Legend Of Zelda: Breath Of The Wild | Final Trial
This dungeon is directly linked with one of the main DLC packs of the game, known as Champions’ Ballad. Your main goal here is to solve a bunch of puzzles in an engine-like labyrinth created after an unknown divine beast.
Unfortunately, though, not everyone is suited for this kind of adventure – even if you have purchased the DLC. Just make sure to clear the following quests before initiating the Final Trial in The Champions’ Ballad DLC:
- EX Champion Urbosa’s Song
- EX Champion Daruk’s Song
- EX Champion Mipha’s Song
- EX Champion Revali’s Song
Once you’re done with the mentioned quests, Monk Maz Koshia will automatically guide you to head towards the Shrine of Resurrection in order for the Final Trial to commence.
Entering The Trial
Legend Of Zelda: Breath Of The Wild | Final Trial | Source: Polygon
Once Link reaches inside the Shrine of Resurrection – a place where he initially awakened, he will hear the voice of Monk Maz Koshia instructing him to return the Sheikah Slate to the terminal.
This is where he obtained to slate, and it’s supposed to go back to the same terminal as a closure to the climactic battle with Ganon and his goons.
Upon doing as instructed, the door to the chamber will be sealed, and the platform will descend towards the dungeon in the Final Trial.
Luckily, you don’t have to worry about your own safety or anything of that sort since the platform will have a magic barrier around it, refraining anyone from leaving until it has fully descended.
Korok will no longer be present in the Shrine of Resurrection as your path ahead is of solitude. Therefore, get prepared as you dive into one of the most conclusive dungeons The Legend of Zelda: Breath of the Wild has to offer.
Obtaining The Map
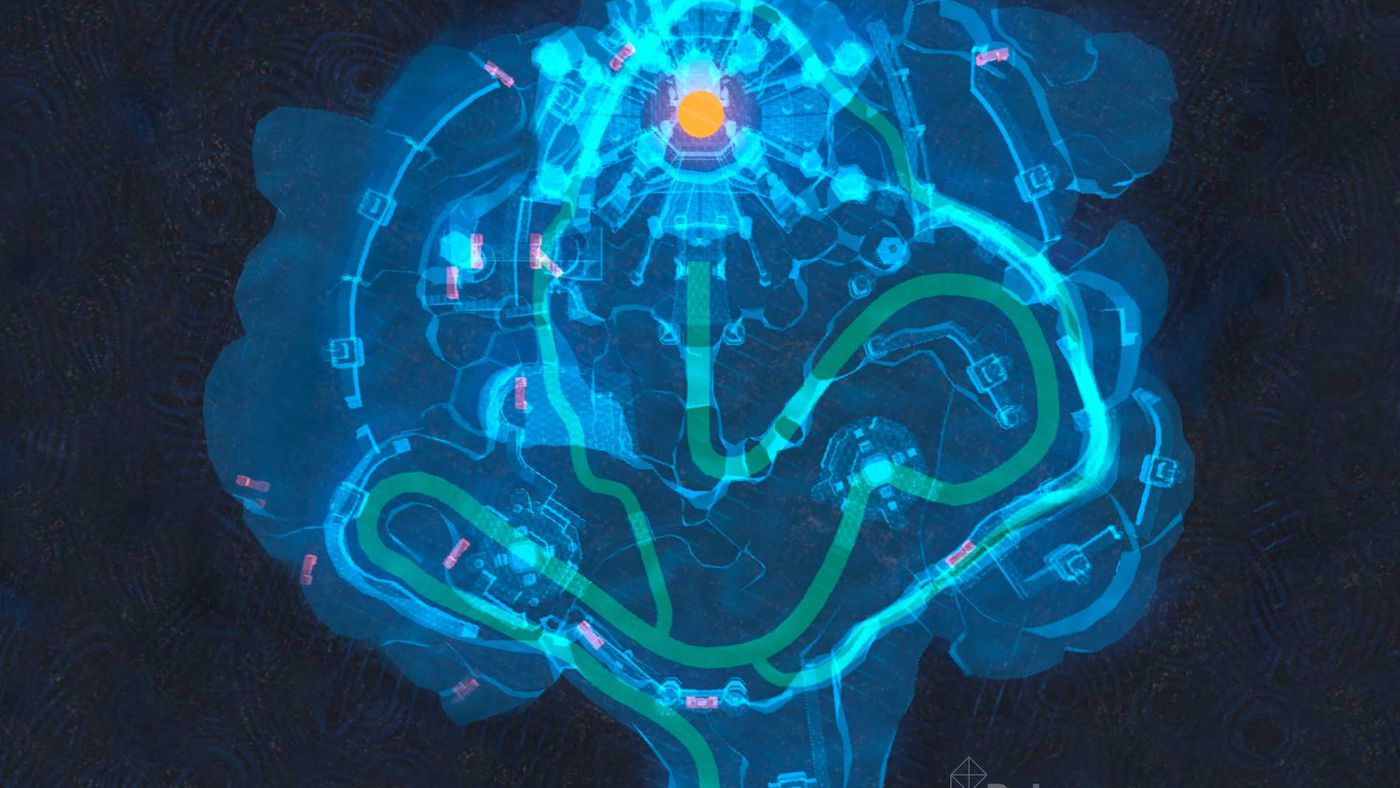
Once you’re inside the dungeon, the voice of Monk Maz Koshia will linger once again, telling you that you’ve successfully entered the dungeon and identifying you with the perils that lie ahead.
From here onwards, you will have to rely on creating your own version of the map by gathering information from the Guidance Stones.
Once you reach this nearby Guidance Stone, interact with it in order to gain the Map data once it finishes verifying your map data through the Sheikah Slate.
You will primarily rely on this map for the remainder of your dungeon adventure. Therefore, we recommend you check it from time to time in order to have a good understanding of your whereabouts.
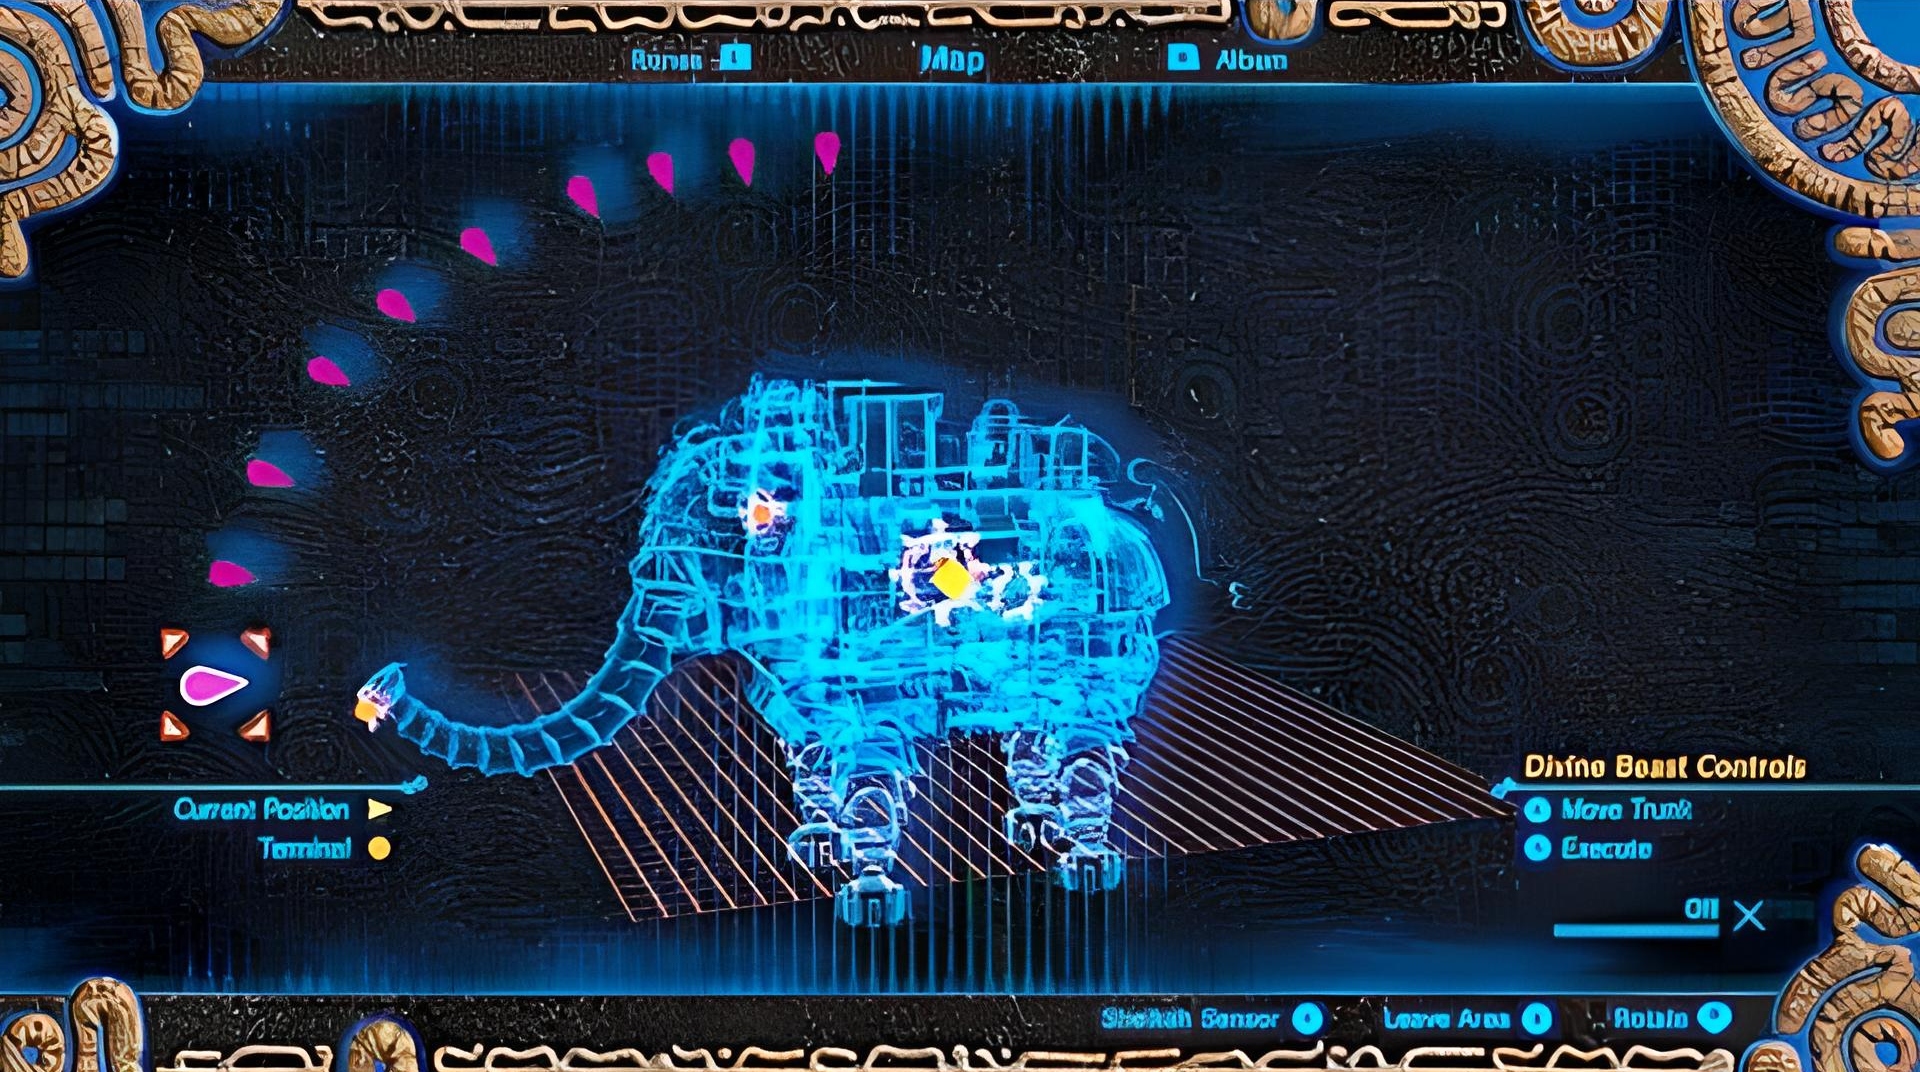
Trial Dungeon: Characteristics
Legend Of Zelda: Breath Of The Wild | Final Trial | Source: Polygon
This Dungeon comprises the main chamber that’s interconnected to four adjoining chambers with a series of mechanical gears. The sub-chambers are modeled to resemble the divine beasts along with their elements.
Ultimately though, they’re still made out of rotating and turning gears along with several mechanical walls and other objects. These mechanical marvels won’t move unless and until the main chamber is thoroughly connected to the sub-chamber.
You can use the Map on your Sheikah Slate to rotate the gears in clockwise and anticlockwise directions in order to make them align the mechanisms and vice versa. Most of these connections are done manually, so don’t expect your workload to be reduced.
Once the terminals are activated one by one, more enemies will start to come out of the main and subchambers.
While the initial onslaught would be rather timid at best, the latter half of the enemies will start to get nighmarish. With each successful activation, you can expect an increase in the rank of enemies being summoned.
In retrospect, you will be initially only fighting a Guardian Scout I. However, as time passes, three additional Guardian Scouts I will be spawned along with a Guardian Scout II as their brain.
Once you activate the second terminal, the same unit will remain, but you will also have to face a newly spawned Guardian Turret. Finally, the third activation of the terminal will boast the highest difficulty, as you will have to face two Guardian Skywatchers.
Beating The Dungeon: A Step By Step Process
The enemies inside this Dungeon will mostly only appear in the central chamber. You don’t have any specific time limits. However, every activation of the terminal will make it harder for you to activate the next one.
Once you head inside the Thunder Chamber, look around until you find a treasure chest containing the Gerudo Scimitar.
Consequently, you will obtain a Cobble crusher in the fire chamber and a Shallow Bow in the Wind chamber. As for the water chamber, you can hope to obtain the Zore Spear.
These are essentially the components for crafting the original champion weapons. Therefore, it’s best if you don’t scrap or break them until then.
Within a rogue treasure chest, you will be able to obtain a diamond – given your luck wills it. Plus, it’s also a necessity for the champion gear, so it’s less of choice than anything.
Aside from the mentioned items, you will also be able to find the Gerudo Shield – which is a component forUrbosa’s Daybreaker Shield, and five bomb arrows.
Controlling The Terminals
Link can authenticate the terminals with the help of his Sheikah Slate. It will not only tell him the location of the terminal but will also track the number of fixed and unfixed terminals – which can come in handy during chaotic fights with the guardians.
Once you’ve deactivated all the locks on the terminals, the dungeon’s deepest area’s location will be revealed. Just move to the instructed location and undo the locks to meet Monk Maz Koshia in person.
Ending Of The Last Trial
Upon meeting Link, Monk Maz Koshia reveals that he has proven himself to possess the power and will of a true hero. Therefore, it’s time for him to face the final trial set after the Dungeon. Monk Maz Koshia then stands up in order to transport Link and himself to the arena.
Hovering directly above the great plateau, this arena is nothing but magnificent. However, your goal today is not sightseeing. Therefore, it’s best you get prepared for the challenge that’s about to ensue.
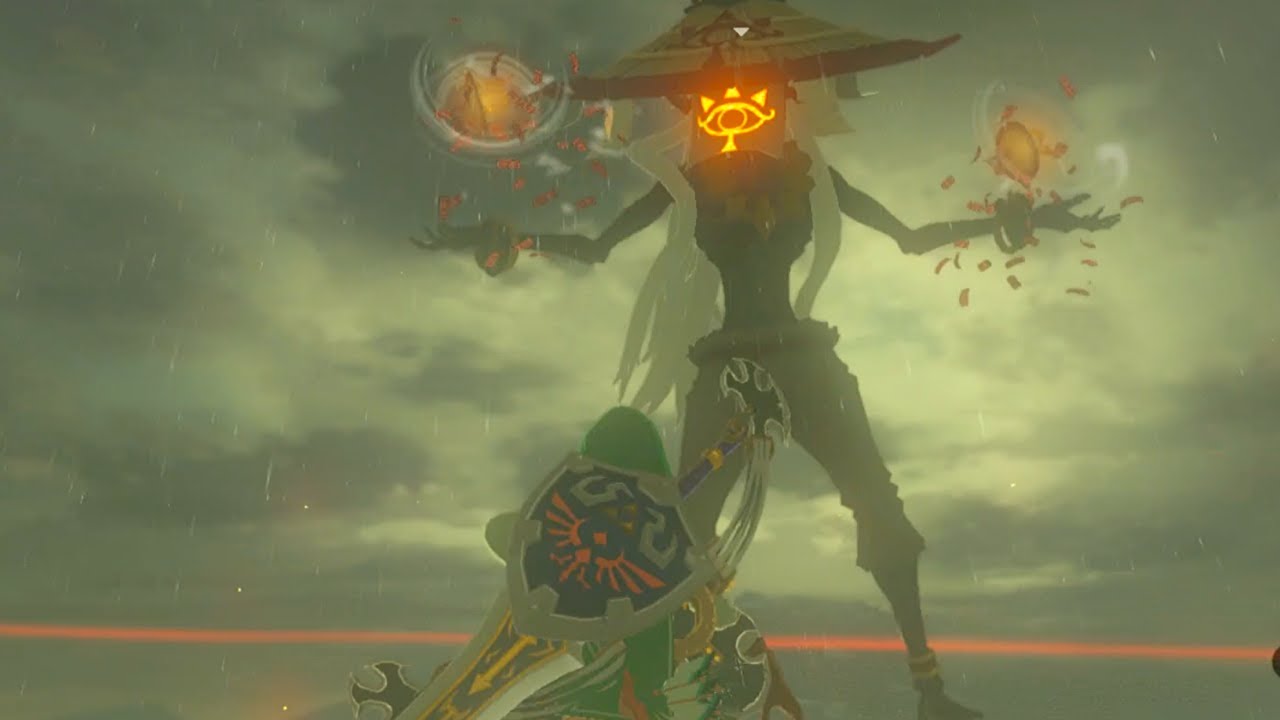
Legend Of Zelda: Breath Of The Wild | Monk Maz Koshia | Source: L.O.G
After that, Link and Monk Maz Koshia engage in a one-on-one battle where the Monk portrays himself as the final boss of the dungeon. After a gruesome battle, the Monk becomes satisfied and tells Link that he is, in fact, a true hero – purely based on the way he took him on.
With that, the trial has been concluded, and you’re rewarded with the Master Cycle Zero Rune. After a few well wishes from the monk, Link is returned back to the Great Plateau, and the journey reaches its conclusion.
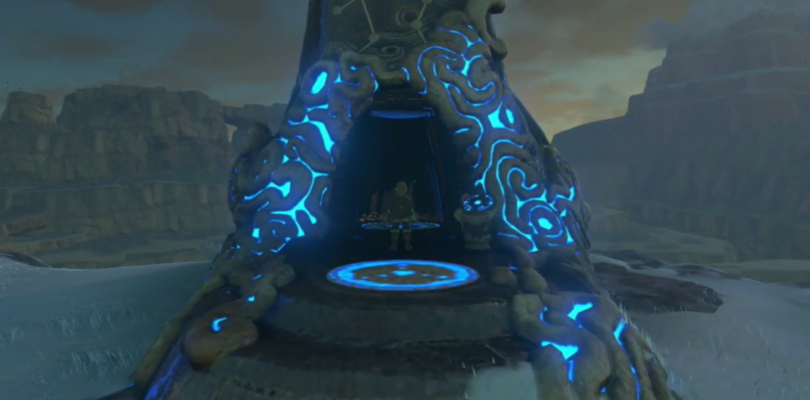
4 – Ancient Shrine
Legend Of Zelda: Breath Of The Wild | Ancient Shrine | Source: Wiki
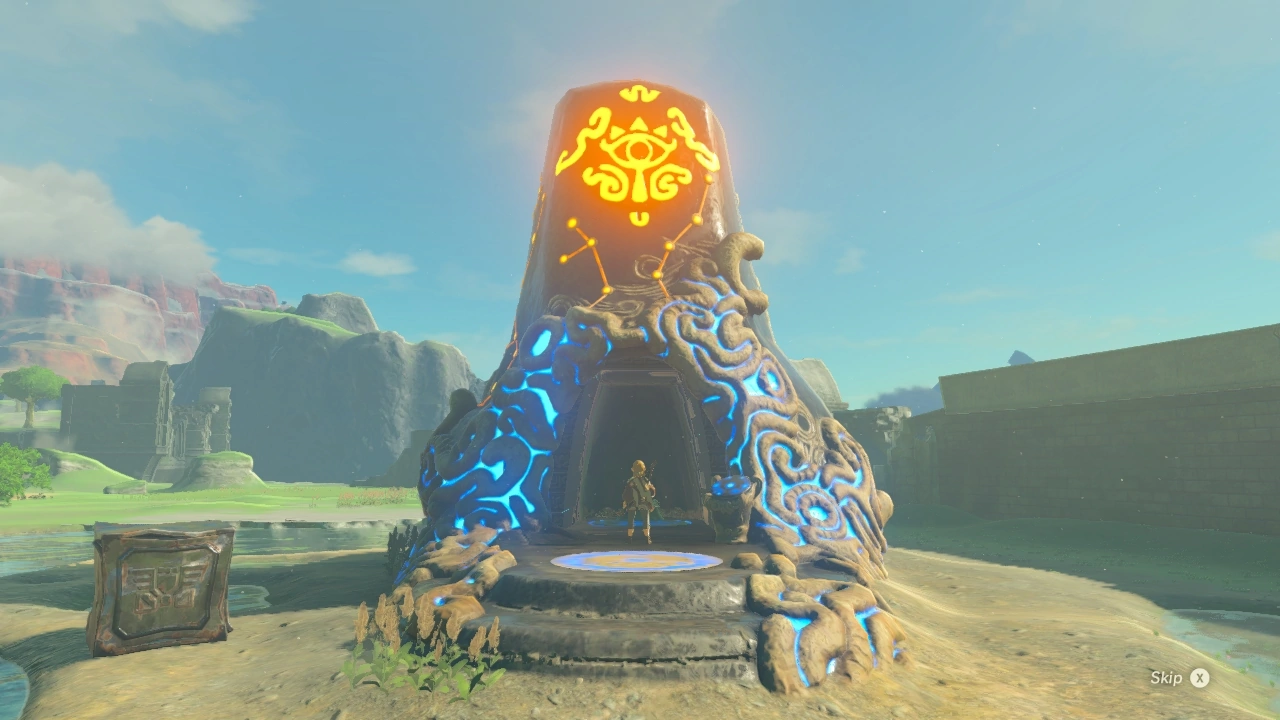
Being extremely close to dungeons in nature, the Ancient Shrines are constructs spanning over the entirety of Hyrule. They provide unique puzzles for Link to explore and solve in order to gain valuable rewards.
The Ancient Sheikah have been pretty meticulous in their elaborate schematics and vice versa while sealing away Calamity Ganon. Luckily, you can benefit from their knowledge to get stronger by challenging yourself in these training ground-esque dungeons.
There are a total of 120 basic Ancient Shrines present throughout the land of Hyrule. While most of these were present way before Calamity Ganon’s domination, they only activated once Link activated the Great Plateau Tower.
There isn’t much you can do at this point than to go and hone your skills in all of these Ancient Shrines in order to know more about yourself and your Sheikah Slate.
These Shrines cannot be accessed without the Sheikah Slate, thereby making Link the only one currently that can go in and out of these shrines without a hiccup.
Entering Ancient Shrines
Every Ancient Shrine is accompanied by an elevator platform that either ascends or descends Link into the dungeon once he places his Sheikah Slate in the terminal. Each Shrine inhabits a monk that’s responsible for giving the trials and testing Link.
Aside from the clearing reward from the dungeon, Link will also be able to gain a Spirit Orb whenever he meets one of these Monks as a reward. So, in theory, you can gain up to 120 free Spirit Orbs by just visiting all the Monks present in the Ancient Shrines.
While most of these Shrines are quite unique in nature, there are certain similarities in certain groups. For example, your first four shrines will contain Runes that serve to bolster the dependability and functionality of your Sheikah Slate and vice versa.
Treasure Distribution
Legend Of Zelda: Breath Of The Wild | Ancient Shrines | Source: ConvictedBattler
Each shrine comes with an evenly spread assortment of treasure chests. Since these locations aren’t generated by random, you can expect to grab a lot of loot as long as you follow their walkthroughs and keep a close eye on detail.
You can be sure to collect every single treasure by checking your map for a Treasure icon. This will only appear once you’ve depleted the Ancient Shrine for all its treasures. Once you’re done clearing all the shrines, Link will receive a brand new quest instructing him to reach the Goddess Statue.
Upon reaching there, you will be granted the Wild Set – representing The Breath of the Wild, as a reward for your dedication and for the fact that you’ve proved yourself as a true hero.
Total In-Game Shrines
As astonishing as it might be, the total number of Ancient Shrines isn’t limited to 120. Rather, it’s 136, with the remaining shrines being the DLC content. These remaining shrines can only be completed once you’re done with the four ancient beast dungeons.
However, since this is an expansion, the total number of shrines that impact the main storyline is still 120.
Of these newly found shrines, four will be located on the Great Plateau, while the remaining set of 12 will be related to the champions that once piloted the Divine Beasts – with each getting three shrines in their remembrance.
Unlike the regular shrines, you will only be getting a Spirit Orb out of the four regular shrines. As for the remaining 12, you will be bestowed with Emblems that symbolize the Divine beast of the respective region where the quest has been completed.
All Shrines In The Legend Of Zelda: Breath Of The Wild
There are a total of 22 regions containing the Shrines spread in Hyrule. While most of these are located sufficiently farther from each other, you will still be able to find most of them as long as you keep heading in a certain direction.
With that said, you can refer to the following list of all the Shrines present in Hyrule along with the reward they give along with their respective trial:
Akkala
This is a region located in the north-eastern section of Hyrule Kingdom. Unfortunately, this is also where the Great Calamity took place. Therefore, a lot of people remember it as the place where Hyrule Kingdom’s demise started.
Akkala Highlands
This list pertains to most of the rather large highlands located in the southern region of the Akkala:
| Shrine Name | Name Of The Trial | Location | Rewards Given |
| Dah Hesho Shrine | A Minor Test of Strength | Akkala Highlands | Giant Ancient Core |
| Kah Mael Shrine | Drop and Rise | Tingel Island | Diamond |
| Ke’nai Shakah Shrine | A Modest Test of Strength | Akkala Highlands | Sapphire |
| Ritaag Zumo Shrine | Ritaag Zumo’s Blessing | Rist Peninsula | Giant Ancient Core |
| Tutsuwa Nima Shrine | A Major Test of Strength | Spring of Power | Flamespear |
| Ze Kasho Shrine | Ze Kasho Apparatus | South Akkala Stable | Silverscale Spear |
Akkala Sea
The eastern and northern parts of Akkala contain a beautiful deep blue sea, where you will find the following shrines:
| Shrine Name | Name Of The Trial | Location | Rewards Given |
| Tu Ka’loh Shrine | Tu Ka’loh’s Blessing | Lomei Labyrinth Island | Barbarian Helm |
Deep Akkala
| Shrine Name | Name Of The Trial | Location | Rewards Given |
| Katosa Aug Shrine | Katosa Aug Apparatus | East Akkala Stable | Great Frostblade |
| Zuna Kai Shrine | Zuna Kai’s Blessing | Skull Lake | Flameblade |
Central Hyrule
This is the main part of Hyrule, which was burned during the Great Calamity a century ago. While the effects of that burn are still visible to date, it’s safe to say that the area has more-or-less successfully embarked on a path to recovery.
Great Plateau
This list contains all the Ancient Shines located in the southwestern area of central Hyrule. As Link, you will be beginning your journey to the Hyrule Kingdom from here.
| Shrine Name | Name Of The Trial | Location | Rewards Given |
| Etsu Korima Shrine(The Champions’ Ballad) | Path of Light | Mount Hylia | Gold Rupee |
| Ja Baij Shrine | Bomb Trial | Eastern Abbey | Traveler’s Claymore
Amber |
| Keh Namut Shrine | Cryonis Trial | Mount Hylia | Traveler’s Spear |
| Oman Au Shrine | Magnesis Trial | Great Plateau | Traveler’s Bow |
| Owa Daim Shrine | Stasis Trial | Great Plateau | Traveler’s Shield |
| Rohta Chigah Shrine(The Champions’ Ballad) | Stop to Start | Great Plateau | Forest Dweller’s Shield |
| Ruvo Korbah Shrine(The Champions’ Ballad) | A Major Test of Strength+ | Great Plateau | Bomb Arrow x10
Giant Ancient Core Small Key |
| Yowaka Ita Shrine(The Champions’ Ballad) | Collected Soul | Forest of Spirits | Bomb Arrow x5
Phrenic Bow |
Hyrule Field
This is the majority of Central Hyrule, comprising of a bunch of unique monsters along with the Guardians. The Hyrule Castle, where the Calamity Ganon resides, is also a part of this region.
| Shrine Name | Name Of The Trial | Location | Rewards Given |
| Bosh Kala Shrine | The Wind Guides You | Hyrule Field | Amber
Soldier’s Claymore |
| Dah Kaso Shrine | A Minor Test of Strength | Hyrule Field | Ancient Core |
| Kaam Ya’tak Shrine | Trial of Power | Hyrule Field | Edge of Duality
Knight’s Broadsword Ancient Core Silver Rupee Diamond |
| Katah Chuki Shrine | A Minor Test of Strength | Hyrule Field | Royal Halberd |
| Monya Toma Shrine | Drawing Parabolas | Hyrule Field | Thunderblade |
| Namika Ozz Shrine | A Modest Test of Strength | Crenel Hills | Frostspear |
| Noya Neha Shrine | A Minor Test of Strength | Hyrule Field | Knight’s Shield |
| Rota Ooh Shrine | Passing of the Gates | Outskirt Stable | Feathered Edge |
| Saas Ko’sah Shrine | A Major Test of Strength | Hyrule Castle Docks | Flameblade |
| Wahgo Katta Shrine | Metal Connections | Riverside Stable | Amber |
| Zalta Wa Shrine | Two Orbs to Guide You | Breach of Demise | Knight’s Bow |
Hyrule Ridge
This list contains the northwestern portion of the Hyrule Kingdom that possesses a more unrefined outlook with rockier terrain and unevenly elevated areas.
| Shrine Name | Name Of The Trial | Location | Rewards Given |
| Mijah Rokee Shrine | A Modest Test of Strength | Washa’s Bluff | Frostblade |
| Maag No’rah Shrine | Maag No’rah’s Blessing | Hyrule Ridge | Silver Rupee |
| Mogg Latan Shrine | Synced Swing | Satori Mountain | Forest Dweller’s Spear
Forest Dweller’s Bow Gold Rupee |
| Shira Gomar Shrine(The Champions’ Ballad) | Aim for Stillness | Hyrule Ridge | Bomb Arrow x10 |
| Toh Yahsa Shrine | Buried Secrets | Thundra Plateau | Rubber Armor
Opal |
Eldin
A vast region in the northeast portion of Hyrule. The eastern side of Eldin contains a mountainous stretch with foothills and volcanic activity. In comparison, the western side contains a different kind of stretch unique to the Hyrule Kingdom.
This is also the place where you will be reclaiming Divine Beast Vah Rudania.
Eldin Canyon
Covering the majority of Eldin, the Canyon is a valley with lots of mountains, rugged slopes, and deep gorges. Despite the desolation, this area contains a decent number of shrines.
| Shrine Name | Name Of The Trial | Location | Rewards Given |
| Daqa Koh Shrine | Stalled Flight | Eldin Canyon | Silver Rupee |
| Gorae Torr Shrine | Gorae Torr’s Blessing | Gut Check Rock | Great Frostblade |
| Kamia Omuna Shrine(The Champions’ Ballad) | Moving Targets | Lake Darman | Diamond |
| Kayra Mah Shrine | Greedy Hill | Eldin Canyon | Ruby
Bomb Arrow x5 |
| Mirro Shaz Shrine | Tempered Power | Pico Pond | Giant Ancient Core
Iron Sledgehammer x2 |
| Mo’a Keet Shrine | Metal Makes a Path | Eldin Canyon | Knight’s Broadsword
Ruby |
| Qua Raym Shrine | A Balanced Approach | Goronbi Lake | Knight’s Claymore |
| Rinu Honika Shrine(The Champions’ Ballad) | Block the Blaze | Eldin Canyon | Stone Smasher |
| Sah Dahaj Shrine | Power of Fire | Eldin Canyon | Knight’s Bow |
| Shae Mo’sah Shrine | Swinging Flames | Goron City | Ruby
Stone Smasher Ice Arrow x10 |
| Sharo Lun Shrine(The Champions’ Ballad) | Blind Spots | Eldin Canyon | Great Flameblade |
| Shora Hah Shrine | Blue Flame | Isle of Rabac | Silver Rupee
Great Flameblade Giant Ancient Core Forest Dweller’s Sword Royal Bow Ice Arrow x10 |
| Tah Muhl Shrine | Passing the Flame | Trilby Valley | Cobble Crusher
Ruby Opal |
Great Hyrule Forest
This is the southern part of the Eldin mountain range that contains lush greeneries along with an awful lot of wood. It’s connected to a lot of major areas in Hyrule, and holds significant geographical value.
| Shrine Name | Name Of The Trial | Location | Rewards Given |
| Daag Chokah Shrine | Daag Chokah’s Blessing | Great Hyrule Forest | Ancient Core |
| Keo Ruug Shrine | Fateful Stars | Korok Forest | Knight’s Claymore |
| Ketoh Wawai Shrine | Ketoh Wawai’s Blessing | Thyphlo Ruins | Ancient Core |
| Kuhn Sidajj Shrine | Kuhn Sidajj’s Blessing | Lake Saria | Giant Ancient Core |
| Maag Halan Shrine | Maag Halan’s Blessing | Mido Swamp | Giant Ancient Core |
| Sword Monk’s Shrine(The Master Trials) | Trial of The Sword | Korok Forest |
Faron
Located in the Southwest of Hyrule Kingdom, the Farn region comprises mostly of jungles with lush greeneries and tall trees. The Lurelin Village is located here, along with a bunch of beaches that connect the sea with the land.
Despite being a major region, Faron isn’t really connected with any Divine Beasts. Rather, it serves its purpose as a standalone state.
Faron Grasslands
This list contains the Ancient Shrines present in the grassland areas of the Faron region.
| Shrine Name | Name Of The Trial | Location | Rewards Given |
| Ka’o Makagh Shrine | Metal Doors Open the Way | Highland Stable | Opal
Traveler’s Bow Gold Rupee |
| Pumaag Nitae Shrine | A Minor Test of Strength | Faron Grasslands | Boomerang |
| Shae Katha Shrine | Shae Katha’s Blessing | Spring of Courage | Thunderspear |
| Shoqa Tatone Shrine | A Modest Test of Strength | Puffer Beach | Royal Broadsword |
Lake Hylia
This lake is almost entirely known for the underground temple residing at its bottom.
| Shrine Name | Name Of The Trial | Location | Rewards Given |
| Ya Naga Shrine | Shatter the Heavens | Hylia Island | Eightfold Blade |
Gerudo
Similar to the Sheikah, and Zora, the Gerudo houses a unique tribe that’s known for their culture and laws. Gerudos are generally dark-skinned individuals that serve as warriors by tradition. You can find a lot of amazing personalities in their tribes.
Gerudo Desert
This vast expanse of sand covers a major portion of Hyrule. You can only follow the survival of the fittest doctrine here.
| Shrine Name | Name Of The Trial | Location | Rewards Given |
| Dako Tah Shrine | Electric Path | Great Cliffs | Moonlight Scimitar
Ancient Core Silver Rupee Radiant Shield |
| Daqo Chisay Shrine | The Whole Picture | Gerudo Town | Thunderblade |
| Hawa Koth Shrine | The Current Solution | Gerudo Great Skeleton | Ancient Core
Gold Rupee Sapphire |
| Keive Tala Shrine(The Champions’ Ballad) | Big or Small | East Barrens | Radiant Shield |
| Kema Zoos Shrine | A Delayed Puzzle | West Barrens | Moonlight Scimitar |
| Korsh O’hu Shrine | Korsh O’hu’s Blessing | East Gerudo Ruins | Flamespear |
| Misae Suma Shrine | Misae Suma’s Blessing | East Barrens | Diamond |
| Raqa Zunzo Shrine | Raqa Zunzo’s Blessing | Sand-Seal Rally | Radiant Shield |
| Takama Shiri Shrine(The Champions’ Ballad) | Dual Purpose | West Barrens | Royal Bow
[verification needed] |
| Tho Kayu Shrine | Tho Kayu’s Blessing | Toruma Dunes | Golden Bow |
Gerudo Highlands
These highlands surround the Gerudo desert, with their snowy tails and harsh living environments.
| Shrine Name | Name Of The Trial | Location | Rewards Given |
| Dila Maag Shrine | Dila Maag’s Blessing | South Lomei Labyrinth | Barbarian Armor |
| Ishto Soh Shrine | Bravery’s Grasp | Gerudo Highlands | Topaz
Ancient Core |
| Jee Noh Shrine | On the Move | Gerudo Canyon Pass | Opal |
| Joloo Nah Shrine | Joloo Nah Apparatus | Mount Nabooru | Golden Claymore
Gerudo Spear |
| Kay Noh Shrine | Power of Electricity | Gerudo Canyon Stable | Gerudo Scimitar |
| Keeha Yoog Shrine | Keeha Yoog’s Blessing | Gerudo Highlands | Diamond |
| Kema Kosassa Shrine | A Major Test of Strength | Risoka Snowfield | Silver Rupee |
| Kihiro Moh Shrine(The Champions’ Ballad) | Inside the Box | Gerudo Highlands | Thunderspear |
| Kuh Takkar Shrine | Melting Ice Hazard | Gerudo Highlands | Frostblade |
| Sasa Kai Shrine | A Modest Test of Strength | Gerudo Highlands | Frostblade |
| Sho Dantu Shrine | Two Bombs | Gerudo Highlands | Silver Rupee |
| Suma Sahma Shrine | Suma Sahma’s Blessing | Mount Granajh | Moonlight Scimitar |
Hebra
Spanning over the northwestern edge of Hyrule, the Hebra region possesses vast expanses of flat terrain. While the majority of this region is extremely cold, there are certain patches of land containing sunny – or even mild temperatures.
You will be eating a lot of spicy food in order to survive here, so be sure to pack extra!
Hebra Mountains
This list contains all the Ancient Shrines present in the mountainous region of the Hebra.
| Shrine Name | Name Of The Trial | Location | Rewards Given |
| Goma Asaagh Shrine | A Major Test of Strength | Hebra Peak | Royal Claymore |
| Hia Miu Shrine | A Major Test of Strength | Icefall Foothills | Sapphire |
| Kiah Toza Shrine(The Champions’ Ballad) | Master the Orb | Pikida Stonegrove | Falcon Bow |
| Maka Rah Shrine | Steady Thy Heart | Lake Kilsie | Ancient Core
Bomb Arrow x10 Diamond |
| Mozo Shenno Shrine | A Major Test of Strength | Biron Snowshelf | Diamond |
| Noe Rajee Shrine(The Champions’ Ballad) | The Four Winds | Flight Range | Shield of the Mind’s Eye |
| Qaza Tokki Shrine | Qaza Tokki’s Blessing | North Lomei Labyrinth | Barbarian Leg Wraps |
| Rok Uwog Shrine | Power of Reach | Pikida Stonegrove | Drillshaft |
| Sha Warvo Shrine | Path of Hidden Winds | Dronoc’s Pass | Knight’s Bow
Purple Rupee |
| Shada Naw Shrine | Red Giveaway | Selmie’s Spot | Great Frostblade |
| To Quomo Shrine | To Quomo’s Blessing | Hebra Great Skeleton | Royal Claymore |
Tabantha Tundra
This list contains all the shrines present in the Tabantha Tundra.
| Shrine Name | Name Of The Trial | Location | Rewards Given |
| Rin Oyaa Shrine | Directing the Wind | Snowfield Stable | Ancient Core |
| Sha Gehma Shrine | Shift and Lock | North Tabantha Snowfield | Royal Broadsword |
Tabantha Frontier
This area contains most of the Hylian race, including the Rito Village. You will be witnessing a lot of craters and canyons in this region.
| Shrine Name | Name Of The Trial | Location | Rewards Given |
| Akh Va’quot Shrine | Windmills | Rito Village | Ancient Core
Feathered Spear Sapphire |
| Bareeda Naag Shrine | Cannon | Tabantha Frontier | Swallow Bow
Diamond |
| Dunba Taag Shrine | Build and Release | Tanagar Canyon | Falcon Bow
Great Thunderblade |
| Gee Ha’rah Shrine | Tandem | Kopeeki Drifts | Diamond |
| Kah Okeo Shrine | Wind Guide | Tabantha Frontier | Korok Leaf
Gold Rupee Forest Dweller’s Sword Giant Ancient Core Thunderspear |
| Lanno Kooh Shrine | Lanno Kooh’s Blessing | Tabantha Frontier | Gold Rupee |
| Rona Kachta Shrine | Rona Kachta’s Blessing | Forgotten Temple | Great Flameblade |
| Shae Loya Shrine | Aim for the Moment | Tabantha Bridge Stable | Falcon Bow
Topaz |
| Sheem Dagoze Shrine | Moving in Parallel | West Hyrule Plains | Great Thunderblade |
| Tena Ko’sah Shrine | A Major Test of Strength | Ancient Columns | Knight’s Halberd |
| Voo Lota Shrine | The Winding Route | Warbler’s Nest | Flameblade |
Lanayru
This is the eastern region of the Hyrule Kingdom and acts as the primary source of water for Hyrule Kingdom. You will be meeting a lot of Zora people, including Mipha’s father and her brother.
Lanayru Great Spring
This area consists of an elevated plateau where the water flows forms rivers that go into the wastelands.
| Shrine Name | Name Of The Trial | Location | Rewards Given |
| Dagah Keek Shrine | Dagah Keek’s Blessing | Lanayru Great Spring | Silver Rupee |
| Mah Eliya Shrine(The Champions’ Ballad) | Secret Stairway | Ploymus Mountain | Royal Shield
[verification needed] |
| Mezza Lo Shrine | Ancient Trifecta | Rabia Plain | Thunderblade |
| Ne’ez Yohma Shrine | Pushing Power | Zora’s Domain | Zora Spear |
| Rucco Maag Shrine | Five Flames | Samasa Plain | Opal
Silver Bow |
| Sato Koda Shrine(The Champions’ Ballad) | Support and Guidance | Upland Zorana | Giant Ancient Core |
| Soh Kofi Shrine | A Minor Test of Strength | Lanayru Great Spring | Knight’s Bow |
Lanayru Sea
As the name suggests, this is a vast sea that contains the Spool Bight, and the region’s coastline.
| Shrine Name | Name Of The Trial | Location | Rewards Given |
| Kee Dafunia Shrine(The Champions’ Ballad) | The Melting Point | Lanayru Sea | Frostblade |
| Shai Yota Shrine | Shai Yota’s Blessing | Horon Lagoon | Great Flameblade |
Lanayru Wetlands
These wetlands contain the rivers that irrigate the land and breathe life into it. Most of the Zora community resides here.
| Shrine Name | Name Of The Trial | Location | Rewards Given |
| Daka Tuss Shrine | Sunken Scoop | Shrine Island | Silver Longsword |
| Kaya Wan Shrine | Shields from Water | Wetland Stable | Ancient Core
Knight’s Broadsword |
| Sheh Rata Shrine | Speed of Light | Lanayru Wetlands | Giant Boomerang
Opal |
Mount Lanayru
A tall cold mountain located in the southeastern part of Lanyaru. You will be meeting Naydra here.
| Shrine Name | Name Of The Trial | Location | Rewards Given |
| Jitan Sa’mi Shrine | Jitan Sa’mi’s Blessing | Spring of Wisdom | Frostspear |
| Tahno O’ah Shrine | Tahno O’ah’s Blessing | Madorna Mountain | Climbing Boots |
Necluda
Being the easiest method of getting to Kakariko, the Necluda region is quite popular for newbies due to its geographical significance. It is the home to some of the most interesting shrines Breath of the Wild has in store.
It is located to the east of the Faron province while sticking to the south of Central Hyrule. Despite being smaller in size, it also holds the Kakariko Village – where Impa and her sister reside as former members of Zelda’s team.
East Necluda
Here are all the shrines located in the eastern portion of the Necluda province.
| Shrine Name | Name Of The Trial | Location | Rewards Given |
| Dow Na’eh Shrine | Three Boxes | Lanayru Promenade | Amber
Opal Zora Sword |
| Kah Yah Shrine | Quick Thinking | Palmorae Ruins | Knight’s Claymore |
| Kam Urog Shrine | Trial of Passage | East Necluda | Opal
Soldier’s Spear |
| Muwo Jeem Shrine | A Modest Test of Strength | Cape Cales | Knight’s Bow |
| Myahm Agana Shrine | Myahm Agana Apparatus | Hateno Village | Phrenic Bow |
| Tawa Jinn Shrine | Tawa Jinn’s Blessing | East Necluda | Great Thunderblade |
| Yah Rin Shrine | A Weighty Decision | Lurelin Village | Knight’s Broadsword
Opal |
Necluda Sea
| Shrine Name | Name Of The Trial | Location | Rewards Given |
| Chaas Qeta Shrine | A Major Test of Strength | Tenoko Island | Climbing Gear |
| Korgu Chideh Shrine | Korgu Chideh’s Blessing | Eventide Island | Gold Rupee |
West Necluda
Here are all the Ancient Shrines located in the western portion of the Necluda province.
| Shrine Name | Name Of The Trial | Location | Rewards Given |
| Ha Dahamar Shrine | The Water Guides | Dueling Peaks Stable | Purple Rupee |
| Hila Rao Shrine | Drifting | Floret Sandbar | Ice Arrow x5
Opal |
| Lakna Rokee Shrine | Lakna Rokee’s Blessing | West Necluda | Edge of Duality |
| Qukah Nata Shrine | Qukah Nata’s Blessing | West Necluda | Rubber Tights |
| Ree Dahee Shrine | Timing is Critical | Dueling Peaks | Climber’s Bandanna |
| Shai Utoh Shrine | Halt the Tilt | Lakeside Stable | Ancient Core
Traveler’s Sword |
| Shee Venath Shrine | Twin Memories | Dueling Peaks | Serpentine Spear |
| Shee Vaneer Shrine | Twin Memories | Dueling Peaks | Eightfold Longblade |
| Shoda Sah Shrine | Impeccable Timing | West Necluda | Ice Arrow x5 |
| Ta’loh Naeg Shrine | Ta’loh Naeg’s Teaching | Kakariko Village | Eightfold Blade
Shield of the Mind’s Eye Opal |
| Toto Sah Shrine | Toto Sah Apparatus | West Necluda | Shield of the Mind’s Eye |
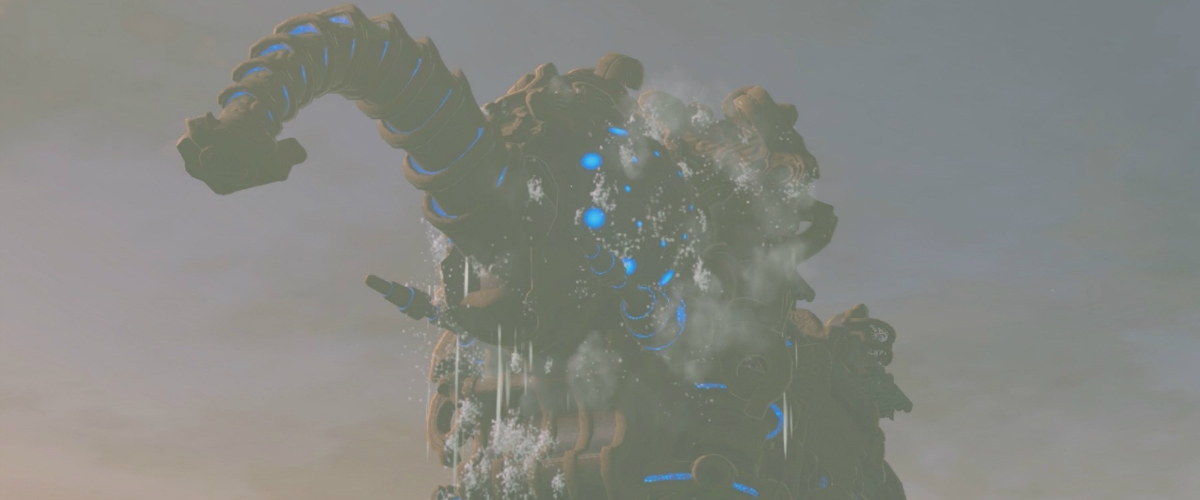
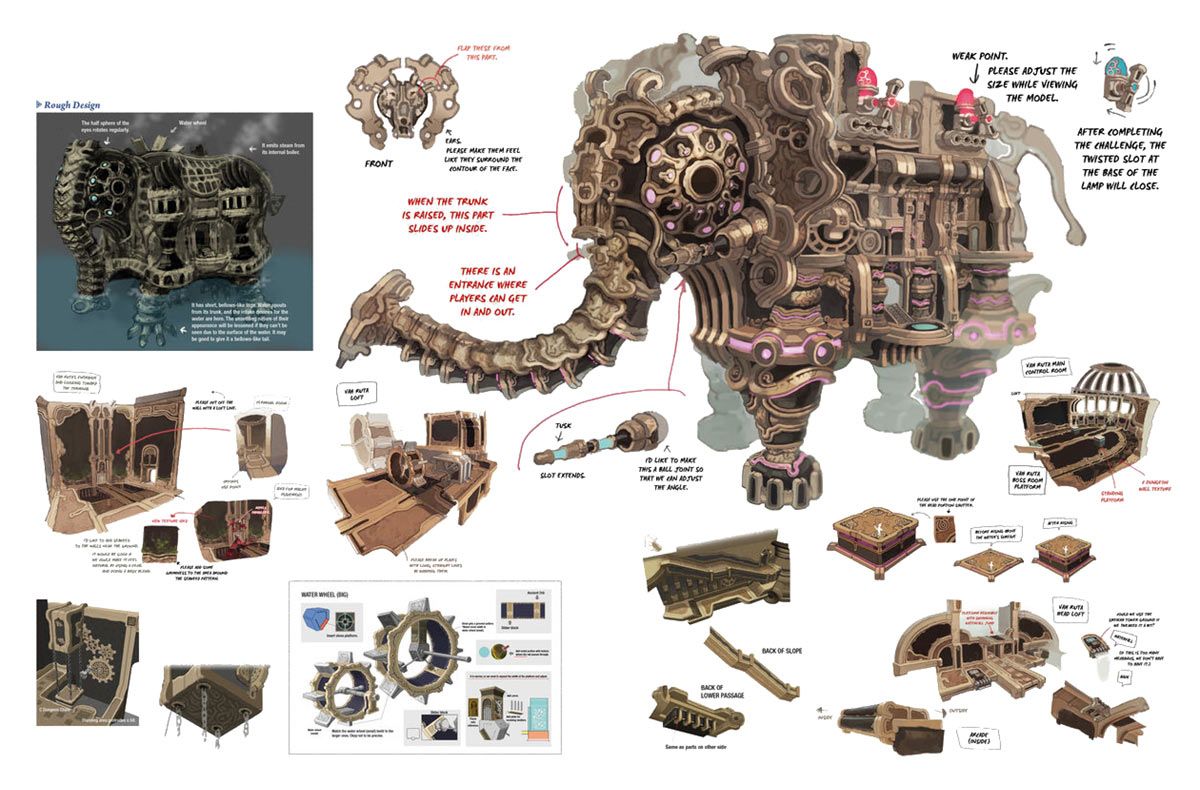
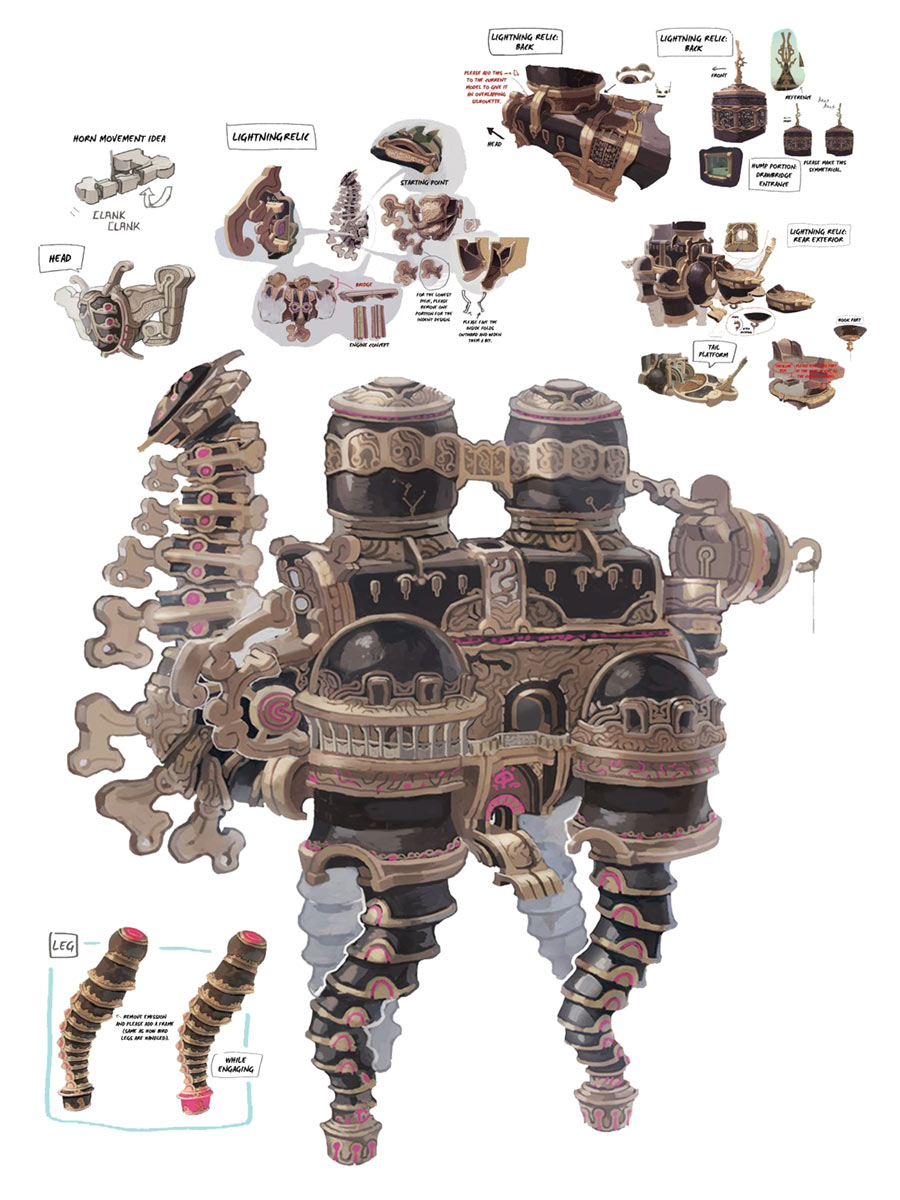
5 – Divine Beast Vah Ruta

Legend Of Zelda: Breath Of The Wild | Divine Beast Vah Ruta | Source: Mae Polzine
This is a giant elephant-like machine that, along with three other similar mechanical marvels, was created in order to put a stop to Calamity Ganon. While the efforts have more or less been successful, there has been a multitude of difficulties in reaching the desired ending.
The Divine Beast was initially meant to be piloted by the Zora champion Mipha. However, due to Ganon’s schemes 100 years ago, all of the champions lost their lives in the great battle.
With the Divine Beast Vah Ruta going the way of the Calamity Ganon, it now seeks to wreak havoc by creating endless downpours on the masses of the Zora. Luckily, it’s still not too late to free it; you just need to defeat the Waterblight Ganon.
While that might be easier said than done, It must be done in order to take back what once was snatched away from Hyrule.
Entering The Divine Beast
Legend Of Zelda: Breath Of The Wild | Divine Beast Vah Ruta
Link needs to pair up with Mipha’s brother, Prince Sidon in order to disable all the contraptions and barricades preventing one from reaching Rutah’s body. Sidon is known as a great swimmer.
Since most of the battle will be fought on water, you will be standing on top of the swimming Sidon while shooting shock arrows to disable all the Switches on the Divine Beast.
Naturally, the resistance will increase as soon as Link disables the first switch. You will essentially be swimming up the waterfalls to shoot yourself in the air in order to make these shots. Therefore, missing them can be quite detrimental to your HP bar and vice versa.
Overview
Legend Of Zelda: Breath Of The Wild | Divine Beast Vah Ruta | Source: Shacknews
Rutah’s entire body is a dungeon, and once you’re in, you’ll be able to control its trunk as you wish. Your Sheikah Slate will be receiving a temporary map upgrade to shift to a 3D model that encompasses the entire ins and outs of the best.
After that, it’s just a matter of activating the terminals in order to bring Vah Rutah under control.
Mipha’s spirit has been stuck inside Vah Rutah for the past 100 years. When you activate all the terminals and reach the control room, a bloody fight with the Waterblight Ganon will ensue. It has two modes with different levels of aggression.
Aftermath
Legend Of Zelda: Breath Of The Wild | Divine Beast Vah Ruta | Source: CreativeUncut
Once the battle has concluded with Link’s victory, a cutscene will ensue where you will meet Mipha’s spirit. She is pretty grateful to you for freeing her, and as a result, you will be getting Mipha’s Blessing which essentially boosts your tankiness by introducing health regen to the mix.
In addition to this fairy-like blessing, you will also receive Mipha’s Lightscale Trident once you head back to Muzu. In order to prepare for the final battle, the Divine Beast Vah Rutah will climb on top of a cliff and aim towards the Hyrule Castle to be ready for Ganon’s imminent awakening.
In order to read the complete walkthrough, please refer to The Legend Of Zelda: Breath Of The Wild – Divine Beast Vah Ruta Guide.
6 – Divine Beast Vah Rudania
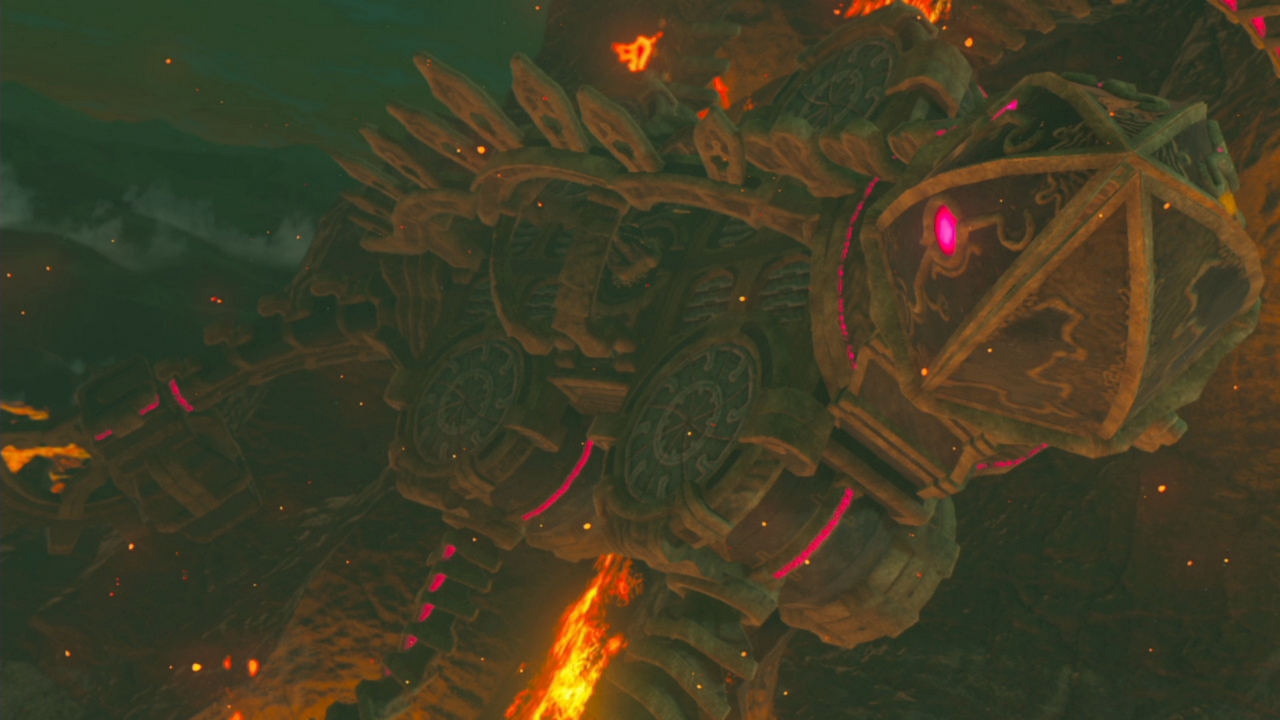
Legend Of Zelda: Breath Of The Wild | Divine Beast Vah Rudania | Source: SE7EN
This is a Salamander-like Divine Beast that was created tens of thousands of years ago in order to combat the Calamity Ganon. While the tech has managed to survive the trials of time, the battle 100 years ago was unfortunately not as forgiving.
Goron champion Darku was the one piloting Divine Beast Vah Rudania at the time, and with the wielder of Master Sword in critical condition, he did what needed to be done. Entrapped as a wisp of soul in Divine Beast Vah Rudania, Daruk now passes his days while being reminiscent of the past.
In the current times, the Gorons are being tortured by the Magma Bombs spewed out by the Divine Beast Vah Rudania.
Entering The Divine Beast
Legend Of Zelda: Breath Of The Wild | Divine Beast Vah Rudania | Source: Mae Polzine
Once you’re through to the Bridge of Eldin, the attack on Rudania will finally begin. You will be facing a bunch of sentries deployed to prevent you from progressing any further.
These sentries can only be destroyed stealthily because if caught, you – along with Yunobo, will have to face a magma bomb assault from Vah Rudania.
Continue onwards until you’ve reached the three cannons of Death mountain. Once there, use these cannons to fire at the Divine Beast Vah Rudania in order to make it enter the weakened state. Since Vah Rudania is a semi-aerial unit, you will have to weaken it to board on top of it.
The third shot will make it fall into a crater. Link can use this time to board the Divine Beast and get started with the dungeon. Luckily, this is checkpoint-based, so even if you die, it’s possible to resume from a certain point in time.
Overview
Legend Of Zelda: Breath Of The Wild | Divine Beast Vah Rudania | Source: Wiki
Unlike most divine beasts, the interior of Divine Breast Vah Rudania is pretty dark. With a plethora of eyeballs staring at you animously, it’s bound to send shivers down your spine. You can shoot these eyeballs to make treasure chests spawn, so don’t hesitate to rampage to your heart’s content.
There are a total of three sections of Divine Beast Vah Rudania’s body. These are segmented according to the treasures they drop. To put this into perspective, the first section will drop Ice Arrows along with Dragonbone Bokom Clubs, whereas the second one will contain the Knight’s Bow along with a bunch of arrows.
You will be utilizing your Blue Fire in order to progress through the doors and other contraptions in the dungeon. Once you’ve reached the third section, the map will upgrade to a 3D version showing all the ins and outs of the Divine Beast.
These dials will cause Divine Beast Vah Rudani to move around on specific portions of its body. Manipulate that in order to reach the main room where the battle with the Fireblight Ganon will take place.
Aftermath
Legend Of Zelda: Breath Of The Wild | Divine Beast Vah Rudania | Source: CreativeUncut
Once the battle is over, Daruk’s spirit will appear, showing his gratitude and reminiscing about the events of the past. Luckily, he can pass on to the afterlife now. However, there’s something that needs to be done before that.
Understanding his duties, Darkuk will give Link his blessing. This allows him to be protected from all incoming attacks a set number of times. However, this comes at a cooldown cost, so it’s not very spammable.
After that, Daruk’s soul – along with the Divine Beast will go on top of a cliff, waiting for the final battle to come.
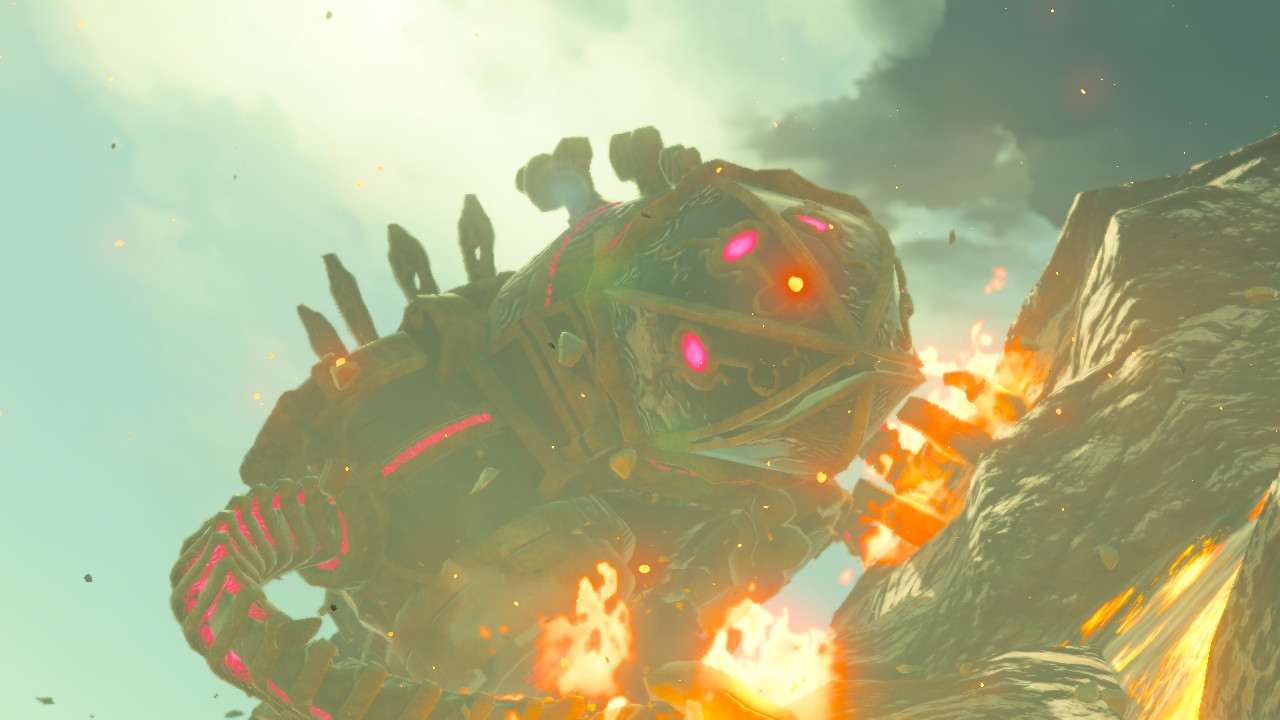
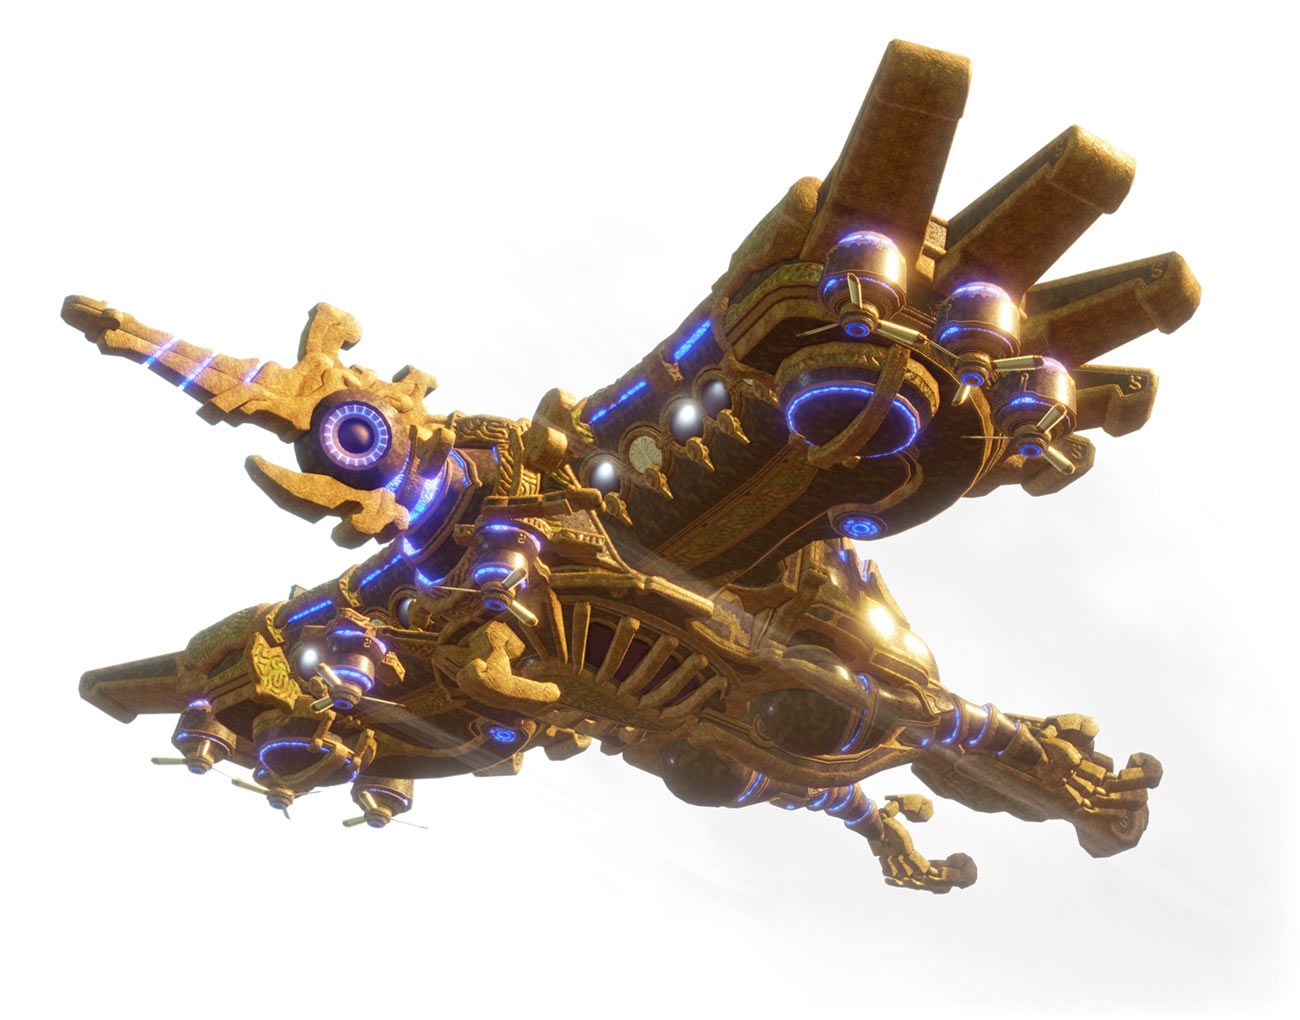
7 – Divine Beast Vah Medoh
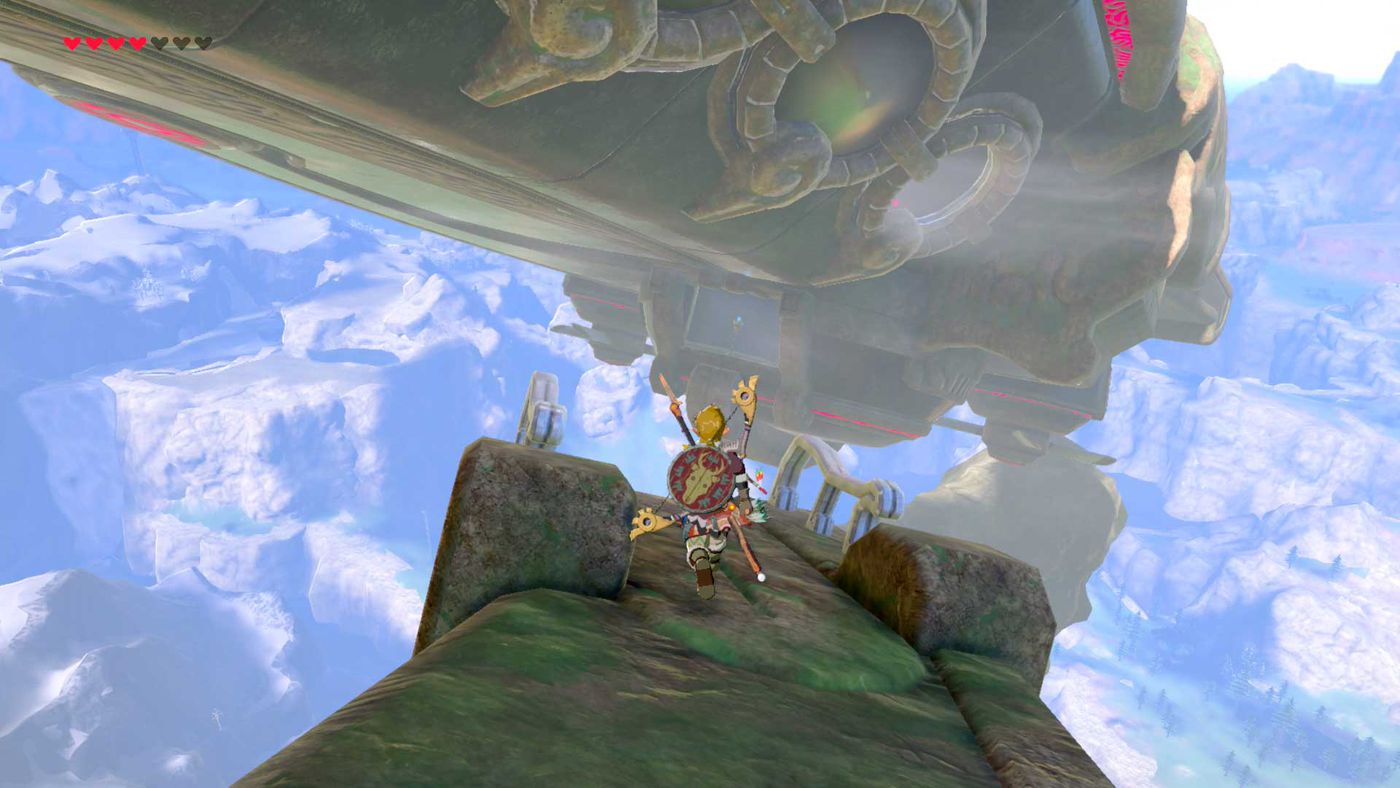
Legend Of Zelda: Breath Of The Wild | Divine Beast Vah Medoh | Source: Polygon
Created 10,000 years ago, the Divine Beast Vah Medoh is the by-product of ancient Sheikah technology. While it has been protecting the Kingdom of Hyrule ever since the attack of Calamity, Ganon changed the tides of the battle a bit too much.
Link was wounded, most of the champions died, and Zelda was left by her lonesome to contain Calamity Ganon.
A hundred years later, the seal is starting to break, and Ganon is ready to make another return. With his influence and dark energy spreading throughout Hyrule, the Divine Beasts have started to lose control of him.
Vah Medoh is supposed to be a complete aerial unit and is, therefore, pretty hard to contain, especially when it shoots and kills whenever the inhabitants of the Rito village try to fly too high. For a community with wings, this is a massive cause of unrest and concern.
Entering The Divine Beast
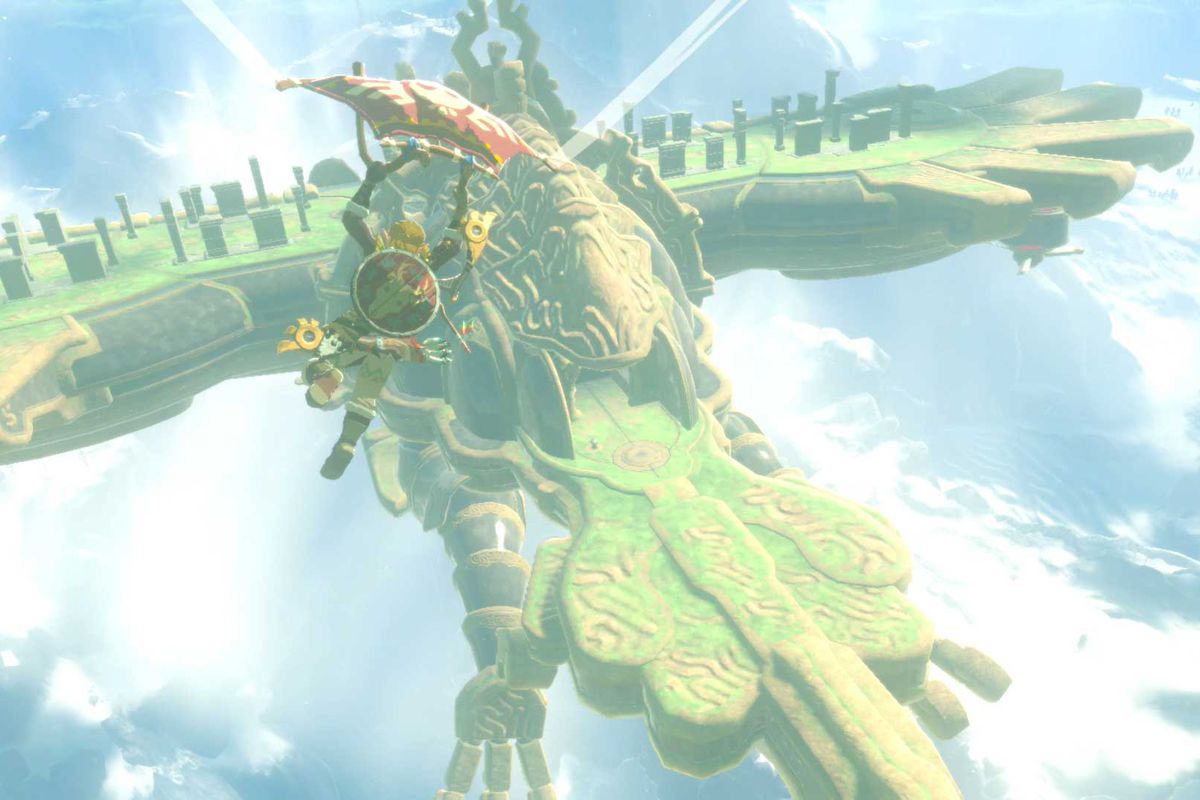
Legend Of Zelda: Breath Of The Wild | Divine Beast Vah Medoh | Source: Polygon
Once you speak to the Rito Chief and finish the dialogue, once done, you will meet Teba at the flight range, who will present a few challenges of his own. Luckily, getting him on the same page is pretty easy.
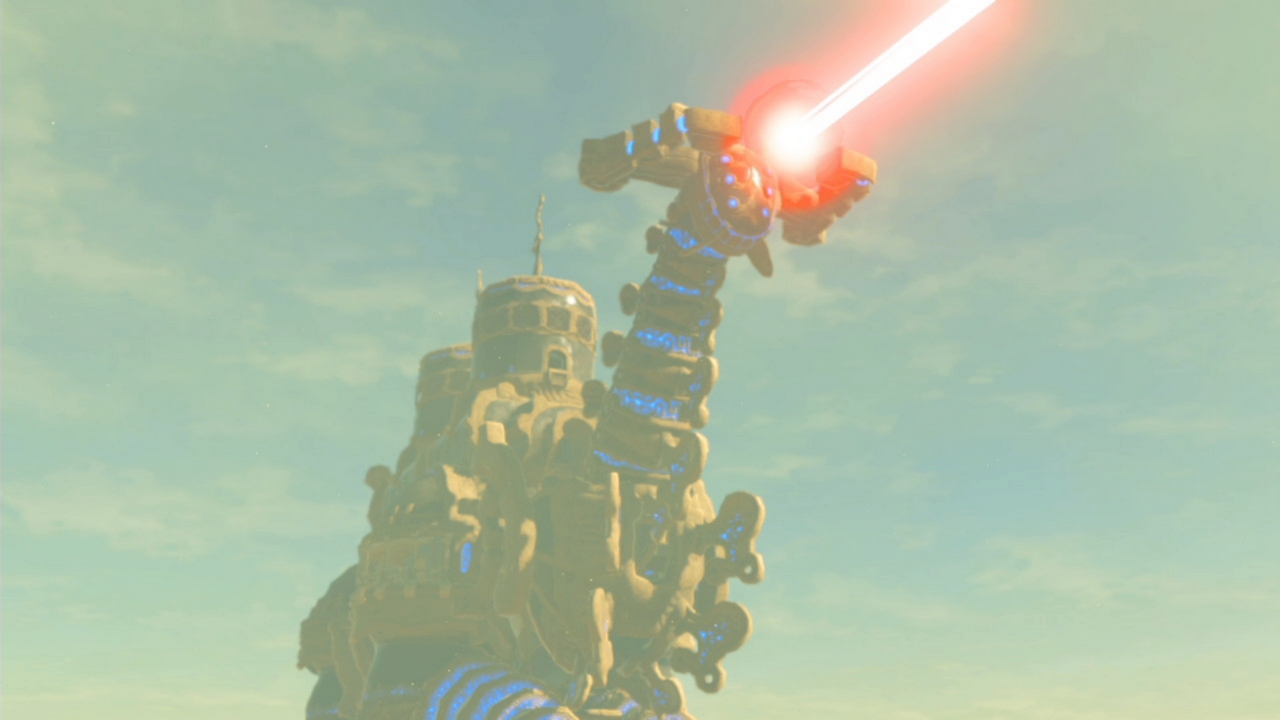
After that, you will be sitting on his back in order to reach the body of the aerial Divine Beast Vah Medoh. Needless to say, you will be facing an awful lot of resistance from the canons located on the body of the Divine Beast.
Shoot some arrows to take them down in order to land inside the dungeon successfully. The interaction with the first terminal is rather automatic, but the rest require you to venture deep within. So be sure to pack extra beforehand!
Overview
Legend Of Zelda: Breath Of The Wild | Divine Beast Vah Medoh
Unlike most of the Divine Beasts, the insides of Vah Medoh are pretty stock standard. Therefore, it’s only a matter of reaching the terminals without falling off, and you’re good to go. There are a total of six terminals that need to be interacted with in order to liberate the beast.
Your map upgrade will come right after the first terminal, so most of the insides are rather easy to navigate through. Before activating the final terminal, you will be facing resistance from the Windblight Ganon.
Link will need to use all the updrafts possible in order to gain the upper hand against this monster, and once you’re done defeating him. Head straight to the final terminal, and activate it.
Aftermath

Legend Of Zelda: Breath Of The Wild | Divine Beast Vah Medoh | Source: CreativeUncut
After the defeat of the Windblight Ganon, you will be meeting the spirit of Revali. Gaining grudging respect, Revali offers Link his congratulations and acknowledges him. After that, Revali – along with Divine Beast Vah Medoh, will fly to a nearby mountain peak – waiting for the imminent rise of the Calamity Ganon.
This area is located above a giant stone perch. However, you can no longer head inside the body of the Divine Beast.
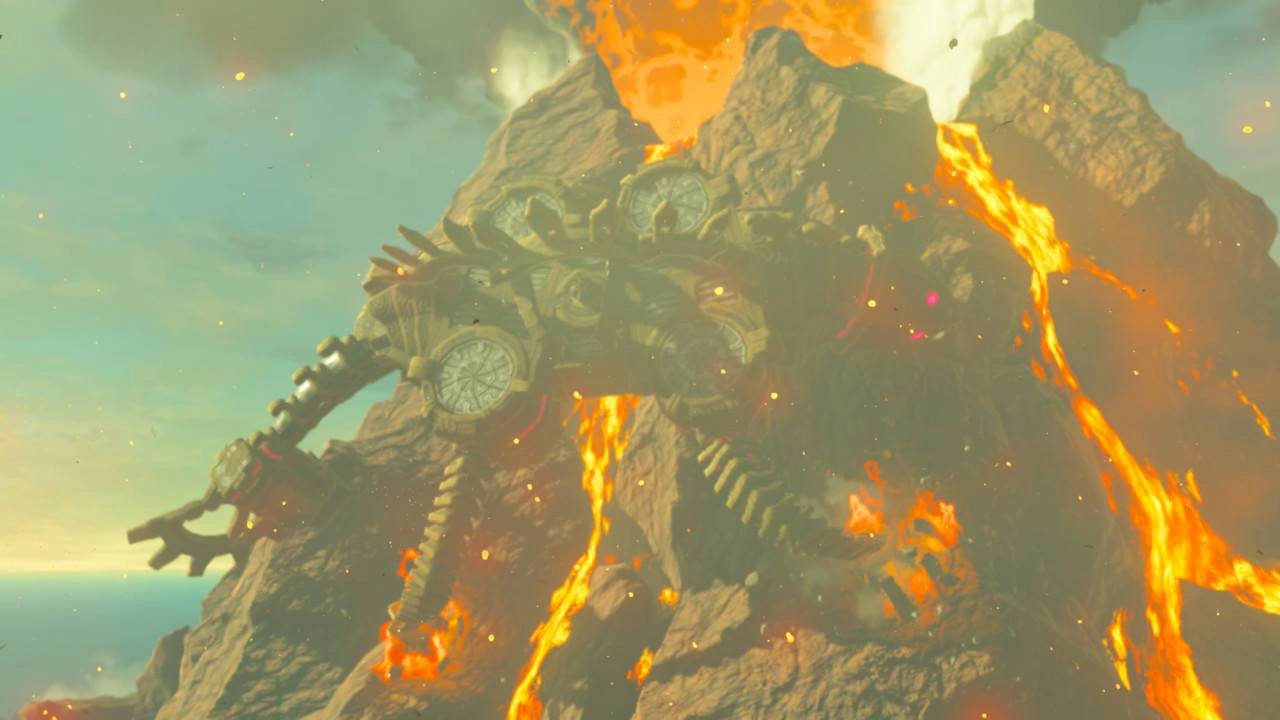
8 – Divine Beast Vah Naboris
Legend Of Zelda: Breath Of The Wild | Divine Beast Vah Naboris | Source: SE7EN
Resembling a Bactrian Camel, the Divine Beast Cah Naboris is the final entry in the ancient Sheikah Technology book. Just like other bests, its main purpose of creation was to combat the Calamity Ganon.
For this very cause, the champion Urbosa was given its reigns. However, the surprise attack wasn’t kind to anyone, and, just like other champions, Urbosa gave up her life. The Divine Beast Vah Naboris – fallen under the malice of the Calamity Ganon,
These days, Vah Naboris can be seen causing trouble for the Gerudo people trying to cross the desert. Now, deterring visitors isn’t really permissible since the desert is mainly reliant on trade. Therefore, it’s up to Link to neutralize it.
Entering The Divine Beast
Legend Of Zelda: Breath Of The Wild | Divine Beast Vah Naboris
The Divine Beast’s legs are a bit too long for Link to reach. But with such an influx of bomb arrows, it’s quite possible to target the hooves in order to make Vah Naboris fall down. However, this action will be met with sufficient resistance as you will be facing a rain of lightning bolts.
Once you’ve struck enough bomb arrows into his hoves, the beast will temporarily shut down. Use this opportunity to bid farewell to Riju and climb aboard the fallen body of the Divine Beast Vah Naboris.
You will be hearing the voice of Urbosa’s spirit inside; follow her words and jerk the best away from Ganon’s hands! Vah Naboris can only be entered with the help of Riju, so make sure to complete her quest before going on to challenge this dungeon.
Overview
Legend Of Zelda: Breath Of The Wild | Divine Beast Vah Naboris | Source: IGN
The insides of Naboris are segmented into three primary cylinders. These cylinders are further segmented between multiple levels. With the power of lightning coursing through Vah Naboris, you will be facing a lot of resistance from within.
You will be receiving a temporary upgrade to your map after toughing the guidance stone within. Use it to climb towards the mentioned cylinders and fix the terminals within. You will be able to activate all the terminals before heading to the main room.
This is the battleground for the Thunderblight Ganon – which you will have to defeat in order to liberate Urbosa’s spirit and the Divine Beast Vah Naboris. Throughout this battle, Urbosa will be advising you about his movement patterns and vice versa, so make sure to commit those to memory.
Aftermath
Legend Of Zelda: Breath Of The Wild | Divine Beast Vah Naboris | Source: CreativeUncut
Once the Thunderblight Ganon has been defeated, you will be hearing gratitude from Urbosa’s spirit for freeing her and for returning peace to the Gerudo. After that, you will be gaining Urbosa’s Lightning as a reward that essentially allows you to command the chain of lightning.
Urbosa believes that the past events were too much of a burden for Princess Zelda, and that she should not take the blame for it. After the interaction, Urbosa’s spirit will take the Divine beast to the southern mesa in order to await the promised day.
Conclusion
All in all, most of the dungeons in The Legend of Zelda: Breath of the Wild is pretty relevant to the main storyline. While there are admittedly a bit too many shrines, most of them are optional, so it’s really up to you if you want to experience the critical path or the entirety of what the game has to offer.
These dungeons have been programmed to provide a good balance of problem-solving and skill testing. The four Divine Beast Dungeons are extremely important to the main story, but they’re also the hardest to clear since you essentially have to fight mini versions of the Calamity Ganon.
Luckily though, most of the instructions are provided well in advance. Therefore, you don’t necessarily need to go out of your way to challenge them. Just keep going with the flow, and you will be good to go!