
Genshin Impact has no shortage of waifu characters that seem to have no haters whatsoever. Take Eula as an example; she’s lovable, she’s kind, and she’s unbelievably strong.
However, utilizing her strength requires you to plan as meticulously as possible. Whether it be through your in-game expertise or reaction timings, everything needs to be top-notch.
While most of these areas can only be improved over time, you can still gain a significant advantage by building her effectively. So, in this article, we’re going to show you the best Eula builds and vice versa; let’s jump right in!
Who Is Eula In Genshin Impact?
Belonging to the ever-tyrannical Lawrence family, Eula was born in an extremely congested environment. She is a 5 star claymore Cryo character and boasts extreme battle prowess.
She has cut all ties and connections with the Lawrence family and serves her time with the Knights of Favonicus as the captain of the Reconnaissance Company.

via Genshin Impact
In terms of popularity, she nearly stands at the top. However, being a Spindrift Knight just wasn’t enough for Eula to showcase her superior bloodline.
Having said that, she generally builds as the main DPS of a team comp, with her damage numbers becoming downright scary, if not completely broken.
Best Eula Builds In Genshin Impact
Eula is pretty versatile when it comes to builds. She is one of the best bruisers in the game and can deliver a lot as long as you build pure damage.
Having said that, there are a couple of builds that tend to synergize with her kit a bit too well, regardless of the meta. Let’s break them down to see how they function!
Best Weapons On Eula – Pure DPS Build
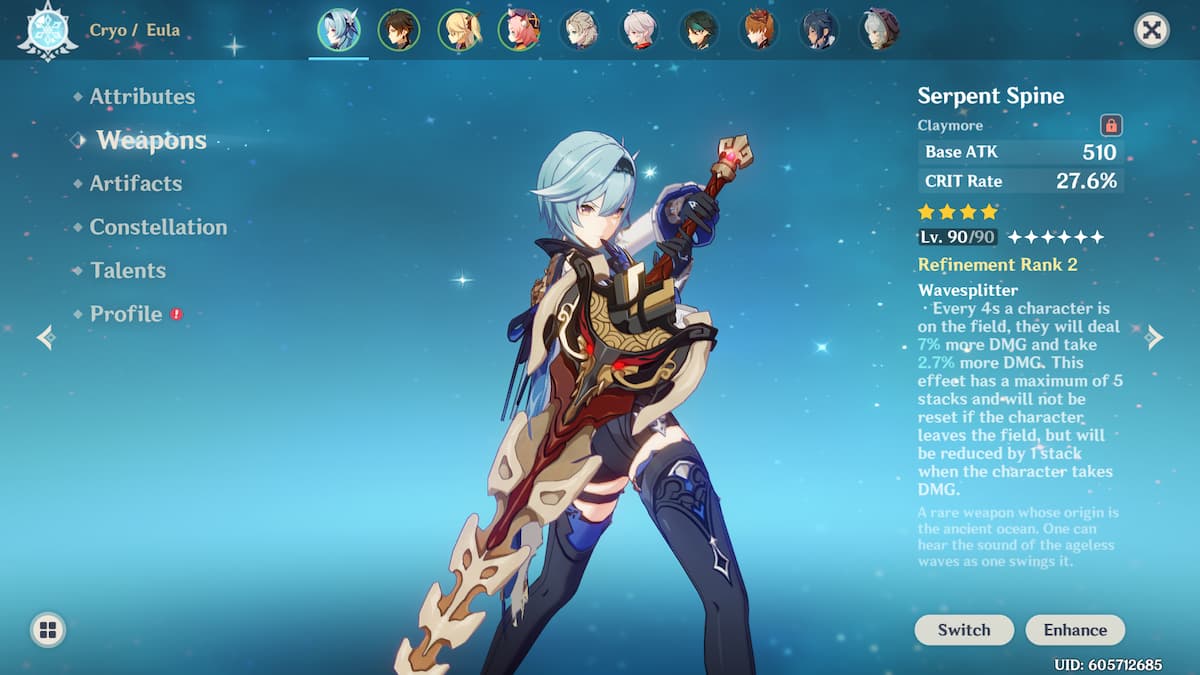
Eula generally tends to go Song of Broken Pines alongside Wolf’s Gravestone or The Unforged in the offhand. However, Serpent Spine is not a bad choice either – given you’re going F2P.
Having said that, the general idea is to maximize Eula’s damage by as many points as possible. While defense does factor in, you don’t really need to pay it much heed since your teammates will be more than capable of taking the brunt.
Note: You can also use the same weapons to create a damage-stacking build that takes advantage of her sub-stats to outshine the main build.
Song of Broken Pines
Belonging to the Millennial Movement Series, the Song of Broken Pines is a 5-star Claymore capable of inflicting The Rebel’s Banner Hymn.
According to this ability, your ATK is increased by 16% – 32%. Whenever your normal or charged attacks hit your opponents, a Sigil of Whispers can be formed.
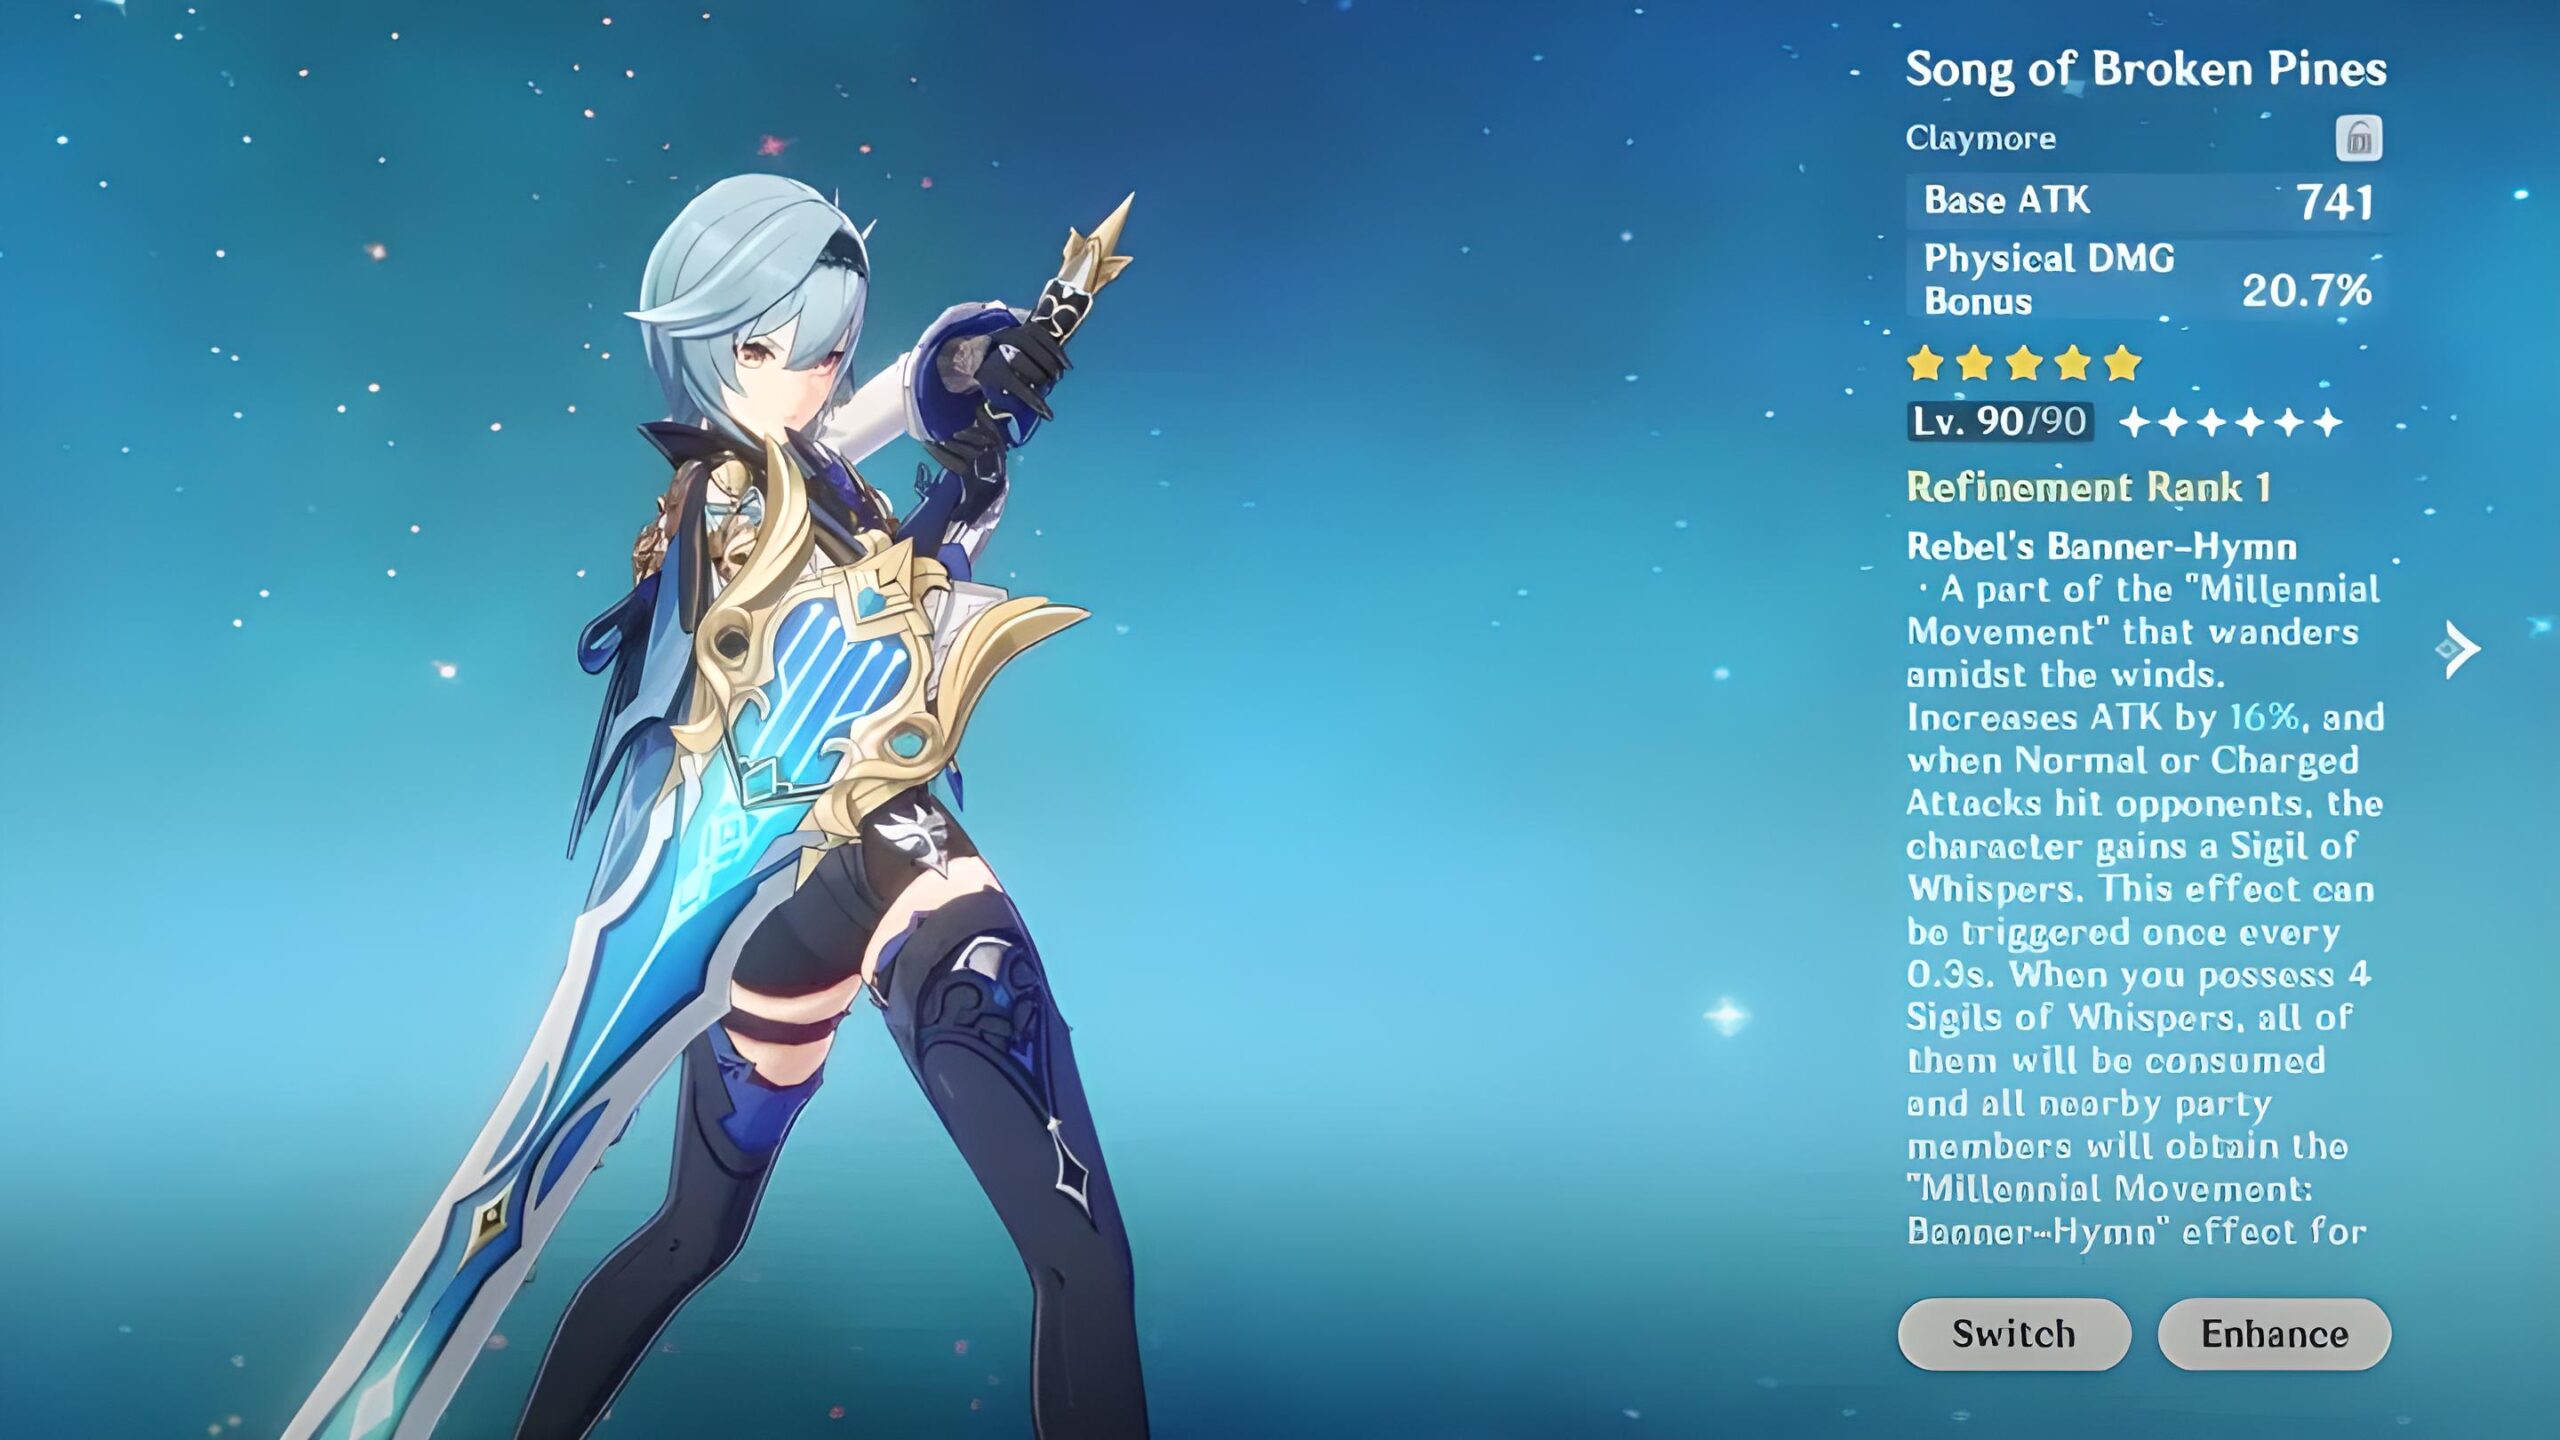
There’s a 0.3-second cooldown on this effect, and it can be triggered even if the said character is no longer on-field.
Millennial Movement: Banner-Hymn
Once you have a total of 4 Sigils of Whispers, your party members will gain the Millennial Movement: Banner Hymn for the next 12 seconds – while consuming the Sigils of Whispers.
This ability will increase your Normal ATK SPD by 12% – 24% and your ATK DMG by 20% – 40%. This buff will not stack.
Consequently, you won’t be gaining any Sigils of Whispers for 20 seconds.
Stats
Here is the stat distribution for Song of Broken Pines:
| Base ATK (LVL 1 – 90) | 2nd Stat Type | 2nd Stat (LVL 1-90) |
| 49 – 741 | Physical DMG Bonus |
4.5% – 20.7% |
Weapon Refinement
You will be experiencing the following stat changes according to your weapon refinement level:
|
Stat |
Level 1 | Level 2 | Level 3 | Level 4 | Level 5 |
| Upgrade Cost | 2000 Mora | 4000 Mora | 8000 Mora | 16000 Mora |
– |
|
ATK Increase |
16% | 20% | 24% | 28% | 32% |
| Millennial Movement ATK Boost | 12% | 15% | 18% | 21% |
24% |
|
Millennial Movement ATK Speed Boost |
20% | 25% | 30% | 35% |
40% |
Ascension Costs
Here are all the Ascension costs related to upgrading Elegy for the End:
|
Item |
Quantity |
| Mora | 225,000 |
| Tile of Decarabian’s Tower | 5 |
| Debris of Decarabian’s City | 14 |
| Fragment of Decarabian’s Epic | 14 |
| Scattered Piece of Decarabian’s Dream | 6 |
| Heavy Horn | 23 |
| Black Bronze Horn | 27 |
| Black Crystal Horn | 41 |
| Damaged Mask | 15 |
| Stained Mast | 23 |
| Ominous Mask | 27 |
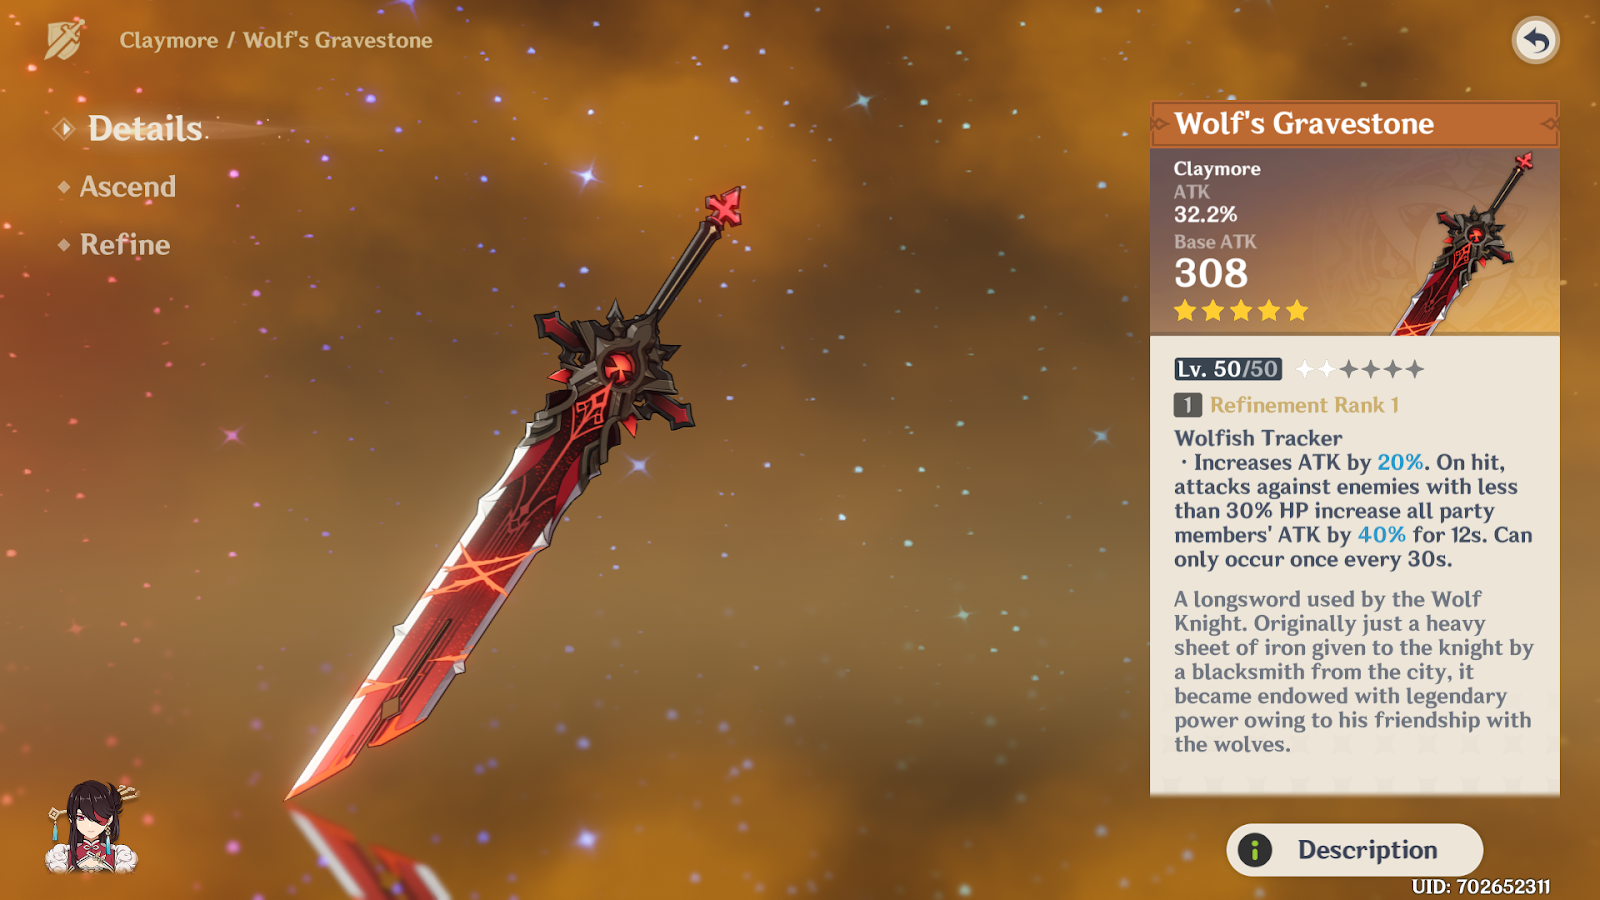
Wolf’s Gravestone
This is a 5-Star Claymore belonging to the Wolf Knight. This weapon is capable of boosting the ATK of all party members. Here’s how it works:
Your ATK damage is increased by 20% – 40%. Consequently, your on-hit attacks on enemies with HP count lower than 30% boost your party member’s attacks by 40% – 80%.
via Sportskeeda
The boost in attack damage lasts for 12 seconds, whereas the cooldown time of the ability lasts for a total of 30 seconds.
Stats
Here is the stat distribution for Wolf’s Gravestone:
| Base ATK (LVL 1 – 90) | 2nd Stat Type | 2nd Stat (LVL 1-90) |
| 46 – 608 | ATK |
10.8% – 49.6% |
Weapon Refinement
You will be experiencing the following stat changes according to your weapon refinement level:
|
Stat |
Level 1 | Level 2 | Level 3 | Level 4 | Level 5 |
| Upgrade Cost | 2000 Mora | 4000 Mora | 8000 Mora | 16000 Mora |
– |
|
Self ATK Increase |
20% | 25% | 30% | 35% | 40% |
| Party Members’ ATK Increase | 40% | 50% | 60% | 70% |
80% |
Ascension Costs
Here are all the Ascension costs related to upgrading Favonius Warbow:
|
Item |
Quantity |
| Mora | 225,000 |
| Fetters of the Dandelion Gladiator | 5 |
| Chains of the Dandelion Gladiator | 14 |
| Shackles of the Dandelion Gladiator | 14 |
| Dream of the Dandelion Gladiator | 6 |
| Chaos Device | 23 |
| Chaos Circuit | 27 |
| Chaos Core | 41 |
| Divining Scroll | 15 |
| Sealed Scroll | 23 |
| Forbidden Curse Scroll | 27 |
The Unforged
This is a 5-Star Claymore belonging to the Liyue Series. It increases your overall damage while adding a tanky element to your build.
The Unforged’s passive is known as Golden Majesty, which essentially increases your Shield Strength by 20% – 40. Whenever you land a successful hit on your opponents, your ATK experiences a 4% – 8% increase.

This can stack for a total of 5 times and can only happen every 0.3 seconds so there’s no spamming involved. Whenever you’re enveloped under a shield, your ATK increase
Stats
Here is the stat distribution for The Unforged:
| Base ATK (LVL 1 – 90) | 2nd Stat Type | 2nd Stat (LVL 1-90) |
| 46 – 608 | ATK |
10.8% – 49.6% |
Weapon Refinement
You will be experiencing the following stat changes according to your weapon refinement level:
|
Stat |
Level 1 | Level 2 | Level 3 | Level 4 | Level 5 |
| Upgrade Cost | 2000 Mora | 4000 Mora | 8000 Mora | 16000 Mora |
– |
|
Shield Strength Increase |
20% | 25% | 30% | 35% | 40% |
| On-hit ATK Increase | 4% | 5% | 6% | 7% |
8% |
Ascension Costs
Here are all the Ascension costs related to upgrading The Unforged:
|
Item |
Quantity |
| Mora | 225,000 |
| Mist Veiled Lead Elixir | 5 |
| Mist Veiled Mercury Elixir | 14 |
| Mist Veiled Gold Elixir | 14 |
| Mist Veiled Primo Elixir | 6 |
| Mist Grass Pollen | 23 |
| Mist Grass | 27 |
| Mist Grass Wick | 41 |
| Treasure Hoarder Insignia | 15 |
| Silver Raven Insignia | 23 |
| Golden Raven Insignia | 27 |
Serpent Spine
This is a 4-Star Claymore belonging to the Gnosic Hymn Series. It essentially increases your damage dealt in stacks.
Fading Twilight’s passive is called Wavesplitter. This ability introduces the following effects over time:
For every 4 seconds of your character being on the field, the character’s damage will increase by 6%, with their fragility increasing by 3% (they’ll take 3% more DMG).
via Gamepur
This ability can stack 5 times and will be active even if the character is off-field but in battle. The stacks won’t reset during this duration, either. However, they will fall by 1 if your character takes DMG.
Stats
Here is the stat distribution for Serpent Spine:
| Base ATK (LVL 1 – 90) | 2nd Stat Type | 2nd Stat (LVL 1-90) |
| 42 – 510 | Crit Rate |
6% – 27.6% |
Weapon Refinement
You will be experiencing the following stat changes according to your weapon refinement level:
|
Stat |
Level 1 | Level 2 | Level 3 | Level 4 | Level 5 |
| Upgrade Cost | 1000 Mora | 2000 Mora | 4000 Mora | 8000 Mora |
– |
|
DMG Increase |
6% | 7% | 8% | 9% | 10% |
| More DMG Taken | 3% | 2.7% | 2.4% | 2.2% |
2% |
You need to have Glowing Gen instead of an identical weapon in order to refine Fading Twilight. These gems can be found through the Perilous Trial’s event challenges.
Ascension Costs
Here are all the Ascension costs related to upgrading Fading Twilight:
|
Item |
Quantity |
| Mora | 150,000 |
| Grain of Aerosiderite | 3 |
| Piece of Aerosiderite | 9 |
| Bit of Aerosiderite | 9 |
| Chunk of Aerosiderite | 4 |
| Hunter’s Sacrificial Knife | 15 |
| Agent’s Sacrificial Knife | 18 |
| Inspector’s Sacrificial Knife | 27 |
| Divining Scroll | 10 |
| Sealed Scroll | 15 |
| Forbidden Curse Scroll | 18 |
Best Artifacts On Eula
Amber can choose between both Pale Flame and Bloodstained Chivalry. However, the Emblem of Severed Fate set is not a bad spot-holder either.
Since Eula is primarily reliant on her Damage to carry teamfights, her Artifact choices pretty much become a no-brainer.
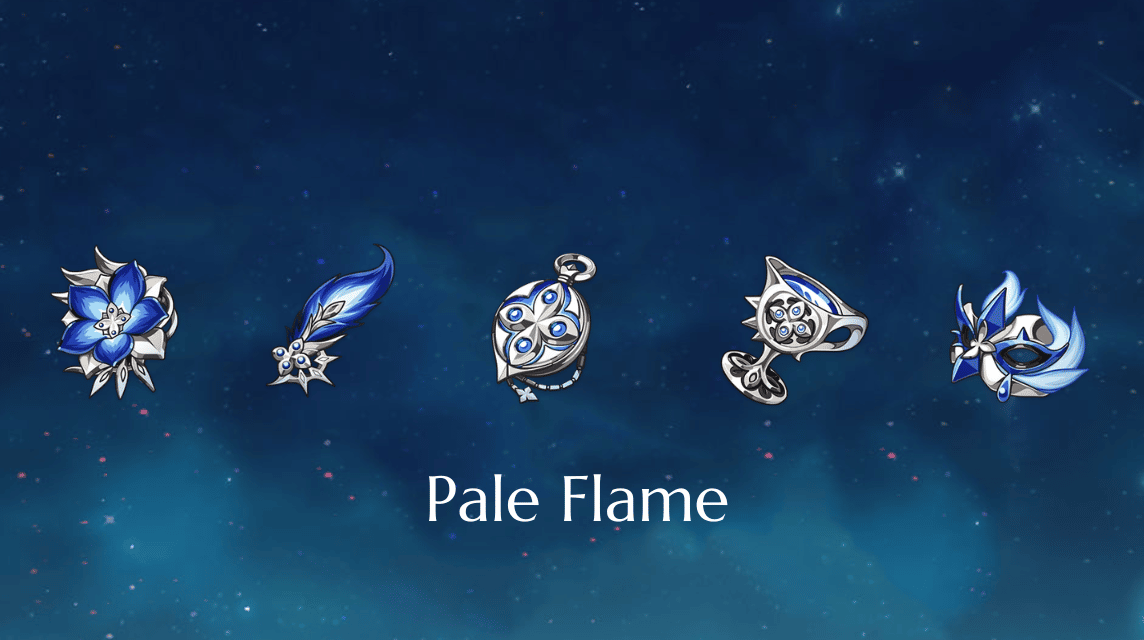
Pale Flame
This artifact set increases your Physical DMG, flatly and under certain conditions. The main idea is to boost the damage numbers for Eula to be the main carry.

via VCgamers
The Pale Flame set consists of the following:
- Flower of Life: Stainless Bloom
- Plume of Death: Wise Doctor’s Pinion
- Sands of Eon: Moment of Cessation
- Goblet of Eonothem: Surpassing Cup
- Circlet of Logos: Mocking Mask
The set bonuses of these artifacts activate at the following marks:
2 – Piece Bonus
This bonus increases your Physical DMG Bonus by 25%
4 – Piece Bonus
Your ATK is increased by 9% for every time your Elemental Skill hits an opponent. This attack can be staked twice and only triggers once per 0.3 seconds.
The main effect has a duration of 7s, after which, your damage numbers are returned to normal. Alternatively, your set effect will be doubled as soon as you reach 2 stacks.
How To Obtain
The Noblesse Oblige set can be obtained from the Ridge Watch – a Domain of Blessing located at the mountainous area between Mondstadt and Liyue.
The higher the levels you challenge, the better your chances of obtaining the 4* and 5* rarities.
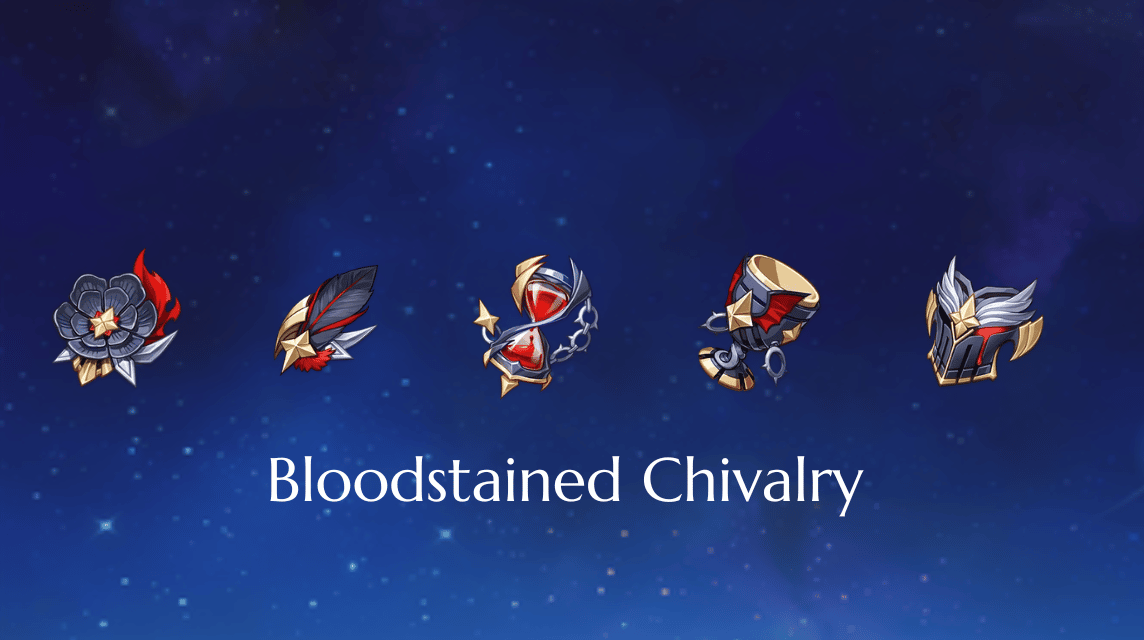
Bloodstained Chivalry
The Bloodstained Chivalry set focuses on increasing your Physical DMG while reducing your stamina costs by as much as possible. Depending on how you use it, Bloodstained Chivalry can be the best option for Eula.

via VCgamers
The Bloodstained Chivalry artifact set comprises the following:
- Flower of Life: Bloodstained Flower of Iron
- Plume of Death: Bloodstained Black Plume
- Sands of Eon: Bloodstained Final Hour
- Goblet of Eonothem: Bloodstained Chevalier’s Goblet
- Circlet of Logos: Bloodstained Iron Mask
The set bonuses of these artifacts activate at the following marks:
2 – Piece Mark
This bonus increases your Physical DMG Bonus by 25%, thereby allowing you to deal greater amounts of damage through your main weapon.
4 – Piece Mark
Your Charged ATK DMG is increased by 50% whenever you defeat an opponent. Consequently, your stamina costs for Charged ATK are also reduced to 0. This effect lasts for 10 seconds.
This effect can be triggered by defeating any kind of enemies, including board, frogs, and squirrels.
How To Obtain
The Bloodstained Chivalry set can be obtained from the Clear Pool and Mountain Cavern – a Domain of Blessing located to the north of Mt. Aocang and Liyue.
You can also grab it from the Artifact Strongbox. The higher the levels you challenge, the better your chances of obtaining the 4* and 5* rarities.
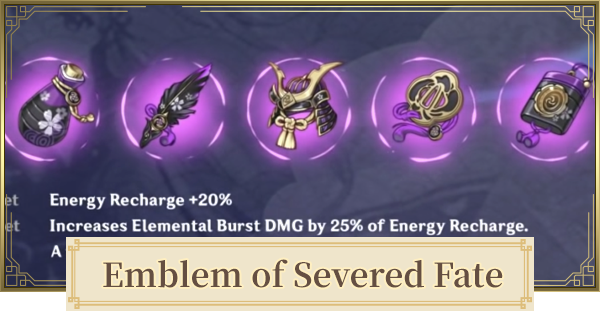
Emblem of Severed Fate
This artifact set focuses on your Energy Recharge and elemental burst damage, making it possible for Amber to unleash those huge damage combos continuously.
Emblem of Severed Fate via Gamewith
The Emblem of Severed Fate set consists of the following:
- Flower of Life: Magnificent Tsuba
- Plume of Death: Sundered Feather
- Sands of Eon: Storm Cage
- Goblet of Eonothem: Scarlet Vessel
- Circlet of Logos: Ornate Kabuto
The set bonuses for these artifacts activate at the following marks:
2 – Piece Bonus
Equipping any two of the items mentioned above will increase your Energy Recharge by 20%.
4 – Piece Bonus
Equipping 4 of the artifacts mentioned above increases your Elemental Burst DMG by 25% of your current Energy recharge.
However, this number is capped at 75% of your bonus DMG. However, even that is borderline absurd for an artifact set.
How To Obtain
Both 4* and 5* variants of this item can be obtained by challenging the Momiji-Dyed Court.
This Domain of Blessing is located in Inazuma. The higher the level you challenge and clear, the better the reward will be.
What’s The Best Team For Eula?
Eula will be taking care of the damage department. Therefore, you need to surround her with buffers, supports, and shields in order to best make use of her.
The following characters tend to synergize well with her playstyle:
Zhongli
Zhongli is a 5 star Geo Polearm character that’s borderline insane when it comes to taking damage and shielding your allies.
via UHDW
Since we’ve only built damage on Eula so far, Zhongli will be the one taking care of the damage absorption part. Plus, additional survivability is always good on characters like Eula.
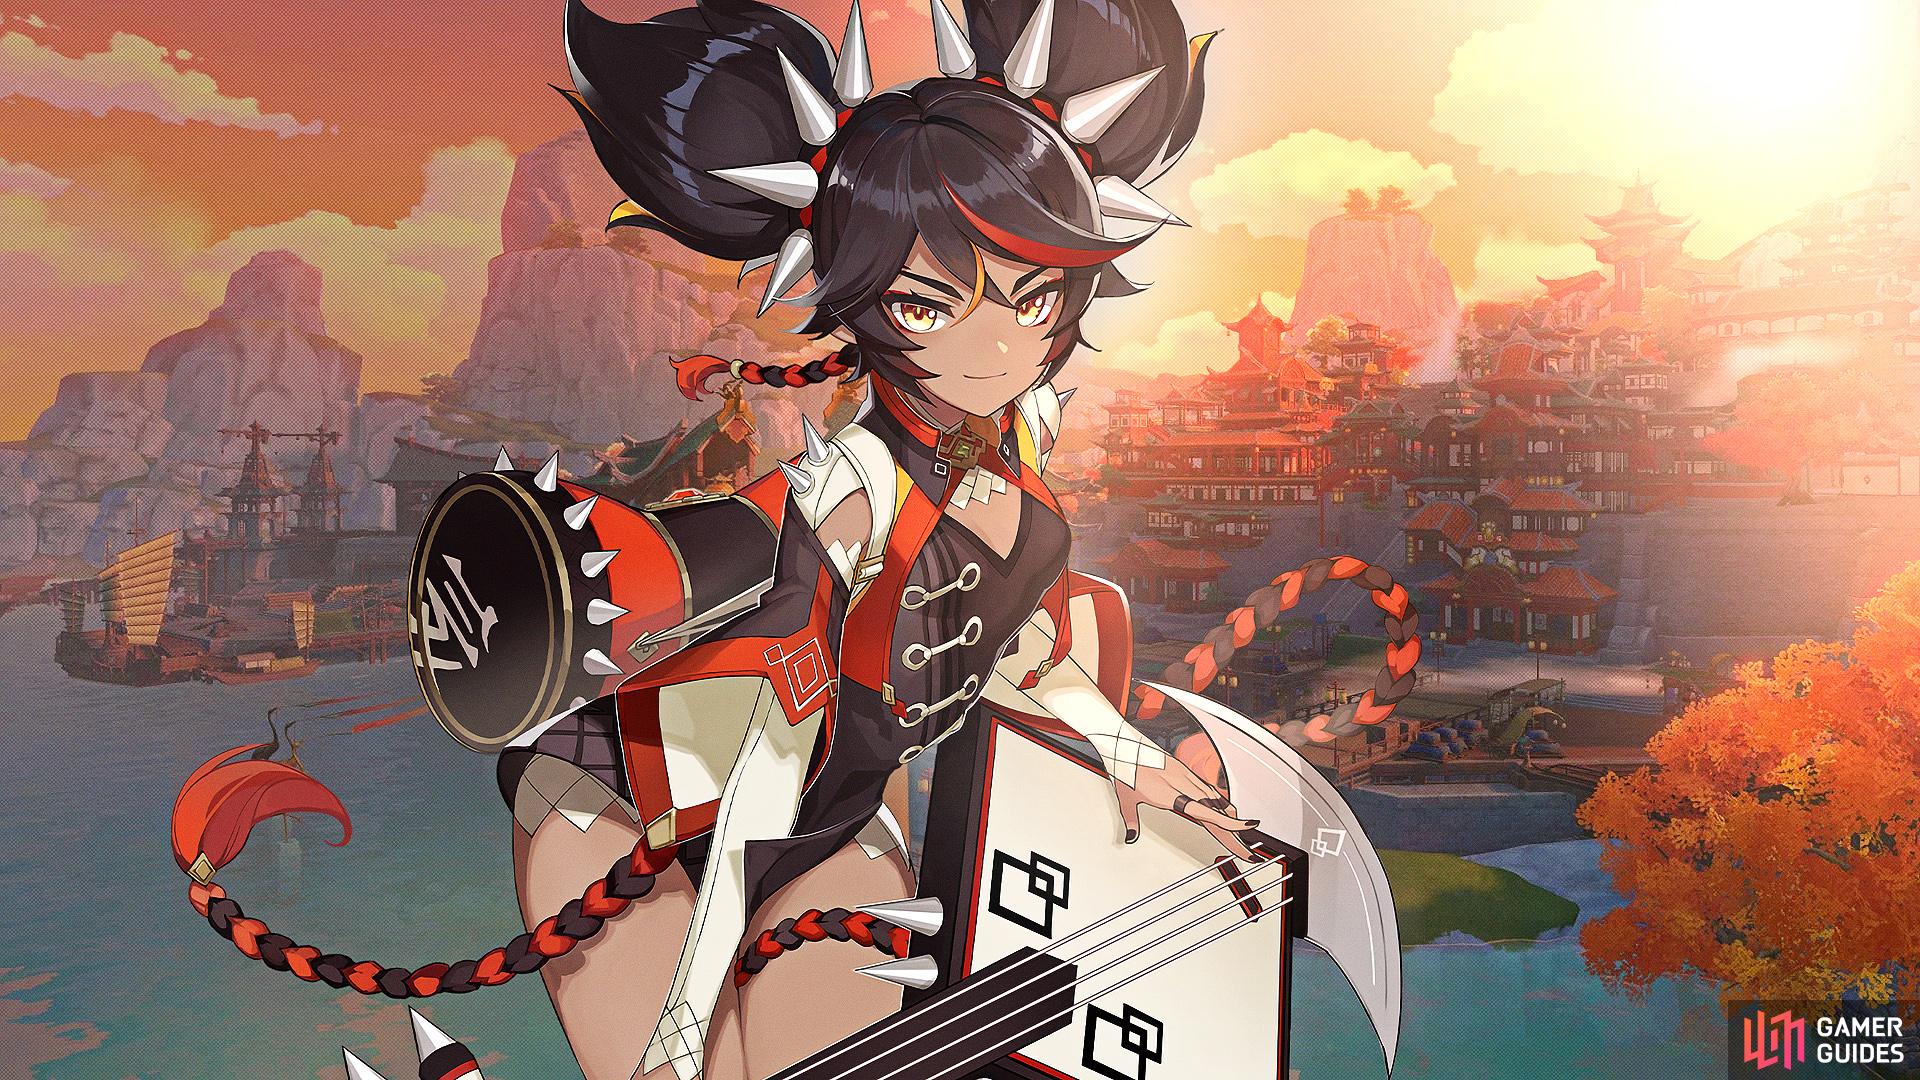
Xinyan
Xinyan is a 4 star Pyro Claymore character that can both buff and shield Eula with he help of her passive talents.

via Gamer Guides
Additionally, her pyro damage along with Eula’s can produce strong Elemental Reactions!
Fischi
Fischi is an Electro bow character capable of increasing Eula’s Physical damage even further. Her Superconduct Elemental Skill, and Burst can synergize pretty well with Eula’s own.

Fischi via UHD-W
Together, it’s pretty much Elemental Reaction galore if Fischi and Eula are on the same field.
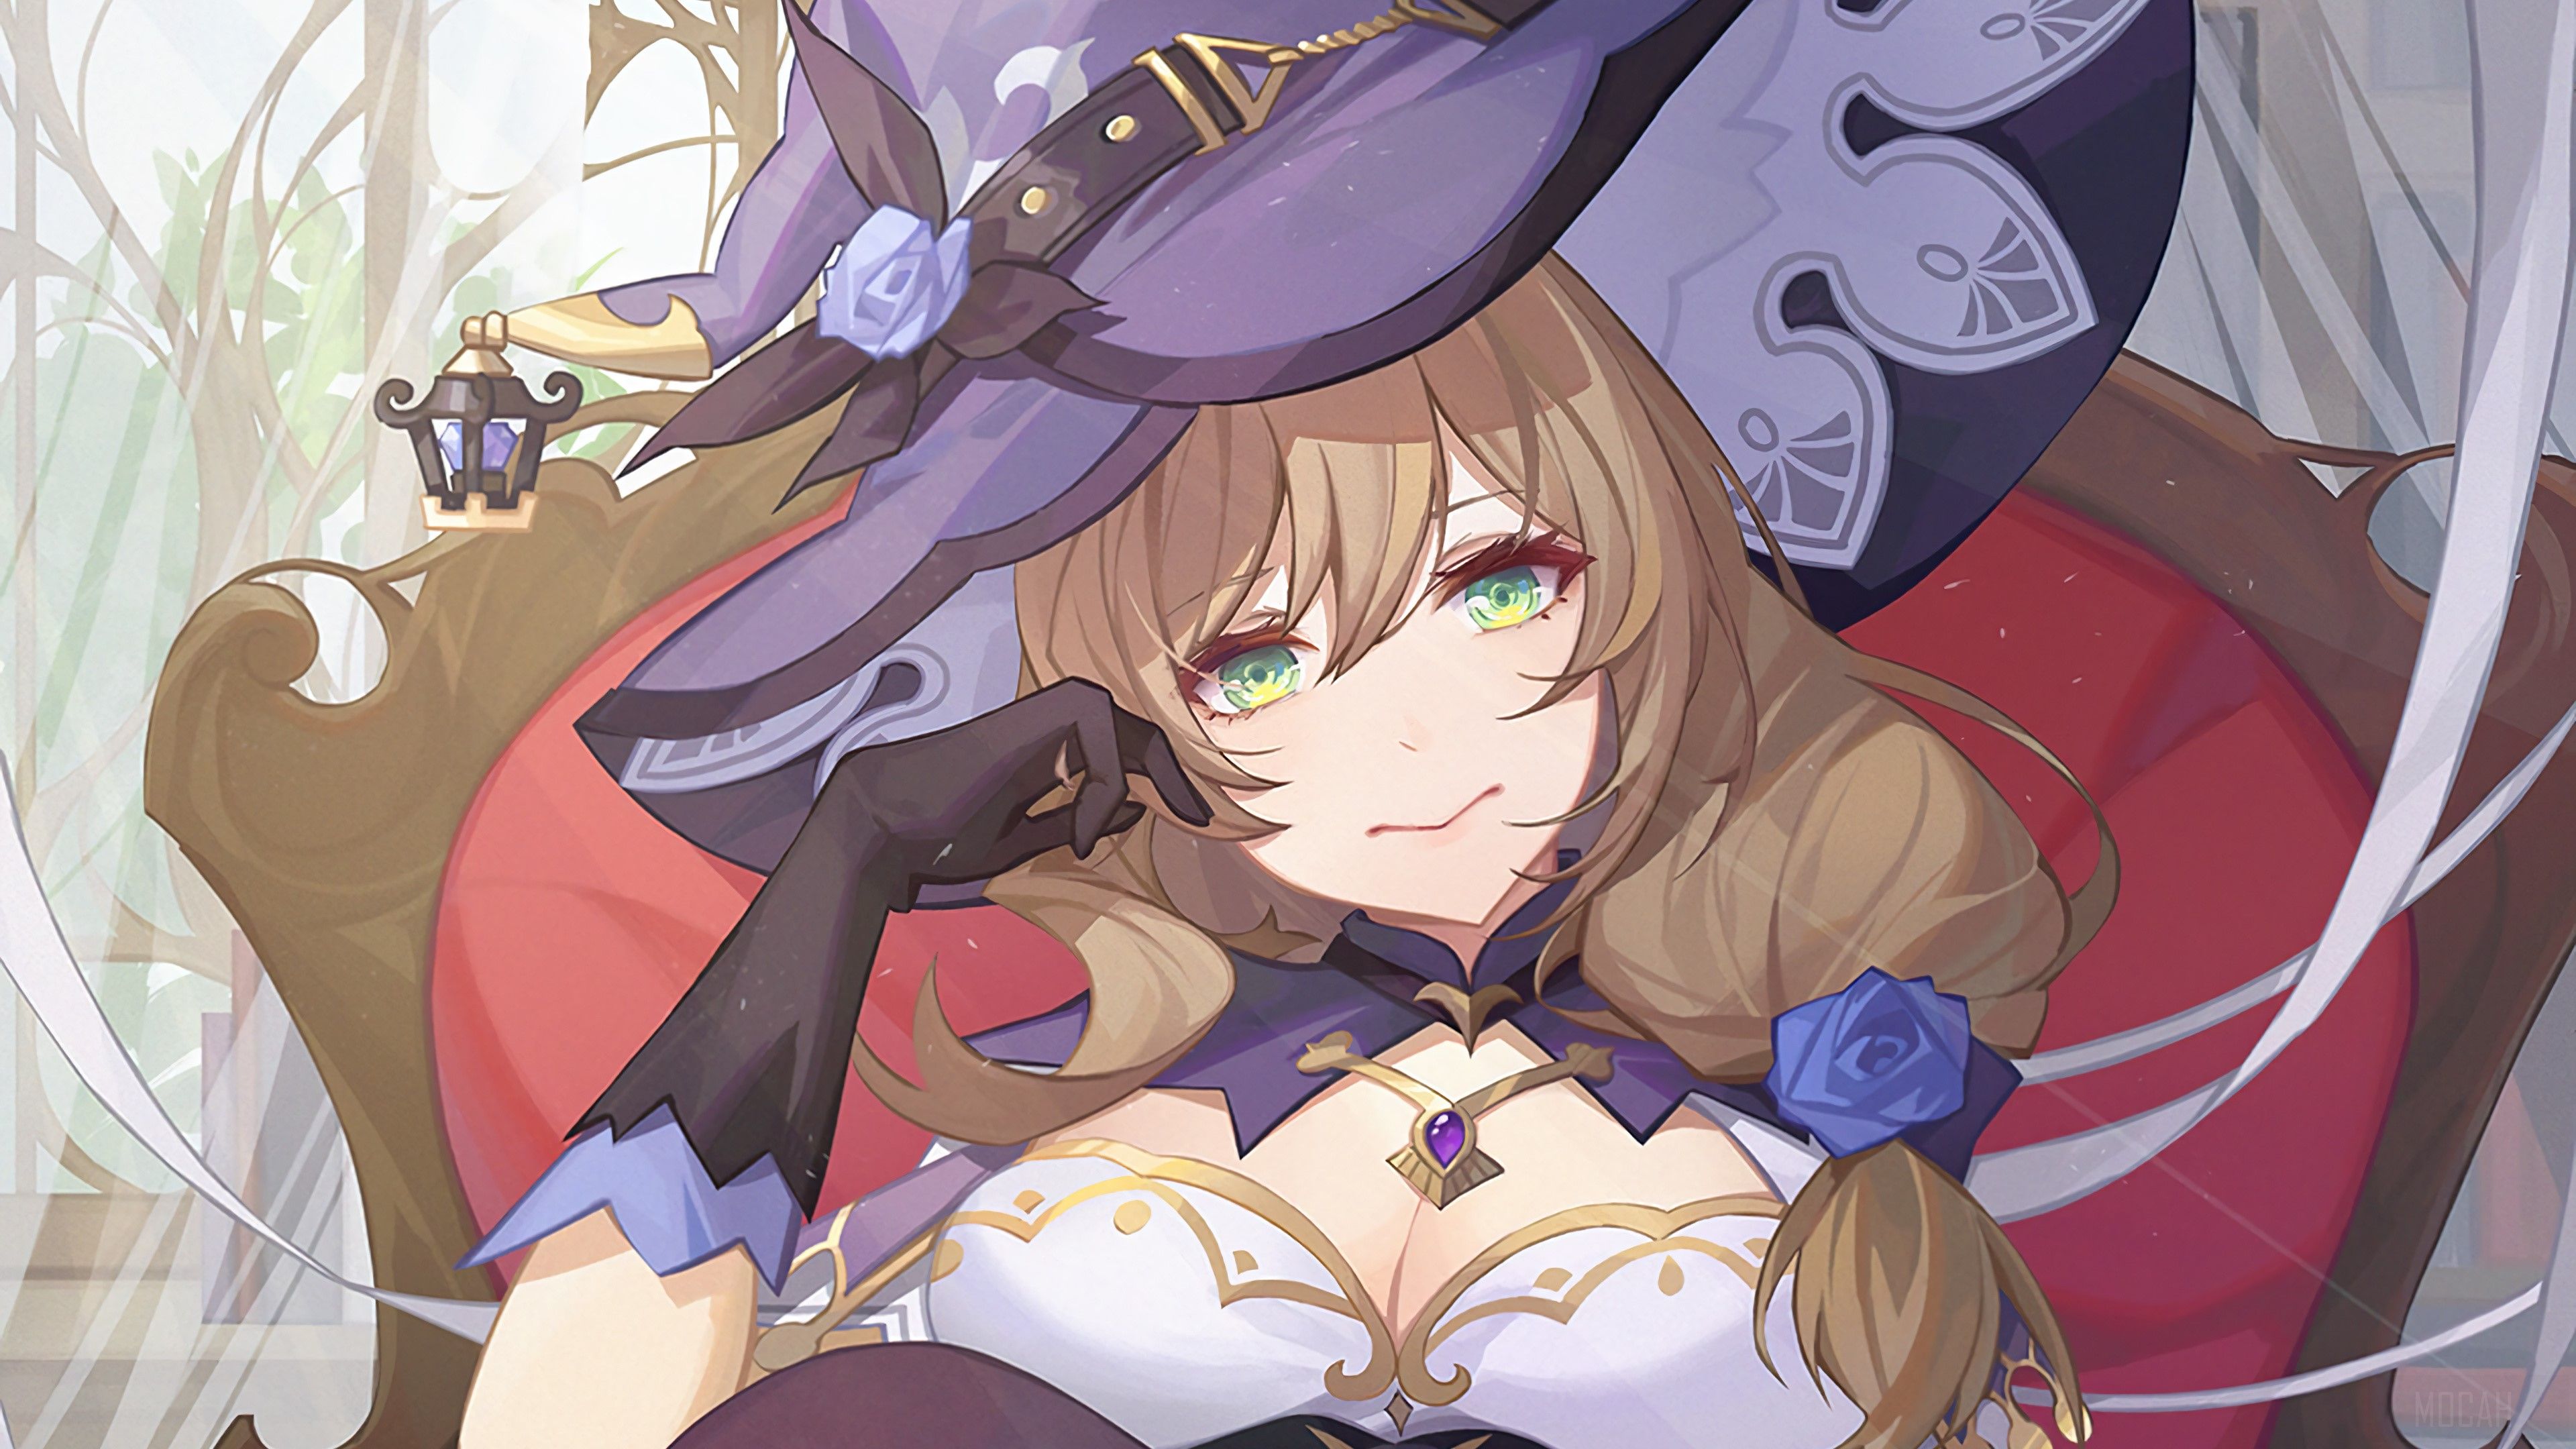
Lisa
Being a strong Electro catalyst, Lisa can also increase Eula’s damage output with Superconduct.

via WC
Now, pair her long-duration but potent Elemental burst, and both of their compatibility levels go off the charts!
Eula: Ability Rundown
Eula has plenty of damage by now. However, in order to properly utilize that damage, you need to be aware of how her kit functions.
With that said, here’s everything you need to know in order to make best use of her:
Basic Attack: Favonius Bladework – Edel
Amber unleashes up to 5 consecutive strikes with her claymore that deal damage upon impact.

via Wiki
There’s not a lot associated with her basic blows since they’re meant to apply the weapon passives.
With that said, here’s how the damage scaling works for Favonius Bladework – Edel:
|
1 |
2 | 3 | 4 | 5 | 6 | 7 | 8 | 9 | 10 | 11 | |
| 1-Hit DMG (%) | 89.73 | 97.04 | 104.34 | 114.77 | 122.08 | 130.42 | 141.9 | 153.38 | 164.86 | 177.38 |
191.72 |
|
2-Hit DMG (%) |
93.55 | 101.17 | 108.78 | 119.66 | 127.27 | 135.97 | 147.94 | 159.91 | 171.87 | 184.93 | 199.88 |
| 3-Hit DMG (%) | 56.8
+ 56.8 |
61.42
+ 61.42 |
66.05
+ 66.05 |
72.65
+ 72.65 |
77.27
+ 77.27 |
82.56
+ 82.56 |
89.82
+ 89.82 |
97.09
+ 97.09 |
104.35
+ 104.35 |
112.28
+ 112.28 |
121.36 + 121.36 |
|
4-Hit DMG (%) |
112.64 | 121.81 | 130.98 | 144.08 | 153.25 | 163.73 | 178.13 | 192.54 | 206.95 | 222.67 | 240.68 |
|
5-Hit DMG (%) |
71.83
+ 71.83 |
77.68
+ 77.68 |
83.53
+ 83.53 |
91.88
+ 91.88 |
97.73
+ 97.73 |
104.41
+ 104.41 |
113.6
+ 113.6 |
122.79
+ 122.79 |
131.97
+ 131.97 |
142
+ 142 |
153.48
+ 153.48 |
Charged Attack
Her charged attack allows her to attack continuously while letting her stamina be drained freely.

via Wiki
Eula then ends the sequence with one big slash attack. Here’s the damage composition for her charged attack:
|
Charged Attack |
|||||||||||
|
Charged Attack Spinning DMG (%) |
68.8 | 74.4 | 80 | 88 | 93.6 | 100 | 108.8 | 117.6 | 126.4 | 136 | 147 |
| Charged Attack Final DMG (%) | 124.4 | 134.52 | 144.65 | 159.12 | 169.24 | 180.81 | 196.72 | 212.64 | 228.55 | 245.91 |
265.79 |
|
Charged Attack Stamina Cost |
40/s | ||||||||||
| Max Duration |
5s |
||||||||||
Plunging Attack
Eula launches herself toward the ground from mid-air while damaging any opponents in the path to her ground strike.

via Wiki
The attack hits the ground in an AoE radius and deals damage to any enemy caught in its range.
Having said that, here’s the damage breakdown for Eula’s Plunging attack:
|
Plunging Attack |
|||||||||||
| Plunge DMG (%) | 74.59 | 80.66 | 86.73 | 95.4 | 101.47 | 108.41 | 117.95 | 127.49 | 137.03 | 147.44 |
159.37 |
|
Low Plunge DMG (%) |
149.14 | 161.28 | 173.42 | 190.77 | 202.91 | 216.78 | 235.86 | 254.93 | 274.01 | 294.82 | 318.67 |
| High Plunge DMG (%) | 186.29 | 201.45 | 216.62 | 238.28 | 253.44 | 270.77 | 294.6 | 318.42 | 342.25 | 368.25 |
398.03 |
Icetide Vortex: Elemental Skill
Eula – as the name suggests – creates an Ice Vortex possessing sharp frost, with her swift blade that reacts differently to the kind of command given.

via GFYcat
Press
Eula performs a swift slash that deals Cryo DMG to enemies in its path. Eula gains a stack of Grimheart each time this ability hits an opponent.
You can have a maximum of two stacks that can only be gained once every 3 seconds.
Hold
Eula consumes all stats of Grimheart, and moves forward while dealing AoE Cryo DMG to all opponents that collide with her path.
If there were any Grimheart stacks to consume, Eula would also decrease the opponent’s Physical RES and Cryo RES upon impact.
For each stack of Grimheart, Eula will deal an Icewhirl Brand (Cryo DMG) to nearby opponents.
Grimheart
Increases Eula’s Interruption and DEF resistance.
On that note, here’s how its attribute scaling works:
| 1 | 2 | 3 | 4 | 5 | 6 | 7 | 8 | 9 | 10 | 11 | 12 | 13 | 14 | |
| Press DMG (%) | 146.4 | 157.38 | 168.36 | 183 | 193.98 | 204.96 | 219.6 | 234.24 | 248.88 | 263.52 | 278.16 | 292.8 | 311.1 |
329.4 |
|
Hold DMG (%) |
245.6 | 264.02 | 282.44 | 307 | 325.42 | 343.84 | 368.4 | 392.96 | 417.52 | 442.08 | 466.64 | 491.2 | 521.9 | 552.6 |
| Icewhirl Brand DMG (%) | 96 | 103.2 | 110.4 | 120 | 127.2 | 134.4 | 144 | 153.6 | 163.2 | 172.8 | 182.4 | 192 | 204 |
216 |
|
DEF Bonus |
30% Per Stack | |||||||||||||
| Grimheart Duration |
18s |
|||||||||||||
|
Physical RES Decrease (%) |
16 | 17 | 18 | 19 | 20 | 21 | 22 | 23 | 24 | 25 | ||||
| Cryo RES Decrease (%) | 16 | 17 | 18 | 19 | 20 | 21 | 22 | 23 | 24 |
25 |
||||
|
RES Decrease Duration |
7s | |||||||||||||
| Press CD |
4s |
|||||||||||||
|
CD (hold) |
10s |
|||||||||||||
Glacial Illumination: Elemental Burst
Eula creates a Lightfall Sword that hovers behind her for the next 7s. She uses her cryo to brandish her greatsword while dealing Cryo DMG to nearby enemies as well.

via Wiki
Lightfall Sword: During its presence, Eula’s interruption resistance increases. The sword charges whenever Eula’s Normal Attack, Elemental Burst, or Elemental Skill hits an enemy. The Lightfall Sword can be stacked once every 0.1 seconds.
Once the Lightfall sword’s duration ends, it’ll strike down on the ground – causing an explosion. This deals Physical DMG to opponents nearby.
The DMG of the descent has direct scaling linked with Eula’s Lightfall Sword stacks. You can make it explode immediately if Eula leaves the field.
Here’s the attribute scaling for Eula’s Elemental Burst:
| 1 | 2 | 3 | 4 | 5 | 6 | 7 | 8 | 9 | 10 | 11 | 12 | 13 | 14 | |
|
Skill DMG (%) |
245.6 | 264.02 | 282.44 | 307 | 325.42 | 343.84 | 368.4 | 392.96 | 417.52 | 442.08 | 466.64 | 491.2 | 521.9 | 553 |
| Lightfall Sword Base DMG (%) | 367.05 | 396.92 | 426.8 | 469.48 | 499.36 | 533.5 | 580.45 | 627.4 | 674.34 | 725.56 | 784.25 | 853.26 | 922.27 |
991.3 |
| DMG Per Stack (%) | 74.99 | 81.1 | 87.2 | 95.92 | 102.02 | 109 | 118.59 | 128.18 | 137.78 | 148.24 | 160.23 | 174.33 | 188.43 |
202.5 |
|
Maximum Stacks |
30 | |||||||||||||
| CD |
20s |
|||||||||||||
|
Energy Cost |
80 |
|||||||||||||
Eula – Passive Talents
Eula’s passive talents serve to amp her damage-oriented playstyle into something viable on the battlefield. They introduce small improvements that shape her kit into a weapon to be reckoned with.
Here’s how they essentially work:
Rolling Prime – Ascension 1 Talent
If the release of Icetide Vortex consumes 2 stacks of Grimheart, then Eula will create a shattered Lightfall Sword.
However, this one will explode immediately while dealing 50% of the damage of a normal Lightfall Sword.
Wellspring of War-Lust – Ascension 4 Talent
Casting Glacial Illumination resets the cooldown of Icetide Vortex while giving Eula a stack of Grimheart.
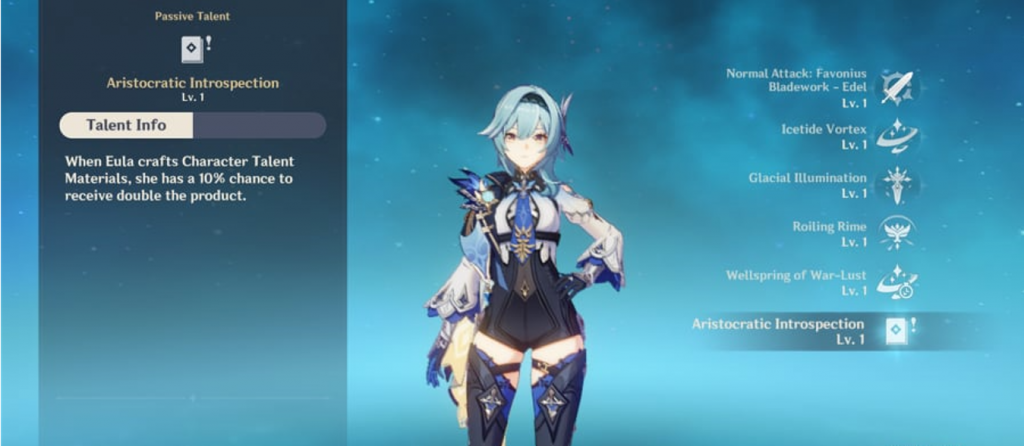
Aristocratic Introspection – Automatic Unlock
This is a utility passive that allows Eula to have a 10% chance of receiving double product when crafting Character Talent Materials.
Eula – Constellations
Like any other character in Genshin Impact, Eula’s kit comprises six unique constellations meant to provide a roundup to her as the main Damage Carry.
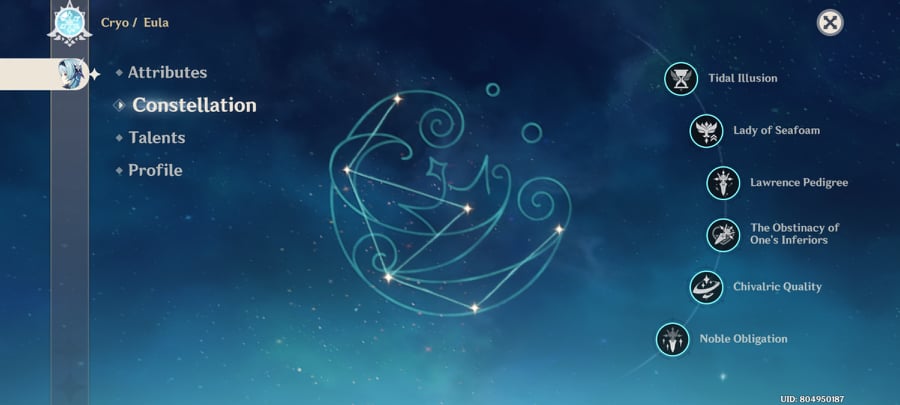
Here’s how they work:
Level 1 Constellation – Tidal Illusion
This constellation increases Eula’s physical DMG by 30% for the next six seconds whenever you consume icetide Vortex’s Grimheart stacks.
Upon each stack consumption – the duration of this effect will increase by 6 seconds. Theoretically, you can keep Tidal Illusion up for 18 seconds.
Level 2 Constellation – Lady of Seafoam
Your Icetide Vortex’s Holding Mode cooldown time is reduced to be identical to the Tap mode’s cooldown.
Level 3 Constellation – Lawrence Pedigree
Glacial Illumination’s level is increased by 3, with the upgrade level cap being 15.
Level 4 Constellation – The Obstinacy of One’s Inferiors
Your Lightfall sword’s damage is increased by 25% on opponents whose HP is less than 50%.
Level 5 Constellation – Chivalric Quality
Icetide Vortex’s level is increased by 3, with the upgrade level cap being 15.
Level 6 Constellation – Noble Obligation
Your Lightfall Swords (during Glacial Illumination) spawn pre-filled with 5 energy stacks.
Your Normal Attacks, Elemental Skills, and Elemental Bursts have an additional 50% chance of giving 1 more stack to Lightfall Sword.
Eula’s Ascension: Stats And Material Costs
Here are all the ascension bonuses and material costs associated with leveling up Eula to reach maximum output:
|
Ascension Phase |
Level | Base
HP |
Base
ATK |
Base
DEF |
Special Stat |
|
0✦ |
1/20 | 1,029 | 26 | 58 | — |
| 20/20 | 2,670 | 69 |
151 |
||
Ascension Cost (0 → 1)
 Mora | via Wiki 20,000  Shivada Jade Silver | via Wiki 1  Dandelion Seed | via Wiki 3  Damaged Mask | via Wiki 3 |
|||||
|
1✦ |
20/40 | 3,553 | 91 | 201 | — |
| 40/40 | 5,317 | 137 |
301 |
||
| Ascension Cost (1 → 2)
Mora | via Wiki 40,000  Shivada Jade Fragment | via Wiki 3 Dandelion Seed | via Wiki 10 Damaged Mask | via Wiki 15  Crystalline Bloom | via Wiki 2 |
|||||
|
2✦ |
40/50 | 5,944 | 153 | 337 | 9.6% |
| 50/50 | 6,839 | 176 |
388 |
||
| Ascension Cost (2 → 3)
Mora | via Wiki 60,000 Shivada Jade Fragment | via Wiki 6 Dandelion Seed | via Wiki 20  Stained Mask | via Wiki 12 Crystalline Bloom | via Wiki 4 |
|||||
|
3✦ |
50/60 | 7,675 | 198 | 435 | 19.2% |
| 60/60 | 8,579 | 221 |
487 |
||
| Ascension Cost (3 → 4)
Mora | via Wiki 80,000  Shivada Jade Chunk | via Wiki 3 Dandelion Seed | via Wiki 30 Stained Mask | via Wiki 18 Crystalline Bloom | via Wiki 8 |
|||||
|
4✦ |
60/70 | 9,206 | 238 | 522 | 19.2% |
| 70/70 | 10,118 | 261 |
574 |
||
| Ascension Cost (4 → 5)
Mora | via Wiki 100,000 Shivada Jade Chunk | via Wiki 6 Dandelion Seed | via Wiki 45  Ominous Mask | via Wiki 12 Crystalline Bloom | via Wiki 12 |
|||||
|
5✦ |
70/80 | 10,746 | 277 | 610 | 28.8% |
| 80/80 | 11,668 | 301 |
662 |
||
| Ascension Cost (5 → 6)
Mora | via Wiki 120,000  Shivada Jade Gemstone | via Wiki 6 Dandelion Seed | via Wiki 60 Ominous Mask | via Wiki 24 Crystalline Bloom | via Wiki 20 |
|||||
|
6✦ |
80/90 | 12,295 | 317 | 698 | 38.4% |
| 90/90 | 13,225 | 342 |
750 |
||
Eula: Talent Upgrade Materials
Here’s everything you need to evolve Eula’s Talents:
|
Talent Level |
Required
Ascension |
Mora
|
Common Materials
|
Talent Level-Up Materials
|
||
| 1 → 2 | 2✦ |
Mora | via Wiki 12,500
|
Damaged Mask | via Wiki 6
|
 Teachings of Resistance | via Wiki 3
|
||
|
2 → 3 |
3✦ |
Mora | via Wiki 17,500
|
Stained Mask | via Wiki 3
|
 Guide To Resistance | via Wiki 2
|
||
| 3 → 4 |
Mora | via Wiki 25,000
|
Stained Mask | via Wiki 4
|
Guide To Resistance | via Wiki 4
|
|||
|
4 → 5 |
4✦ |
Mora | via Wiki 30,000
|
Stained Mask | via Wiki 6
|
Guide To Resistance | via Wiki 6
|
||
| 5 → 6 |
Mora | via Wiki 37,500
|
Stained Mask | via Wiki 9
|
Guide To Resistance | via Wiki 9
|
|||
|
6 → 7 |
5✦ |
Mora | via Wiki 120,000
|
Ominous Mask | via Wiki 4
|
 Philosophies of Resistance | via Wiki 4
|
 Dragon Lord’s Crown | via Wiki 1
|
|
| 7 → 8 |
Mora | via Wiki 260,000
|
Ominous Mask | via Wiki 6
|
Philosophies of Resistance | via Wiki 6
|
Dragon Lord’s Crown | via Wiki 1
|
||
|
8 → 9 |
6✦ |
Mora | via Wiki 450,000
|
Ominous Mask | via Wiki 9
|
Philosophies of Resistance | via Wiki 12
|
Dragon Lord’s Crown | via Wiki 2
|
|
| 9 → 10 |
Mora | via Wiki 700,000
|
Ominous Mask | via Wiki 12
|
Philosophies of Resistance | via Wiki 16
|
Dragon Lord’s Crown | via Wiki 2
|
 Crown of Insight | via Wiki 1
|
|
Eula: Flickering Candlelight: Lore & Ability Showcase
Here’s the official Eula’s showcase:
Conclusion
All in all, Eula strives with damage; the more, the better. While building her, you need to throw all caution to the wind and play to your strengths.
Just chuck a Zhongli with her, and you’re pretty much invincible! She might do even better with restorative support at her side.
These are the weapons and artifacts that we recommend for Eula in Genshin Impact. If you want to learn more, then you can check out our guide on how you can get the Heart Island chest.


