There’s no shortage of DPS carries in Genshin Impact; whether it be Yanfei or Xiao, you just can’t seem to get bored of them. However, the real breadwinners of a team comprise supports that effectively amplify the damage output of the main carry.
Needless to say, great support needs the correct items and artifacts to perform, and no support is more fun to play than the four-star Diona.
Initially released as a free for all character, she has made a place amongst the ranks of top tier supports that can carry your team out of trouble.
With that said, this guide will showcase everything you need to know about Diona, along with her weapons and artifacts. So, let’s jump right in and get started!
Who Is Diona In Genshin Impact?
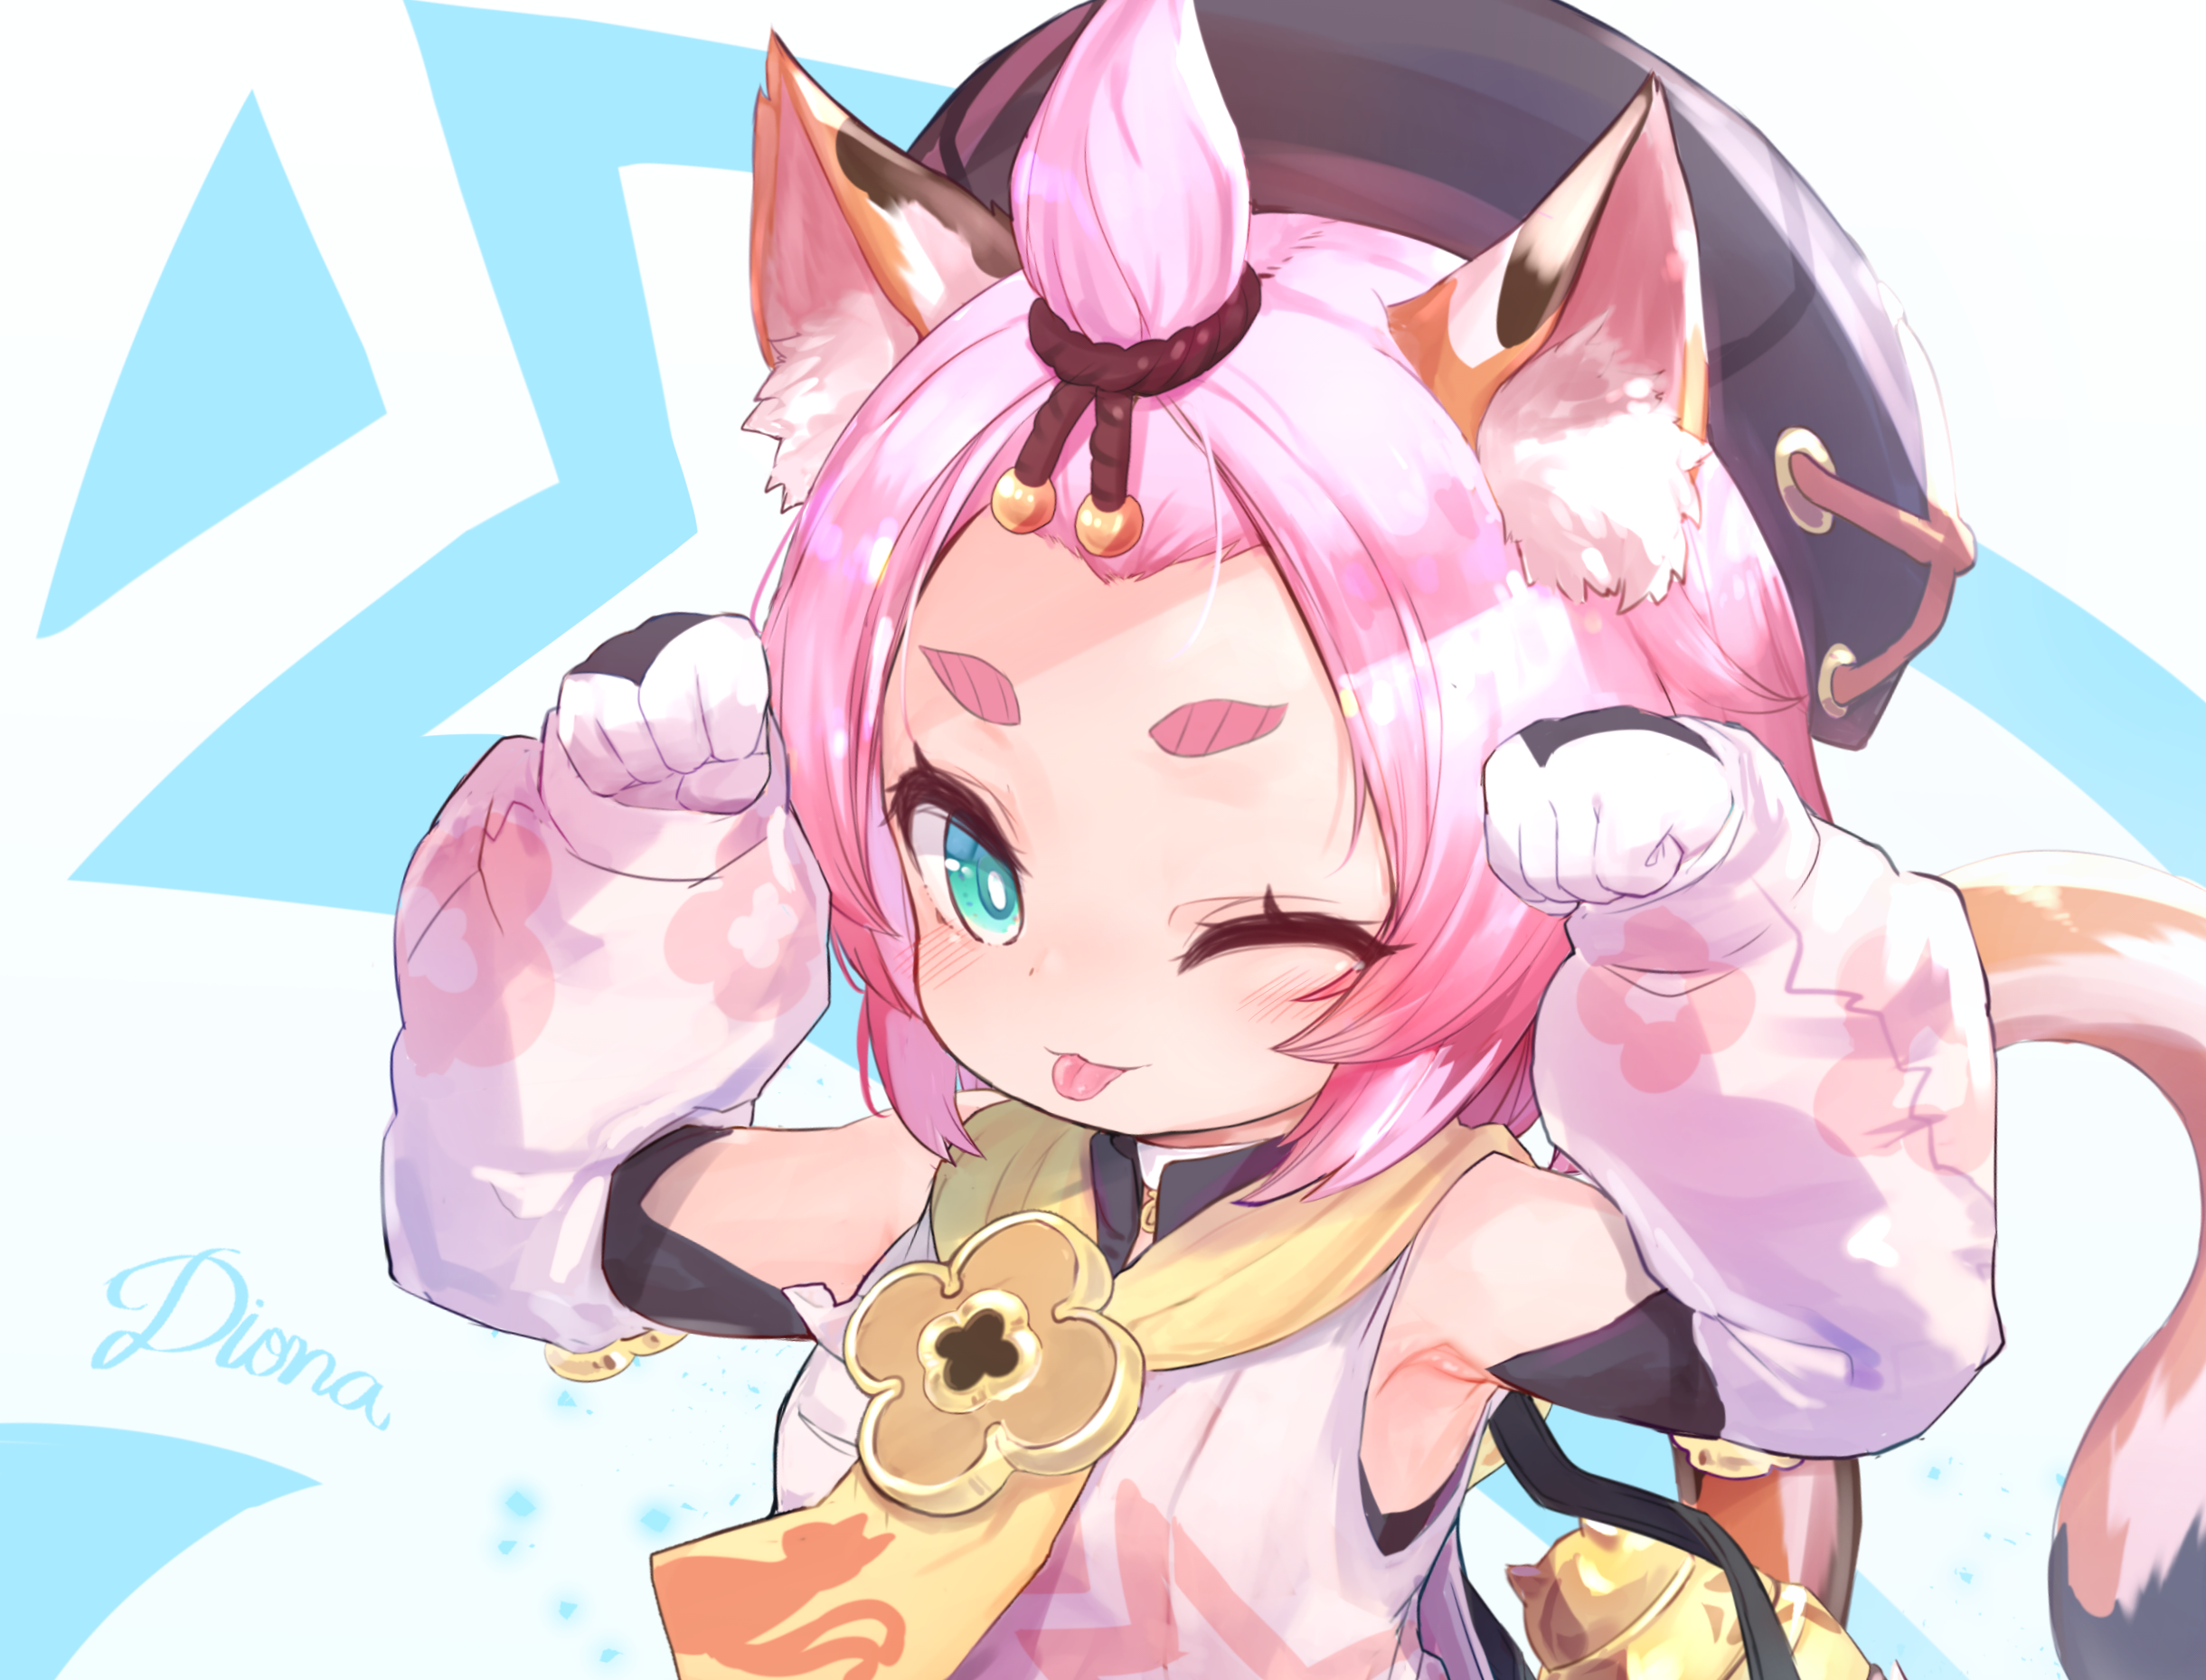
Diona Kätzlein is a cryo-type playable character in Genshin Impact. She has been working as a bartender at the Cat’s Tail. In spite of this, Diona despises alcohol and hates the vine industry of Mondstadt with a passion.

Diona | via UniPin Blog
Unfortunately, destroying the wine business of Mondstadt is easier said than done; plus, she makes great beverages, so who would want that?
Diona has a pretty short build type; she is the daughter of the hunter Draff who works in Springwale. As her catsy appearance might suggest, her kit is geared towards paw-type attacks.
Builds For Diona In Genshin Impact
Diona’s kit works primarily with the Cryo element. She can initiate HP-based health recovery and can give shields to her allies in need.
Unlike regular supports, Diona prioritizes healing and defending instead of buffing. Her DMG potential is low from a base level. Therefore, she is better used with high-hitting carries than with a well-rounded team.
Having said that, here’s what you need to build on Diona:
Best Weapons On Diona
While Diona does well with most Cryo-based weapons, you’d need to go for the cream of the crop in order to really make her stand out.
This can, fortunately, be done with the aid of the following weapons:
Elegy for the End
This is a 5-star bow – belonging to the Millenial Movement Series. It channels The Parting Refrain, which essentially enables you to increase your Elemental Mastery by 60-120.
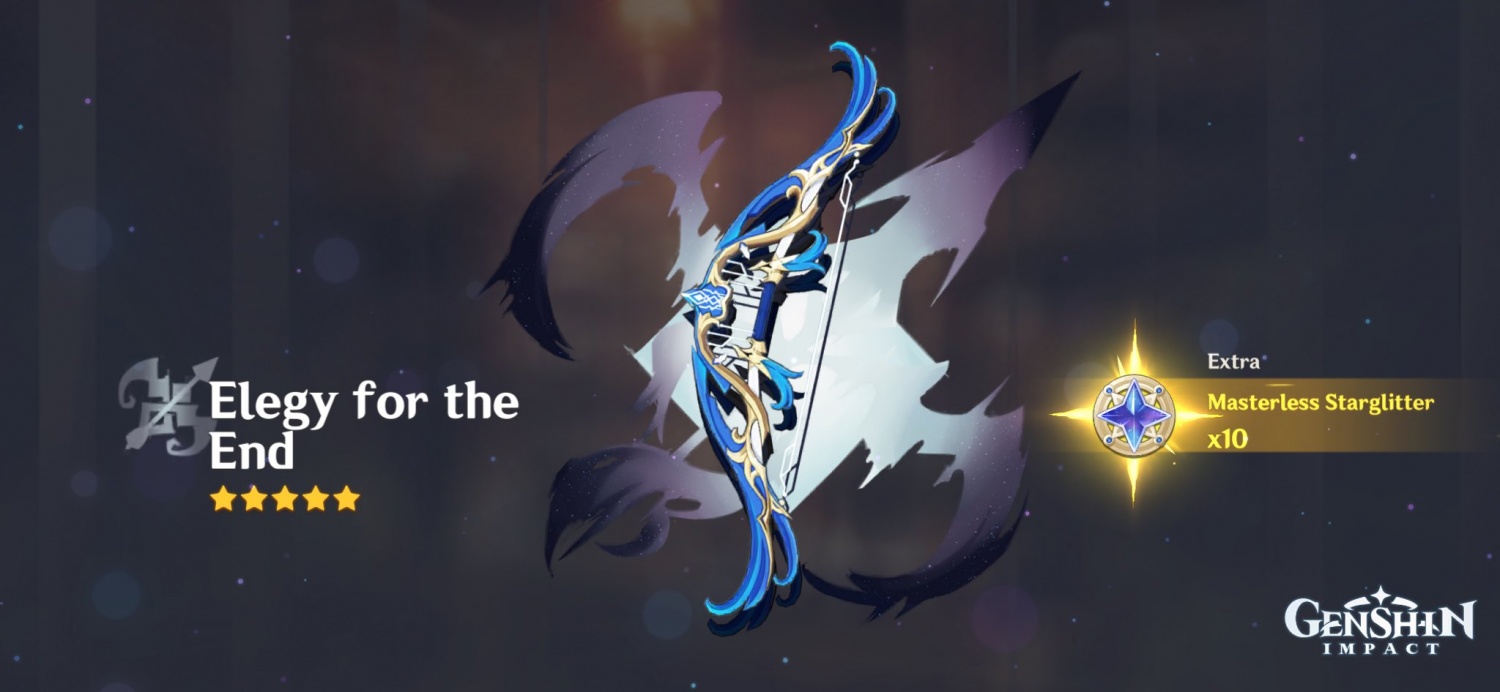
Elegy for the End | via Gamenguide
Consequently, whenever your Elemental Bursts or Elemental Skills hit the opponent, you gain a Sigil of Remembrance.
The character holding the weapon doesn’t really need to be on the field for this effect to trigger. Besides, it can be initiated every 0.2 seconds with a maximum of 4 stacks. At max stacks, all Sigils of Remembrance are consumed.
This will result in your party members obtaining the effect of Millenial Movement: Farewell Song for the next 12 seconds. This bonus buffs your Elemental Mastery by 100-200 while increasing your ATK by 20% – 40%.
The initiation of the Millenial Movement: Farewell Song causes the Sigils of Remembrance to experience a downtime of 20 seconds.
Unfortunately, the buffs on this weapon cannot be stacked with similar effects. Having said that, here’s what this weapon is capable of in terms of raw stats:
| Base ATK (LVL 1 – 90) | 2nd Stat Type | 2nd Stat (LVL 1-90) |
| 46 – 608 | Energy Recharge |
12% – 55.1% |
The Parting Refrain will run its due course even if you’re out of combat. With that said, here’s how you can obtain Elegy for the End:
- Epitome Invocation ( 2021-03-17 ): This wish was previously available from March 17, 2021 – April 6, 2021.
- Epitome Invocation ( 2021-11-02 ): This wish was previously available from November 2, 2021 – November 23, 2021.
- Epitome Invocation ( 2022-03-30 ): This wish was previously available from March 30, 2022 – April 19, 2022.
- Epitome Invocation ( 2022-09-28): This wish was previously available from September 28, 2022 – October 14, 2022.
Once you’ve obtained it, be sure to prepare the following materials for its ascension for rank 0-6:
|
Item |
Quantity |
|
Mora |
225,000 |
| Boreal Wolf’s Milk Tooth |
5 |
|
Boreal Wolf’s Cracked Tooth |
14 |
| Boreal Wolf’s Broken Fang |
14 |
|
Boreal Wolf’s Nostalgia |
6 |
| Heavy Horn |
23 |
| Black Bronze Horn | 27 |
| Black Crystal Horn |
41 |
|
Recruit’s Insignia |
15 |
| Sergeant’s Insignia |
23 |
|
Lieutenant’s Insignia |
27 |
Sacrificial Bow (Replacement Weapon)
The Sacrificial Bow is a great starting bow-type option to go for Diona. It ranks a bit lower in rarity than her main weapon, but is strong enough to be your trusty partner. It essentially grants you the Composed effect during the battle.
Once you’ve dealt damage to an opponent with an Elemental Skill, you will have a 40% -80% chance to have the skill cooldown time end.
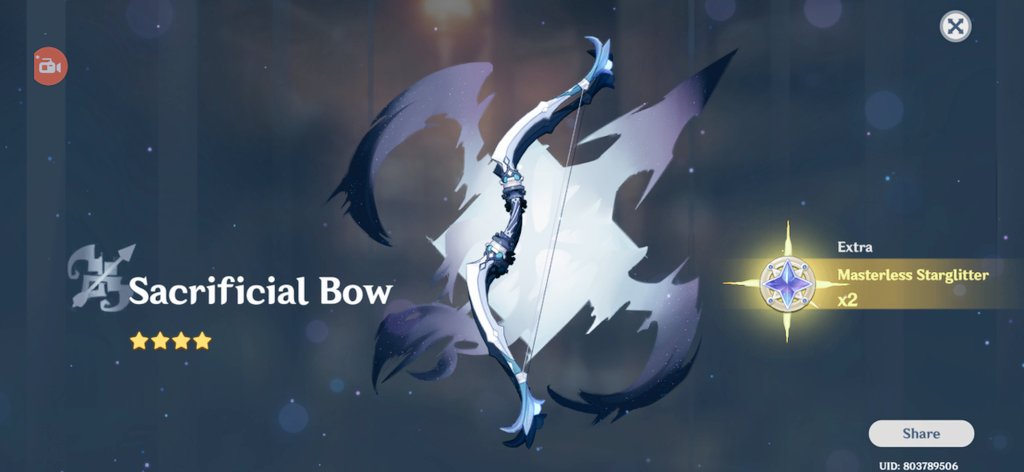
The Sacrificial Bow | via r a n • d a l l 🍄🌕🎱
You can reactivate The Sacrificial bow’s ability every 30-16 seconds, and since the battlefield effect is autonomous, you’ll be able to trigger it instantly.
With that said, here’s what this weapon packs in terms of stats:
| Base ATK (LVL 1-90) | 2nd Stat Type | 2nd Stat (LvL 1-90) |
| 44 – 565 | Energy Recharge |
6.7% – 30.6% |
The Composed status only works as long as you’re in combat dealing damage. While its effects are not the most likely to trigger, it still adds a level of spam-ability to your kit – which is pretty strong to have on a support.
Having said that, the Sacrificial Bow has been on a promoted drop rate boost in a total of 7 event wishes by the time of this article:
- Epitome Invocation ( 2020-10-20 ): This wish was available from October 20, 2020 – November 10, 2020.
- Epitome Invocation ( 2021-02-23 ): This wish was available from February 23, 2021 – March 16, 2021.
- Epitome Invocation ( 2021-04-28 ): This wish was available from April 28, 2021 – May 18, 2021.
- Epitome Invocation ( 2021-09-01): This wish was available from September 1, 2021 – September 21, 2021.
- Epitome Invocation ( 2022-01-25 ): This wish was available from January 25, 2022 – February 15, 2022.
- Epitome Invocation ( 2022-05-31 ): This wish was available from May 31, 2022 – June 21, 2022.
- Epitome Invocation ( 2022-10-14): This wish was available from October 14, 2022 – November 1, 2022.
On that note, the ascension costs of this weapon will roughly set you back in the following amounts:
|
Item |
Quantity |
|
Mora |
150,000 |
|
Boreal Wolf’s Milk Tooth |
3 |
| Boreal Wolf’s Cracked Tooth |
9 |
|
Boreal Wolf’s Broken Ring |
9 |
| Boreal Wolf’s Nostalgia |
4 |
|
Dead Ley Line Branch |
15 |
| Dead Ley Line Leaves |
18 |
|
Dead Ley Line Sprout |
27 |
| Slime Condensate |
10 |
|
Stained Secretions |
15 |
| Ominous Concentrate |
18 |
Best Artifacts On Diona
Since Diona’s primary role is to support the frontlines, you don’t really need to go deep into your Artifacts choice in order to find success on her.
However, if you’re looking for the best of the best, then it might be better to opt for the following.
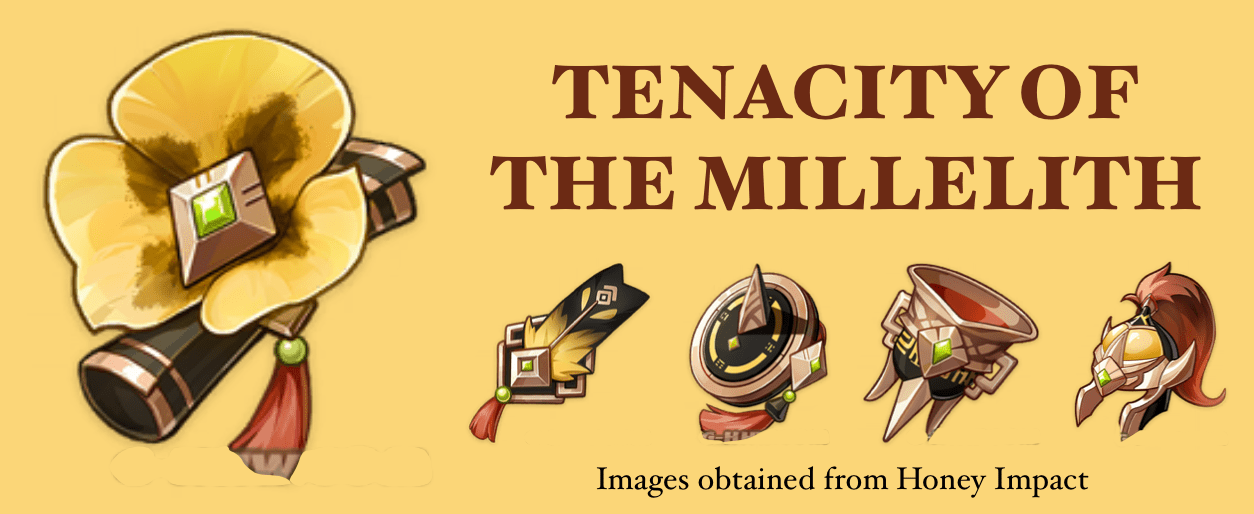
Tenacity of the Millelith
This artifact set is available in both 4-star and 5-star rarities. Its set bonuses – just like most artifacts – are placed at the 2-Piece and 4-Piece marks.

Tenacity of the Millelith | Source: Honey Impact
This set consists of:
- Flower of Life: Flower of Accolades
- Plume of Death: Ceremonial War-Plume
- Sands of Eon: Orichalceous Time-Dial
- Goblet of Eonothem: Noble’s Pledging Vessel
- Circlet of Logos: General’s Ancient Helm
Once you’ve collected most of these set items, the following bonuses will activate:
2 – Piece Bonus
This bonus increases your maximum HP by 20%. Since Diona already suffers from low base HP, the 2 – Piece Bonus perfectly complements her kit.
4 – Piece Bonus
Your nearby party members experience a 20% increase in attack damage along with a 30% increase in shield strength whenever your attack hits an opponent. This attack lasts for the next 3 seconds and can be triggered every 0.5 seconds.
Your character doesn’t need to be on the field to trigger it. Therefore, you’re essentially gaining a buff that lasts the entire fight duration – given you keep weaving your attacks in.
How To Obtain
Both the 4* and the 5* rarities can be obtained by challenging the Ridge Watch. It’s located in the mountainous area connecting Mondstadt and Liyue.
Just head there and keep grinding until you get the complete set. However, we recommend your average party level to be around 70 for a successful run.
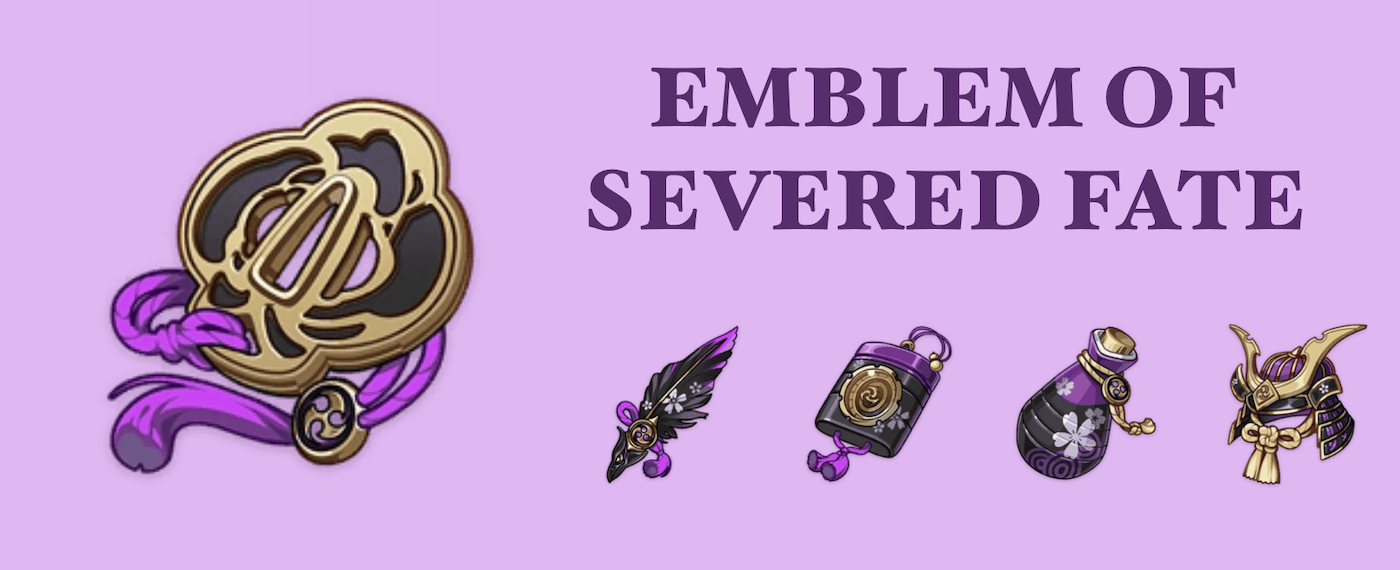
Emblem of Severed Fate (Optional)
The Emblem of Severed Fate comes in the 4* and 5* categories and is the perfect damage-boosting artifact that can push Diona into the realms of support carries.

Emblem of Severed Fate | via Games Atlas
It consists of the following:
- Flower of Life: Magnificent Tsuba
- Plume of Death: Sundered Feather
- Sands of Eon: Storm Cage
- Goblet of Eonothem: Scarlet Vessel
- Circlet of Logos: Ornate Kabuto
Once you’ve collected two or four pieces of these artifacts, the following bonuses will activate:
2-Piece Bonus
Your energy recharge will increase by 20% – allowing you to cast more spells in the midst of the battle.
4-Piece Bonus
Your Elemental Burst DMG is increased by 25% of your Energy Recharge value. This limit is capped at 75% of your bonus damage – which is still pretty intense for an Artifact.
How To Obtain
The Emblem of Severed Fate can be obtained from the Momiji-Dyed Court – located in Inazuma. You will have to challenge this domain in order to obtain artifacts continuously.
We recommend your Party level to be 70 at the very least in order to survive the challenges of the Momiji Dyed Court.
What’s The Best Team For Diona?
Unlike DPS carries, you need a proper team to make full use of Diona’s abilities. While there are multiple variations of what could be considered the best Diona support team, the easiest ones – in terms of execution – are mentioned below:
1. Freeze Team
Diona’s role is pretty versatile here; whether it be a shielder or an energy battery, she can deliver an insane amount of value to the following team:
Ayaka

Ayaka | via PC Invasion
Ayaka is a Cryo character that possesses insane amounts of damage – making her your best choice for the main DPS of the team.
Her sprint can be used for exploration and combat, while the DMG numbers of her Elemental Burst act as the cherry on top. She can melt most of the enemies with the help of her base damage and doesn’t require any power amps to perform to standard.
Mona
Mona | via WF
Mona is a mix of crowd control and magic; she enables the team by making room for the hard-hitting combos to land.
Plus, her Elemental Skill is one of the best in-game decoys, while her Elemental Burst deals an instance amount of damage – making her viable as the secondary support.
Her unique movement style also allows her to weave in more actions than generic supports.
Venti

Venti | via WD
We already have two supports in the team; however, the solo prowess of Ayaka enables us to mold our team around a single carry rather than two. Thus, the addition of Venti serves as a nice roundup for the Freeze team.
Go rowdy with your crowd control and insane damage numbers (post constellation unlock), and your team will be a serious threat to your opponents.
2. Physical DPS
This team makes use of Diona as a healer and a shielder. While it is a bit low in versatility, having two sub-DPS with the main damage dealer is bound to produce some outstanding results – as long as you pair them up with proper support.
Luckily, that’s where Diona’s shields come in clutch. With the aid of her party members, Diona is sure to prove her value in this team comp.
Eula
Eula | via UHD W
Eula utilizes her Grimheart to increase the ‘tankiness’ of the team while lowering the resistance of the enemy.
Pair it with her high damage, and she can quite easily become the main DPS carry of the team. However, her cooldowns and costs are a bit too hight – but pair her with a battery bank like Diona, and you’re good to go!
Fischi
Fischi | via WC
Fischi is an electro-type and is well known for her energy particles. Aside from strong elemental reactions, she can also sustain a considerably high attack speed.
Now, pair all of this up with her constant application of electro, and her value as a sub-DPS becomes pretty apparent.
Unfortunately, you need to have many constellations on her to unleash her true potential, or it might feel a bit lackluster.
Beidou

Beidou | via Gurugamer
Beidou is the third sub-DPS character whose job is to provide a nice roundup to the team. She uses the electro element like Fischi, but is much more lethal in nature.
Your perfect counters can grant you a gigantic amount of damage, while your Elemental Bursh is enough to gain off-field damage.
As a standalone unit, Beidou consumes a bit too much energy. Therefore, she truly wreaks havoc on the battlefield if paired with Diona.
3. Dendro Team
There’s a lot Diona can do to provide value in team comps, but the story completely changes when it’s about Freeze and Dendro comps.
Not only can Diona freeze hydro-fied enemies, but she can also deal massive Bloom damage by utilizing her elemental burst to the max. With that said, here are her companions in this comp:
Ayato

Ayato | via PCGamesN
Ayato’s single-target damage is no joke. He is one of the only Hydro characters capable of dealing large-scale AoE damage over time, thereby making him your go-to DPS carry for the team.
Just like most of the mentioned carries, Ayato’s weakness lies in his high resource utilization costs. However, that’s not an issue as long as you have a Diona on the team.
Aside from the damage factor, Ayato is also capable of supporting teammates with his Elemental Burst, so all the more reason to grab him.
Shinobu
Shinobu | via The Loadout
Shinobu is an Electro based sub DPS carry. She is pretty consistent in whatever she does, whether it’s off-field Electro DMG or Healing.
Shinobu has low resource costs, thereby making her your go-to for Elemental Skill spams. Unfortunately, the healing compartment isn’t party-wide, so you’d have to improvise a bit.
Dendro Traveler

Dendro Traveler | via PCGamesN
Dendro Traveler acts as the main cornerstone of this team. Its high off-field damage, paired with the insane supporting tools, makes it pretty strong as a sub-support alongside Diona.
The only issue with Dendro Traveler lies within its elemental burst cost. Fortunately, Diona is here to save the day once again.
Diona: DPS Ability Rundown
Diona opts for an ability-dependent playstyle since her kit is geared for support instead of DPS. Therefore, you need to be deeply familiar with her abilities in order to make the most out of her.
Having said that, here’s how Diona works on a fundamental level.
Basic Attack: Kätzlein Style
This is Diona’s basic attack that takes up to five consecutive shots with a bow.

Kätzlein Style | via Wiki
Upon landing, the attack deals base AD level of damage and is generally pretty useless to main in battle.
With that said, here’s how her attribute scaling works:
| 1 | 2 | 3 | 4 | 5 | 6 | 7 | 8 | 9 | 10 | 11 | |
| 1-Hit DMG (%) | 36.12 | 39.06 | 42 | 46.2 | 49.14 | 52.5 | 57.12 | 61.74 | 66.36 | 71.4 | 77.18 |
| 2-Hit DMG (%) | 33.54 | 36.27 | 39 | 42.9 | 45.63 | 48.75 | 53.04 | 57.33 | 61.62 | 66.3 | 71.66 |
| 3-Hit DMG (%) | 45.58 | 49.29 | 53 | 58.3 | 62.01 | 66.25 | 72.08 | 77.91 | 83.74 | 90.1 | 97.39 |
| 4-Hit DMG (%) | 43 | 46.5 | 50 | 55 | 58.5 | 62.5 | 68 | 73.5 | 79 | 85 | 91.88 |
| 5-Hit DMG (%) | 53.75 | 58.13 | 62.5 | 68.75 | 73.13 | 78.13 | 85 | 91.88 | 98.75 | 106.25 | 114.84 |
Charged Attack
This attack features better Aim and deals more damage than Diona’s basic attack. During the charge, the arrow will accumulate frost at the front.
Once the charge has been completed, you will be able to deal Cryo DMG on a successful hit.
|
Charged Attack (Aimed Shot) |
|||||||||||
| Aimed Shot (%) | 43.86 | 47.43 | 51 | 56.1 | 59.67 | 63.75 | 69.36 | 74.97 | 80.58 | 86.7 |
93.71 |
|
Fully-Charged Aimed Shot (%) |
124 | 133.3 | 142.6 | 155 | 164.3 | 173.6 | 186 | 198.4 | 210.8 | 223.2 | 236.1 |
Plunging Attack
Diona unleashes a shower of arrows in the air while launching herself and falls while striking the ground to deal AoE damage on impact.
|
Plunging Attack |
|||||||||||
| Plunge DMG (%) | 56.83 | 61.45 | 66.08 | 72.69 | 77.31 | 82.6 | 89.87 | 97.14 | 104.41 | 112.34 |
120.27 |
|
Low Plunge DMG (%) |
113.63 | 122.88 | 132.13 | 145.35 | 154.59 | 165.17 | 179.7 | 194.23 | 208.77 | 224.62 | 240.48 |
| High Plunge DMG (%) | 141.93 | 153.49 | 165.04 | 181.54 | 193.1 | 206.3 | 224.45 | 242.61 | 260.76 | 280.57 |
300.37 |
Icy Paws: Elemental Skill
Diona fires off an Icy Paw toward opponents that creates a shield upon hit. This shield scales off of Diona’s maximum HP, while its duration lasts accordingly with the number of Icy Paws being hit at the target.

Icy Paws | via Wiki
With that said, it performs a bit differently based on how you launch it.
Press
Diona launches a total of two Icy Paws that possess the above-mentioned specifics.
Hold
Diona performs a reverse dash and fires off five Icy Paws towards the specified directions. The shield created by these specific Icy Paws will enjoy the following bonuses:
- 75% base DMG absorption bonus
- 250% Cryo DMG absorption bonus
This will also cause your current character to have Cryo symptoms for an extremely short duration.
| 1 | 2 | 3 | 4 | 5 | 6 | 7 | 8 | 9 | 10 | 11 | 12 | 13 | 14 | |
| Icy Paw DMG (%) | 41.92 per Paw | 45.06 per Paw | 48.21 per Paw | 52.4 per Paw | 55.54 per Paw | 58.69 per Paw | 62.88 per Paw | 67.07 per Paw | 71.26 per Paw | 75.46 per Paw | 79.65 per Paw |
83.84 per Paw |
89.08 per Paw |
94.3 per Paw |
|
Base Shield DMG Absorption |
7.2% Max HP
+ 692.8 |
7.74% Max HP
+ 762 |
8.28% Max HP
+ 837.16 |
9% Max HP
+ 918 |
9.54% Max HP
+ 1004 |
10.08% Max HP
+ 1096 |
10.8% Max HP
+ 1195 |
11.52% Max HP
+ 1299 |
12.24% Max HP
+ 1408 |
12.96% Max HP
+ 1524 |
13.68% Max HP
+ 1645 |
14.4% Max HP
+ 1772 |
15.3% Max HP
+ 1905 |
16.2% Max HP + 2044 |
|
Duration |
1.8s per Paw | 1.9s per Paw | 2s per Paw | 2.1s per Paw | 2.2s per Paw | 2.3s per Paw | 2.4s per Paw | |||||||
|
Press CD |
6s |
|||||||||||||
| Holding CD |
15s |
|||||||||||||
Signature Mix: Elemental Burst
Diona tosses a specially made cold brew that can deal AoE Cryo DMG. This AoE is further strengthened by having a Drunken Mist within its premises that holds the following effects:

Signature Mix | via Wiki
- The opponents within it are inflicted with continuous Cryo DMG.
- The allies within it can continuously regenerate their Hitpoints.
| 1 | 2 | 3 | 4 | 5 | 6 | 7 | 8 | 9 | 10 | 11 | 12 | 13 | 14 | |
| Skill DMG (%) | 80 | 86 | 92 | 100 | 106 | 112 | 120 | 128 | 136 | 144 | 152 | 160 | 170 |
180 |
|
Continuous Field DMG (%) |
52.64 | 56.59 | 60.54 | 65.8 | 69.75 | 73.7 | 78.96 | 84.22 | 89.49 | 94.75 | 100.02 | 105.28 | 111.86 | 118.4 |
| HP Regeneration Over Time | 5.34% Max HP
+ 513.19 |
5.74% Max HP
+ 564.51 |
6.14% Max HP
+ 620.11 |
6.67% Max HP
+ 680 |
7.07% Max HP
+ 744.15 |
7.47% Max HP
+ 812.59 |
8% Max HP
+ 885.3 |
8.54% Max HP
+ 962.29 |
9.07% Max HP
+ 1043 |
9.6% Max HP
+ 1129 |
10.14% Max HP
+ 1218 |
10.67% Max HP
+ 1313 |
11.34% Max HP
+ 1411 |
12.01% Max HP + 1514 |
|
Duration |
12s | |||||||||||||
| CD |
20s |
|||||||||||||
|
Energy Cost |
80 |
|||||||||||||
Diona – Passive Talents
Diona possesses three talents that are meant to formulate her kit to be a viable support carry for the team.
Diona | via WA
Some of them come pre-unlocked with the character, while others need you to reach certain ascension stages. Having said that, here’s how they fundamentally work:
Cat’s Tail Secret Menu – Ascension 1 Talent
This talent enables characters shielded by the shield created by Icy Paws to have a 10% movement speed increase.

Cat’s Tail Secret Menu | via Fandom
Consequently, their total stamina consumption is also decreased by 10% – further enabling you to spam combos and abilities however your heart desires.
Drunkards’ Farce – Ascension 4 Talent
Any enemy that enters the AoE damage radius of Signature Mix gets its attack damage lowered by 10% for the next 15 seconds.

Drunkards’ Farce | via Fandom
Complimentary Bar Food – Automatic Unlock
Diona has a 12% chance of obtaining double benefits whenever you try restorative cooking on a dish that already has restorative effects.

via Fanbyte
Diona – Constellations
Just like most characters in Genshin Impact, Diona has a total of six constellations that provide a mix of damage and utility-based buffs.
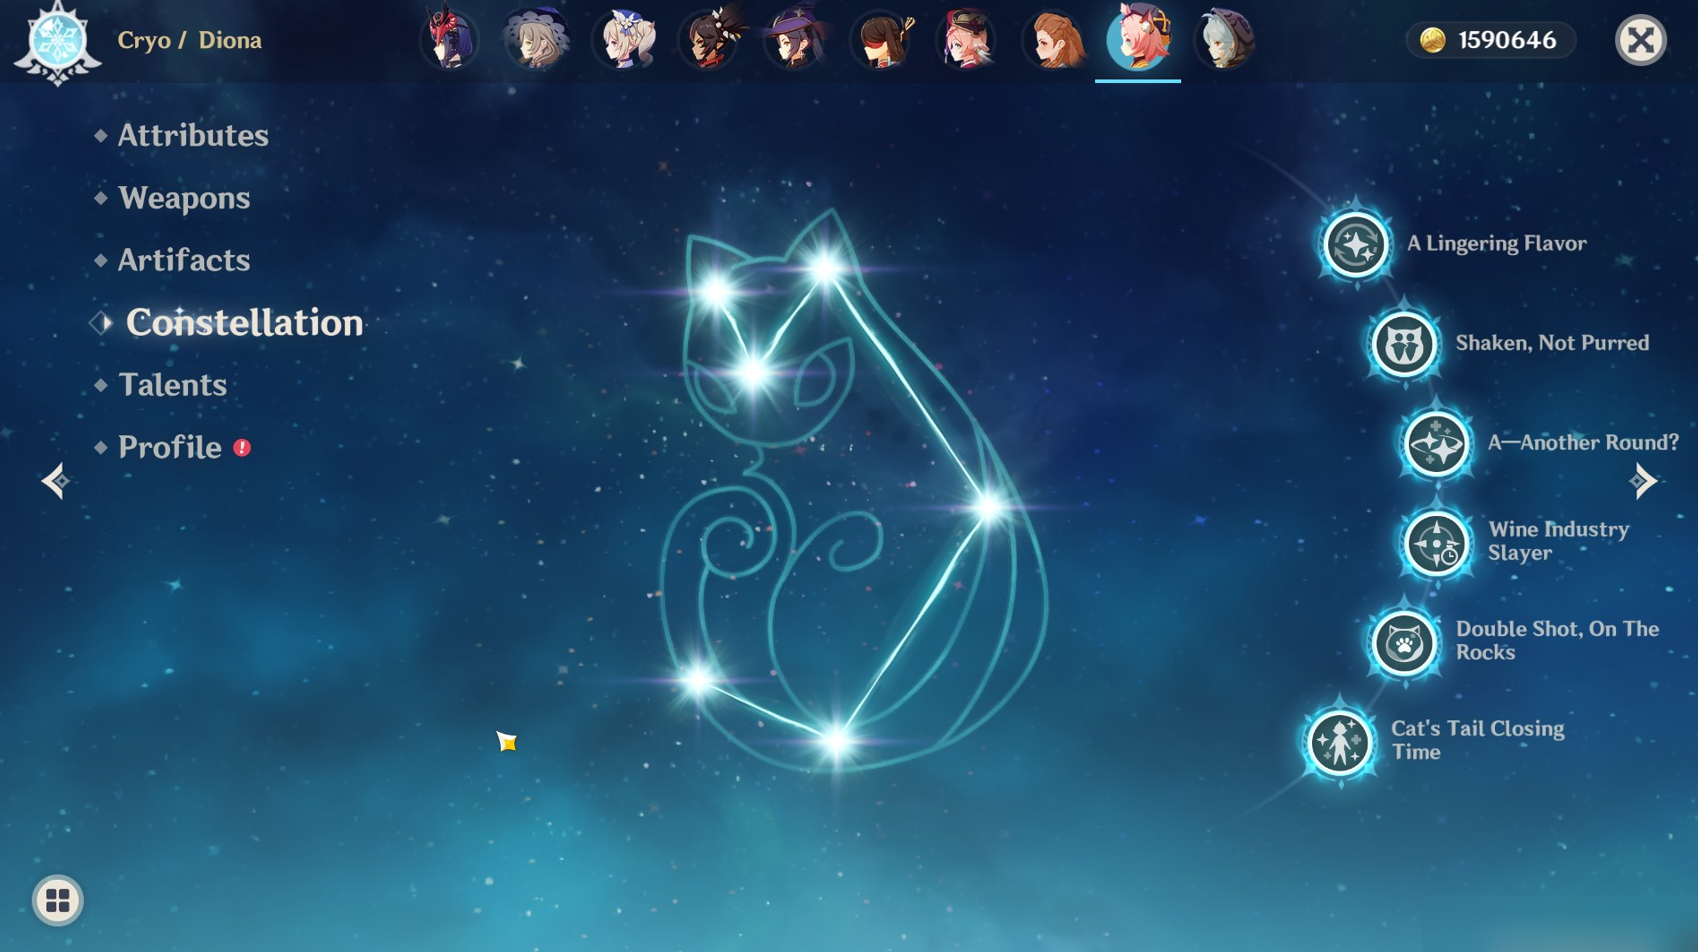
Constellations | via Reddit
With that said, here’s what her Constellations do in battle:
Level 1 Constellation – A Lingering Flavor
This constellation allows Diona to regenerate 15 energy once her Signature Mix ability’s effects end.
It does not have many battle uses and only helps in lowering the overall cost of Signature Mix.
Level 2 Constellation – Shaken, Not Purred
Diona’s Icy Paws Damage and Shield DMG absorption are increased by 15%. Upon each successful hit of her Paws, Diona creates a shield for her nearby allies.
The DMG absorption rate for this shield is only 50% of the Icy Paws’ original potency and lasts only 5 seconds. In Co-Op, you don’t need to have Icy Paws hit their target to gain a shield.
Level 3 Constellation – A-Another Round?
Your Signature Mix’s level is increased by 3, with the maximum level cap being 15.
Level 4 Constellation – Wine Industry Slayer
Diona’s aimed shot charge time experiences a 60% reduction – given she’s within the radius of Signature Mix.
Level 5 Constellation – Double Shot, on the Rocks
Your Signature Mix’s level is increased by 3, with the maximum level cap being 15.
Level 6 Constellation – Cat’s Tail Closing Time
Signature Mix’s radius becomes much more beneficial for your ally characters. They will be experiencing the following effects:
- Increased incoming Healing Bonuses by 30% – given their HP is less than or equal to 50%
- Increased Elemental Mastery (by 200) when your HP exceeds 50%.
Diona’s Ascension: Stats And Material Costs
Here are all the ascension bonuses and material costs associated with leveling up Diona to be your main Support:
| Ascension Phase |
Level | Base HP |
Base ATK |
Base DEF |
Cryo DMG Bonus |
|---|---|---|---|---|---|
| 0✦ | 1/20 | 802 | 17 | 50 | — |
| 20/20 | 2061 | 45 | 129 | ||
| Ascension Cost (0 → 1) | |||||
| 1✦ | 20/40 | 2660 | 59 | 166 | — |
| 40/40 | 3985 | 88 | 250 | ||
| Ascension Cost (1 → 2) | |||||
| 2✦ | 40/50 | 4411 | 97 | 276 | 6.0% |
| 50/50 | 5074 | 112 | 318 | ||
Ascension Cost (2 → 3)
 Mora | via Wiki 60,000  Shivada Jade Fragment | via Wiki 6  Calla Lily | via Wiki 20  Sharp Arrowhead | via Wiki 12  Hoarfrost Code | via Wiki 4 |
|||||
| 3✦ | 50/60 | 5641 | 125 | 354 | 12.0% |
| 60/60 | 6304 | 139 | 395 | ||
| Ascension Cost (3 → 4) | |||||
| 4✦ | 60/70 | 6730 | 149 | 422 | 12.0% |
| 70/70 | 7392 | 164 | 463 | ||
| Ascension Cost (4 → 5)
Mora | via Wiki 100,000  Shivada Jade Chunk | via Wiki 6 Calla Lily | via Wiki 45  Weathered Arrowhead | via Wiki 12 Hoarfrost Code | via Wiki 12 |
|||||
| 5✦ | 70/80 | 7818 | 173 | 490 | 18.0% |
| 80/80 | 8481 | 188 | 532 | ||
| Ascension Cost (5 → 6)
Mora | via Wiki 120,000  Shivada Jade Gemstone | via Wiki 6 Calla Lily | via Wiki 60 Weathered Arrowhead | via Wiki 24 Hoarfrost Code | via Wiki 20 |
|||||
| 6✦ | 80/90 | 8907 | 197 | 559 | 24.0% |
| 90/90 | 9569 | 212 | 600 | ||

Diona: Talent Upgrade Materials
Talents are yet another core component of Diona’s overall kit. Here’s everything you need to evolve her Talents:
|
Talent Level |
Required
Ascension |
Mora
|
Common Materials
|
Talent Level-Up Materials
|
||
| 1 → 2 | 2✦ |
 Mora | via Wiki 12,500
|
 Firm Arrowhead | via Wiki 6
|
 Teachings of Freedom | via Wiki 3
|
||
|
2 → 3 |
3✦ |
Mora | via Wiki 17,500
|
Sharp Arrowhead | via Wiki 3
|
 Guide To Freedom | via Wiki 2
|
||
| 3 → 4 |
Mora | via Wiki 25,000
|
Sharp Arrowhead | via Wiki 4
|
Guide To Freedom | via Wiki 4
|
|||
|
4 → 5 |
4✦ |
Mora | via Wiki 30,000
|
Sharp Arrowhead | via Wiki 6
|
Guide To Freedom | via Wiki 6
|
||
| 5 → 6 |
Mora | via Wiki 37,500
|
Sharp Arrowhead | via Wiki 9
|
Guide To Freedom | via Wiki 9
|
|||
|
6 → 7 |
5✦ |
Mora | via Wiki 120,000
|
Weathered Arrowhead | via Wiki 4
|
 Philosophies of Freedom | via Wiki 4
|
 Shard of a Foul Legacy | via Wiki 1
|
|
| 7 → 8 |
Mora | via Wiki 260,000
|
Weathered Arrowhead | via Wiki 6
|
Philosophies of Freedom | via Wiki 6
|
Shard of a Foul Legacy | via Wiki 1
|
||
|
8 → 9 |
6✦ |
Mora | via Wiki 450,000
|
Weathered Arrowhead | via Wiki 9
|
Philosophies of Freedom | via Wiki 12
|
Shard of a Foul Legacy | via Wiki 2
|
|
| 9 → 10 |
Mora | via Wiki 700,000
|
Weathered Arrowhead | via Wiki 12
|
Philosophies of Freedom | via Wiki 16
|
Shard of a Foul Legacy | via Wiki 2
|
 Crown of Insight | via Wiki 1
|
|
Diona: Wine Industry Slayer: Lore & Ability Showcase
Here is the official showcase of what Diona is capable of:
How To Obtain Diona?
Diona has experienced a drop rate boost in a total of 8 event wishes. You can obtain her from the gacha as usual or try your luck whenever the following reappear:
|
Wish |
Duration |
 via Genshin Impact Farewell of Snezhnaya 2020-11-11 |
November 11, 2020 – December 1, 2020 |
 via Genshin Impact Invitation to Mundane Life 2021-02-03 |
February 3, 2021 – February 17, 2021 |
 via Genshin Impact Gentry of Hermitage 2021-04-28 |
April 28, 2021 – May 18, 2021 |
 via Genshin Impact Tapestry of Golden Flames 2021-08-10 |
August 10, 2021 – August 31, 2021 |
 via Genshin Impact Moment of Bloom 2021-11-02 |
November 2, 2021 – November 23, 2021 |
 via Genshin Impact Everbloom Violet 2022-02-16 |
February 16, 2022 – March 8, 2022 |
 via Genshin Impact Viridescent Vigil 2022-08-24 |
August 24, 2022 – September 9, 2022 |
 via Genshin Impact Gentry of Hermitage (Repeat) 2022-08-24 |
August 24, 2022 – September 9, 2022 |
Despite the hike in drop rate, finding Diona out of the gacha can take a toll on your pocket. Therefore, it’s better to play a placeholder character unless you’re able to afford Diona.
Conclusion
In essence, Diona is a great support character that can enable your high-damage carries to wreak havoc on the battlefield. She consistently regenerates the stamina of your teammates through one ability or another while also shielding and healing them.
Pair all of this with her versatile yet effective kit, and you have an extremely useful battery at your disposal. Plus, she has a fairly decent chance of chaining elemental reactions with the help of her abilities, so that’s always a plus to have.


