
Good Team comps in Genshin Impact tend to have a DPS carry with a combination of Sub DPS and Support characters. Support characters can be Enablers or Healers.
Enablers being characters that can buff other characters in your team for example Raiden Shogun or Xingqiu. And Healers being self-explanatory, they heal other characters in your team, for example Diona.
Bennett is a hybrid character that can act as both an Enabler and a Healer becoming one of, if not the best characters or at least support, in Genshin Impact.
This guide will explain, first of all why he is so good, but also, how to use him efficiently. It will also cover his optimal builds being artifacts, weapons, and teams, to get the most value out of your Bennett.
With that being said, let’s get right into it!
Who Is Bennett In Genshin Impact?
Bennett is a 4-Star sword-wielding Pyro Character. In the Mondstadt region, Bennett was an orphan who was found when he was a little child by an elderly explorer. He was brought up in the Adventurers’ Guild of Mondstadt.
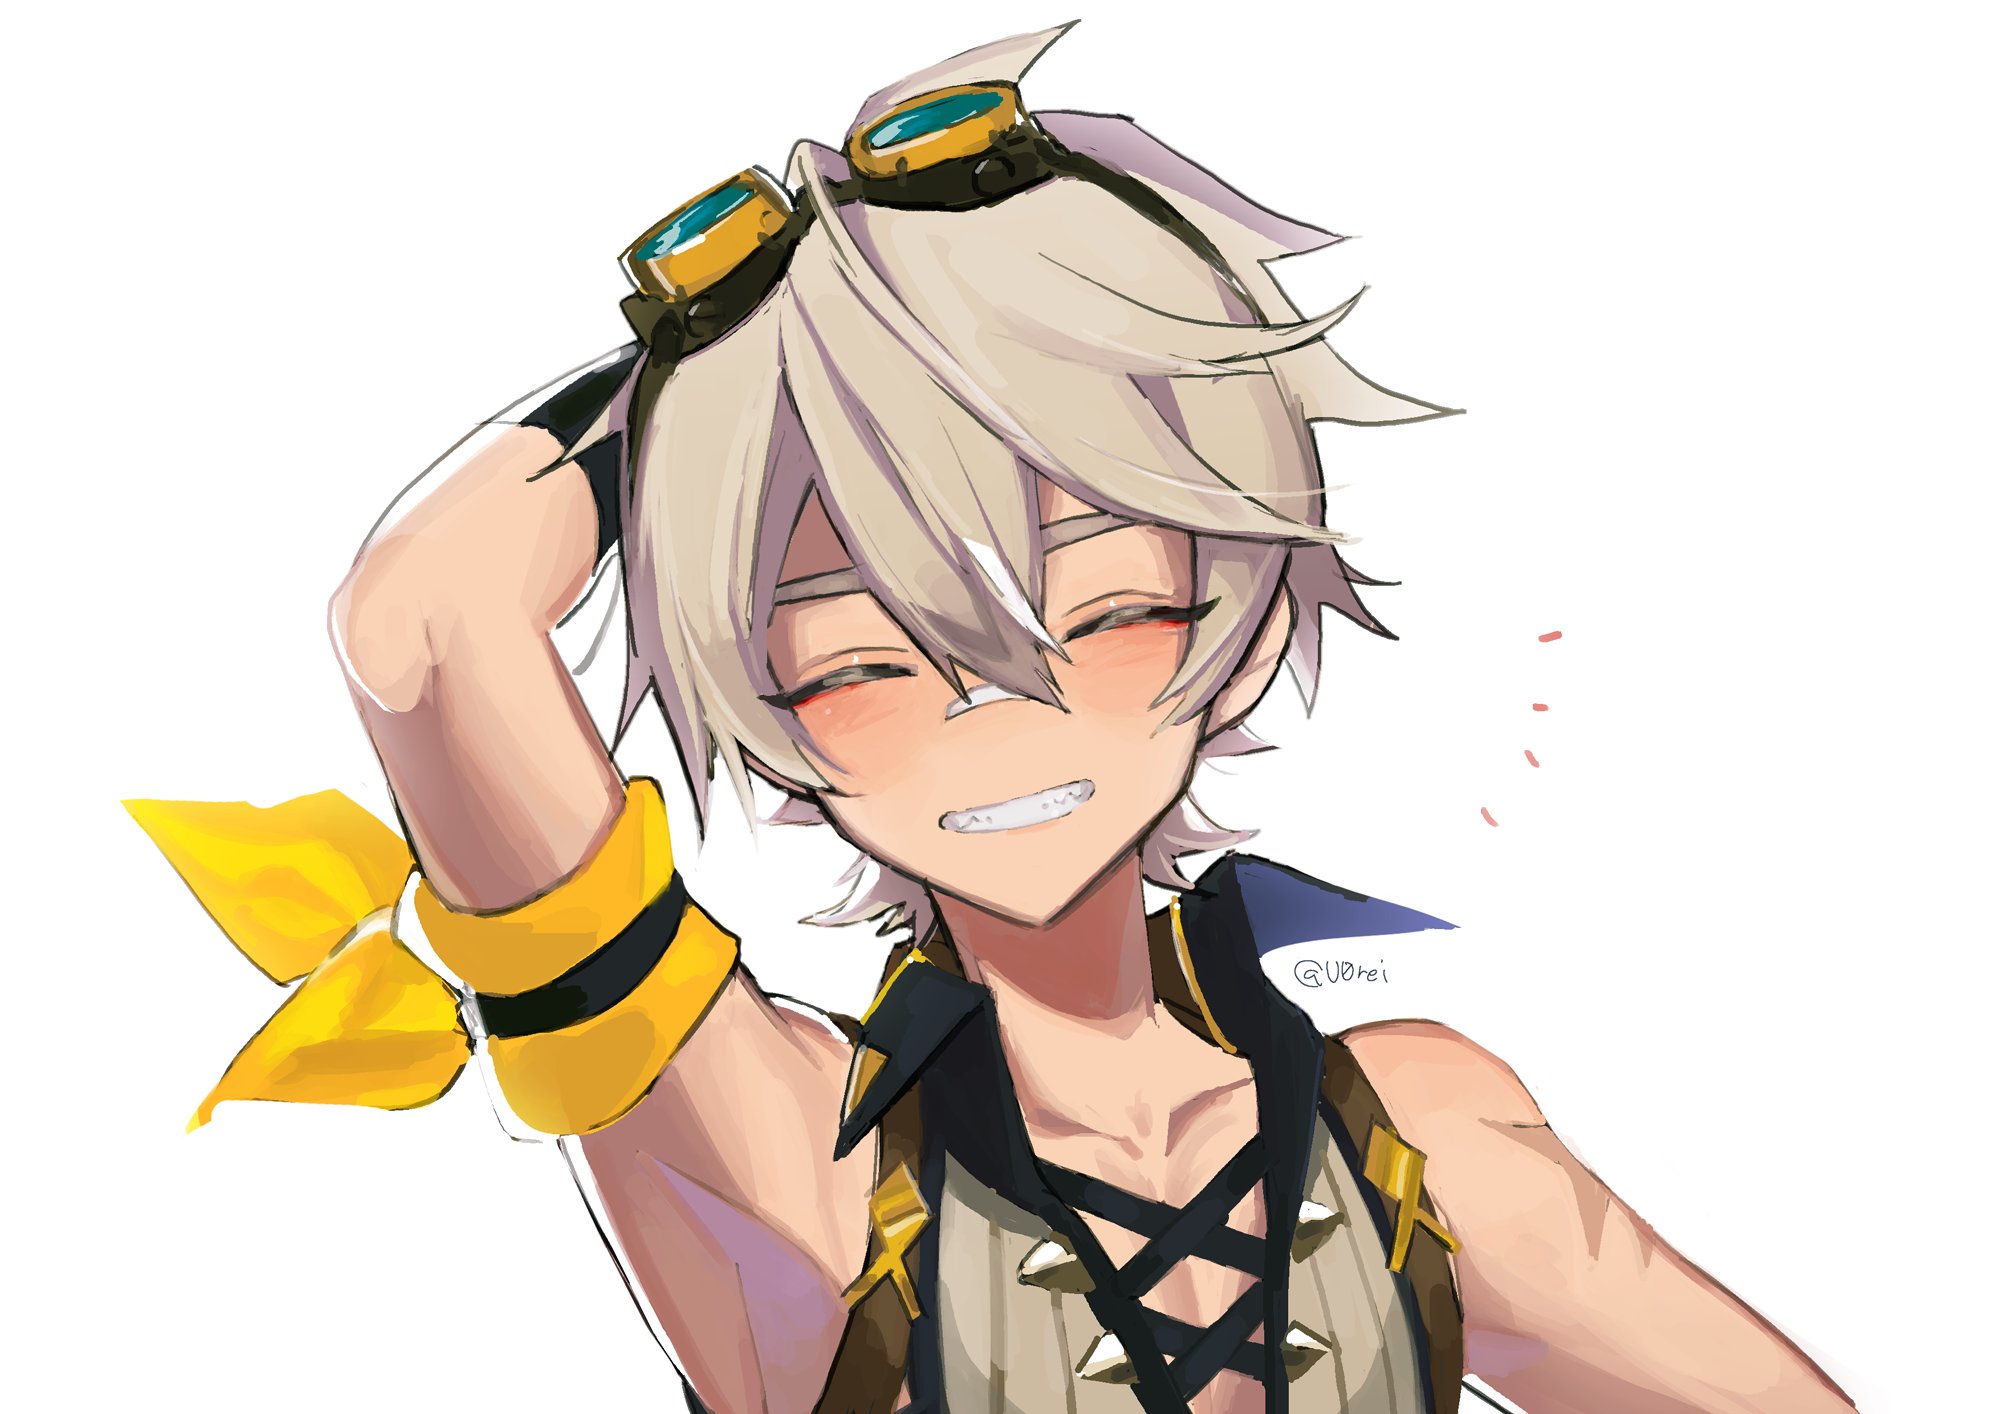
via WA
Everyone else in “Benny’s Adventure Team” quit after witnessing the unending bad luck that follows him, leaving him as the sole remaining member.
He has a positive outlook, is well-mannered, and loves to go on adventures. He experiences long and agonizing streaks of bad luck, but he is also creative, coming up with various solutions to the issues he runs against while traveling.
Young Bennett is slim and well-built, and he frequently has scars from his various accidents whilst exploring.
Builds For Bennett In Genshin Impact
Since Bennett’s kit works with the Pyro element, aside from having an amazing support based Elemental Burst, he can work with other characters in his team and contribute to the total damage by quite a bit.
But due to his Burst, which heals and provides an attack buff to the other teammates, he is considered as a support.
Let’s take a look at what you need to create the optimal build for Bennett:sd
Best Weapons On Bennett
When it comes to choosing the best sword for Bennett, a lot of confusion can be observed. Especially when players compare 5-Star swords to one another, and wondering whether you should go for more base attack or more energy recharge.
Since Bennett mainly needs to buff your team as much as possible by spamming his Burst on cooldown. For that you need to have enough Energy Recharge.
Bennett’s DMG buff to other team members rely completely and only on his own base attack damage. This makes having a high base attack weapon essential to maximize your team.
So weapons with high Energy Recharge can be optimal in the early game, and really good when you do not have enough from your artifacts. But the more you invest into your Bennett, the more base attack becomes important, even more than the Energy Recharge.
This is because you can build up more Energy Recharge through artifacts, but you cannot build more Base Damage.
So let’s take a look at the best possible weapon options for Bennett.
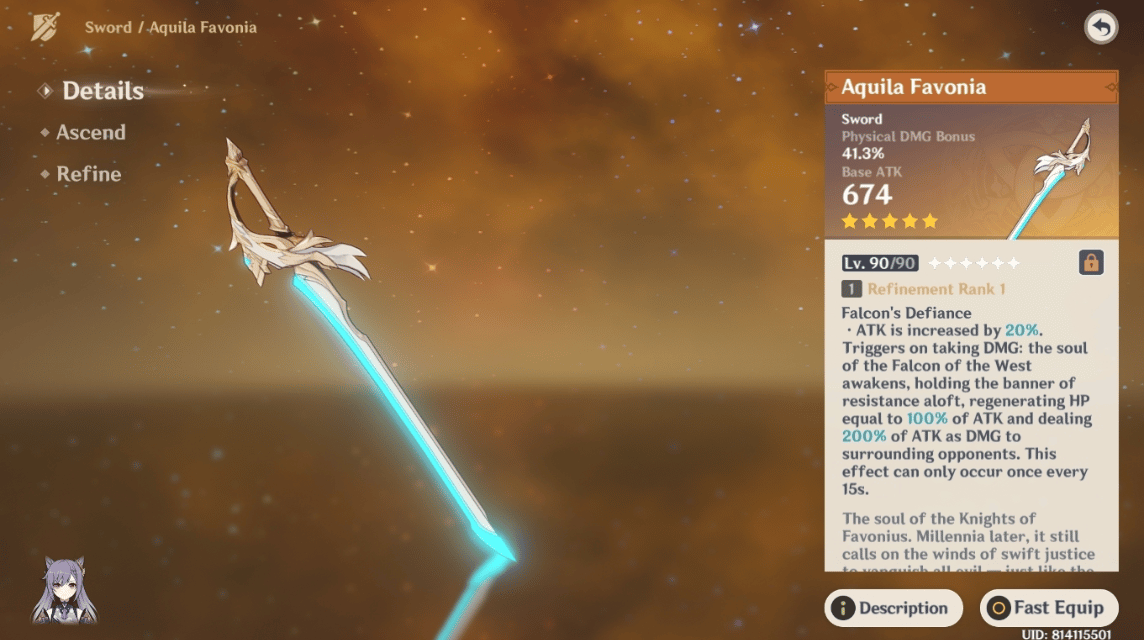
Aquila Favonia
Aquila Favonia is a 5-Star Sword in Genshin Impact. It has one of the highest base damage at max level in the game. Its Bonus Effect gives the wielder a Physical DMG boost as well.
Overall, it provides a lot of pure damage for the wielder who in this case will be Bennett.

via Vcgamers
It has a very fitting weapon Skill as well, increasing the attack by 20%. It triggers every time you take damage, it heals you for 100% of your attack and deals AoE damage equal to 200% of your attack. This is balanced off with a 15 second timer between each trigger.
Stats
The stats distribution for this weapon is given below:
| Base ATK (LVL 1-90) | 2nd Stat Type | 2nd Stat (LvL 1-90) |
| 48 – 674 | Physical DMG Bonus | 9% – 41.3% |
Weapon Refinement
Here are the following changes your weapon’s stats will receive depending upon your Refinement level:
| Stat | Level 1 | Level 2 | Level 3 | Level 4 | Level 5 |
| Upgrade Cost | 2000 Mora | 4000 Mora | 8000 Mora | 16000 Mora | – |
| ATK Increase | 20% | 25% | 30% | 35% | 40% |
| ATK Percentage HP Regen | 100% | 115% | 130% | 145% | 160% |
| AoE Damage | 200% | 230% | 260% | 290% | 320% |
Ascension Cost
The Ascension Costs for this weapon are as follows:
| Item | Quantity |
|---|---|
| Mora | 225,000 |
| Tile of Decarabian’s Tower | 5 |
| Debris of Decarabian’s City | 14 |
| Fragment of Decarabian’s Epic | 14 |
| Scattered Piece of Decarabian’s Dream | 6 |
| Heavy Horn | 23 |
| Black Bronze Horn | 27 |
| Black Crystal Horn | 41 |
| Firm Arrowhead | 15 |
| Sharp Arrowhead | 23 |
| Weathered Arrowhead | 27 |
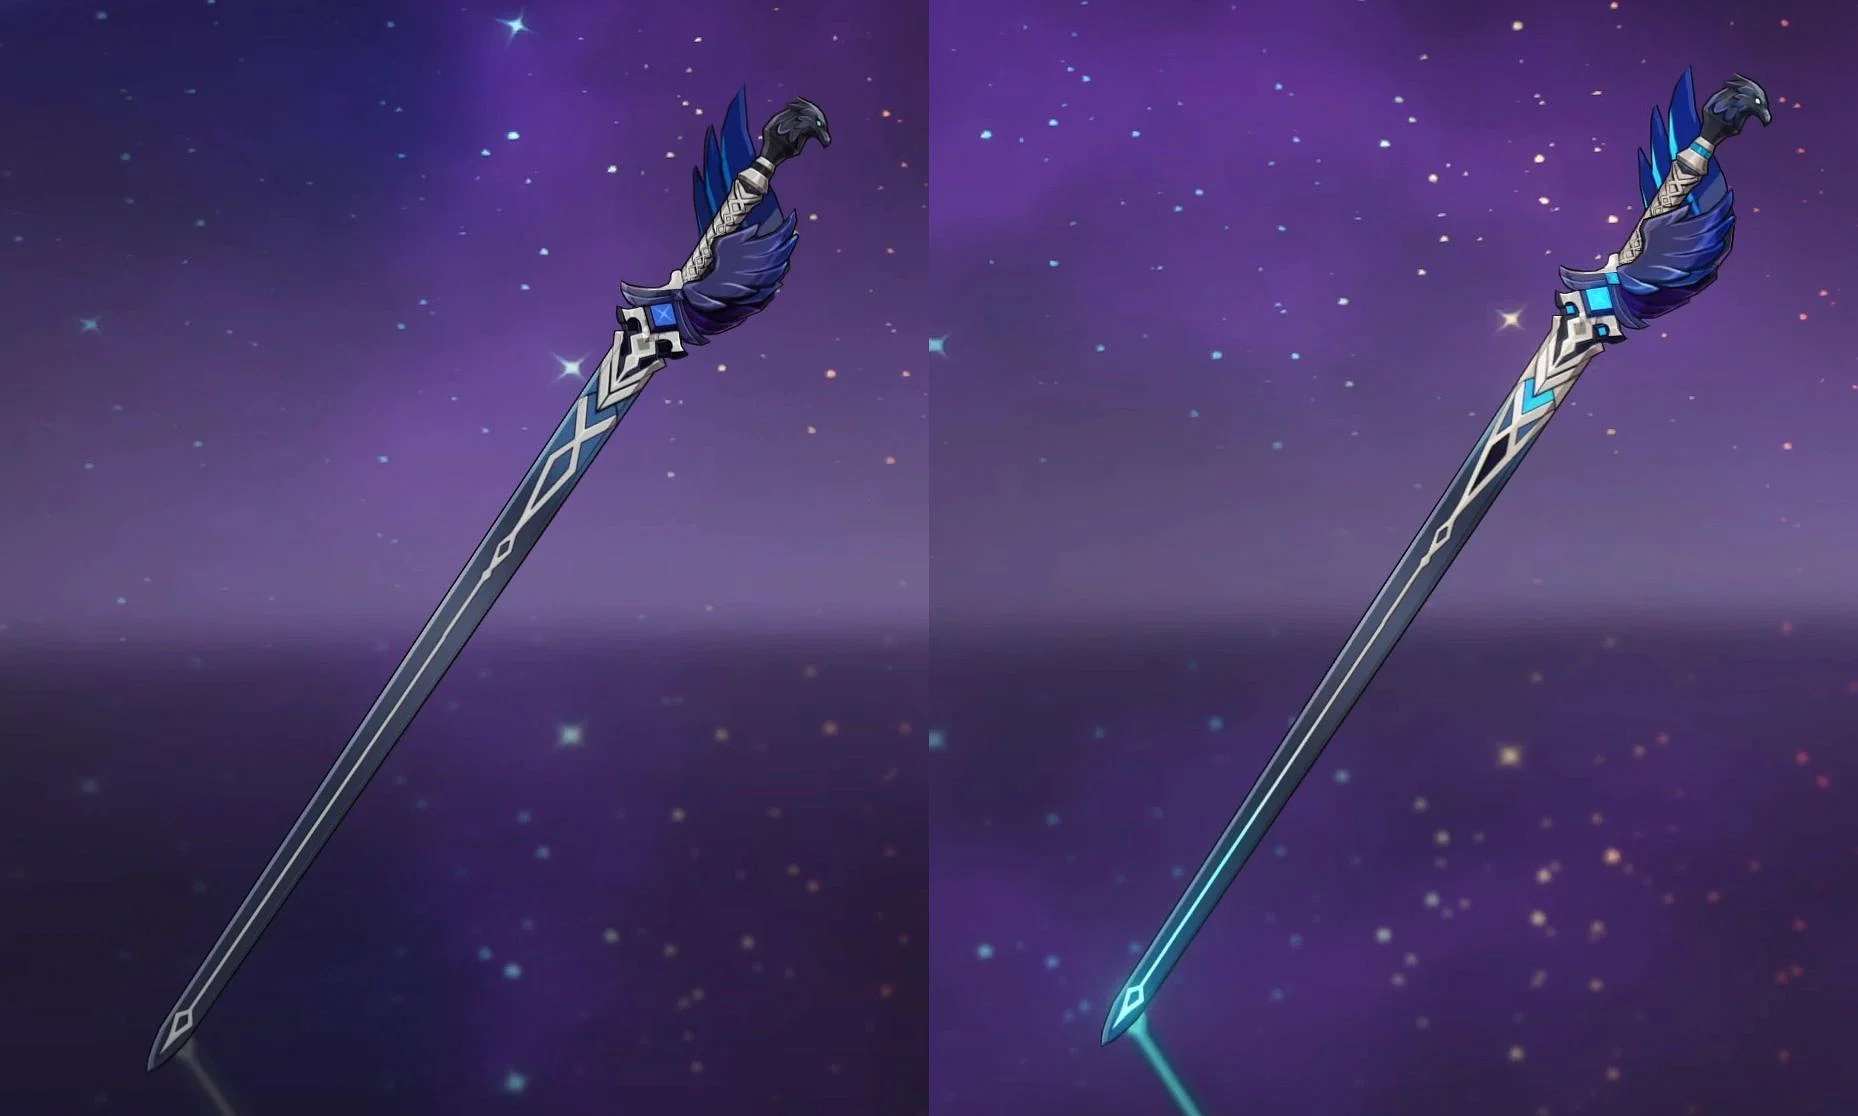
Mistsplitter Reforged
Very similar to the Aquila Favonia, it is mainly for high damage. In fact, it has identical base damage to the Aquila Favonia at max level.
Mistsplitter Reforged is a 5 star weapon in Genshin Impact. Instead of the Physical damage increase as the Bonus Effect, it gives a Crit damage increase.

via GameWith
Mistsplitter’s passive skill provides the wielder with a flat Elemental damage bonus for all elements.
Additionally it provides an additional amount of elemental damage bonus for the character’s elemental type if certain conditions are fulfilled.
Stats
The stat distribution of the Mistsplitter Reforged is as follows:
| Base ATK (LVL 1-90) | 2nd Stat Type | 2nd Stat (LvL 1-90) |
| 48 – 674 | Crit DMG | 9.6% – 44.1% |
Weapon Refinement
Here are the following changes your weapon’s stats will receive depending upon your Refinement level:
| Stat | Level 1 | Level 2 | Level 3 | Level 4 | Level 5 |
| Upgrade Cost | 2000 Mora | 4000 Mora | 8000 Mora | 16000 Mora | – |
| Elemental DMG Bonus | 12% | 15% | 18% | 21% | 24% |
| Mitter’s Emblem Stack 1 | 8% | 10% | 12% | 14% | 16% |
| Mitter’s Emblem Stack 2 | 16% | 20% | 24% | 28% | 32% |
| Mitter’s Emblem Stack 3 | 28% | 35% | 42% | 49% | 56% |
Ascension Cost
The Ascension Costs for this weapon are as follows:
| Item | Quantity |
|---|---|
| Mora | 225,000 |
| Coral Branch of a Distant Sea | 5 |
| Jeweled Branch of a Distant Sea | 14 |
| Jade Branch of a Distant Sea | 14 |
| Golden Branch of a Distant Sea | 6 |
| Chaos Gear | 23 |
| Chaos Axis | 27 |
| Chaos Oculus | 41 |
| Old Handguard | 15 |
| Kageuchi Handguard | 23 |
| Famed Handguard | 27 |
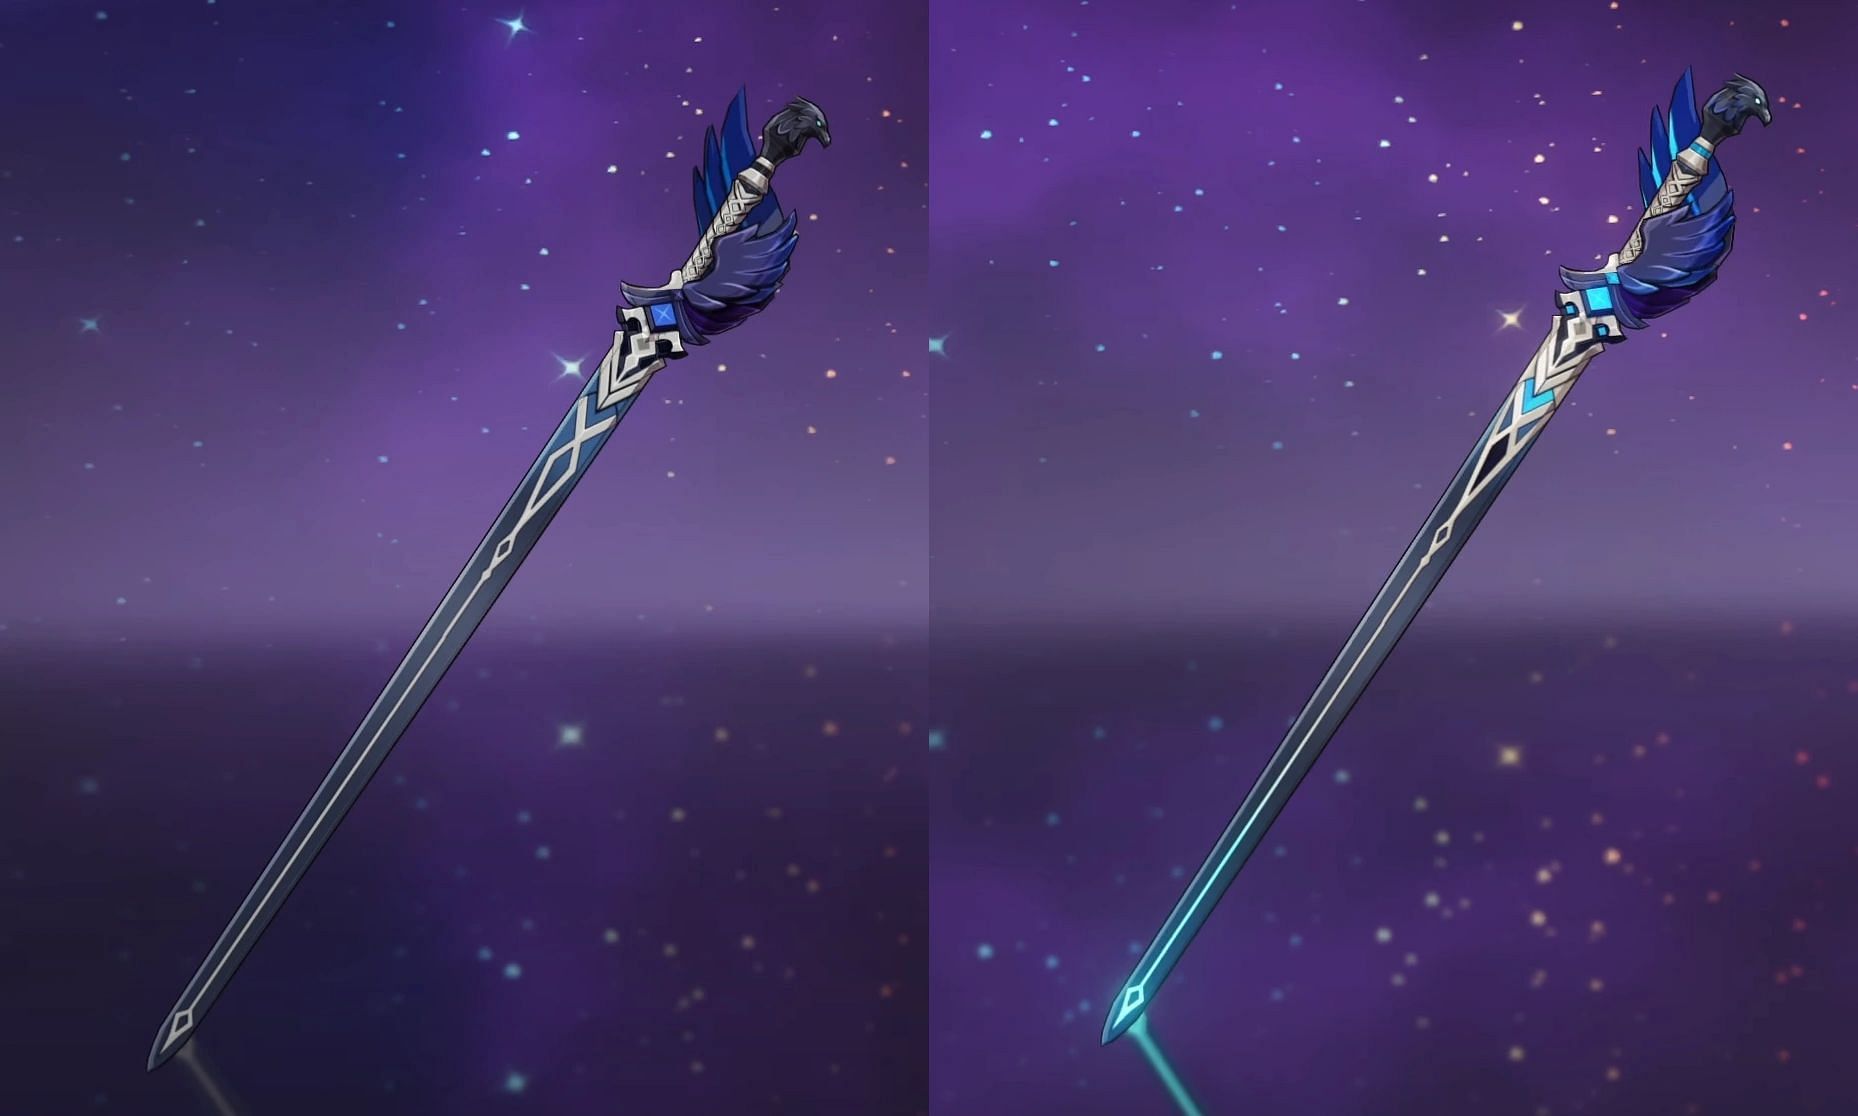
Skyward Blade

via Gamepur
This is a really well rounded 5-Star weapon and it would be recommended to anyone who has it. It has a relatively high base attack while also giving you Energy Recharge. This makes it way easier to build you Bennett and spend your Burst on cooldown.
Also possessing a decent passive weapon skill, increases the Crit rate by 4%. Additionally, it grants a buff called the “Skypiercing Might” when you use your Elemental Burst. This increases the wielder’s movement speed by 10%, attack speed by 10% and the damage of charged normal attacks by 20% for a solid 12 seconds.
Since you will be spamming Bennett’s Burst the second you get it, this is a very good passive.
Stats
The stat distribution of the Skyward Blade is as follows:
| Base ATK (LVL 1-90) | 2nd Stat Type | 2nd Stat (LvL 1-90) |
| 46 – 608 | Energy Recharge | 12% – 55.1% |
Weapon Refinement
Here are the following changes your weapon’s stats will receive depending upon your Refinement level:
| Stat | Level 1 | Level 2 | Level 3 | Level 4 | Level 5 |
| Upgrade Cost | 2000 Mora | 4000 Mora | 8000 Mora | 16000 Mora | – |
| CRIT Rate Increase | 4% | 5% | 6% | 7% | 8% |
| DMG BOOST (% ATK) | 20% | 25% | 30% | 35% | 40% |
Ascension Cost
The Ascension Costs for this weapon are as follows:
| Item | Quantity |
|---|---|
| Mora | 225,000 |
| Boreal Wolf’s Milk Tooth | 5 |
| Boreal Wolf’s Cracked Tooth | 14 |
| Boreal Wolf’s Broken Fang | 14 |
| Boreal Wolf’s Nostalgia | 6 |
| Dead Ley Line Branch | 23 |
| Dead Ley Line Leaves | 27 |
| Ley Line Sprout | 41 |
| Slime Condensate | 15 |
| Slime Secretions | 23 |
| Slime Concentrate | 27 |
The Alley Flash
This is by far the best 4-Star weapon, it was not available on too many banners, but if you managed to get this weapon even at just R1, having an even higher base attack than the Skyward Blade, (although you do lose out on the Energy Recharge) makes it a really good 4-Star option.
via Sportskeeda
It provides a +12 Elemental Mastery and a very good passive Skill that increases the damage done by the wielder constantly! This will however dismantle the effect for 5 seconds every time you take damage.
Stats
The stat distribution of The Alley Flash is as follows:
| Base ATK (LVL 1-90) | 2nd Stat Type | 2nd Stat (LvL 1-90) |
| 45 – 620 | Elemental Mastery | 12 – 55 |
Weapon Refinement
Here are the following changes your weapon’s stats will receive depending upon your Refinement level:
| Stat | Level 1 | Level 2 | Level 3 | Level 4 | Level 5 |
| Upgrade Cost | 1000 Mora | 2000 Mora | 4000 Mora | 8000 Mora | – |
| DMG Boost | 12% | 15% | 18% | 21% | 24% |
Ascension Cost
The Ascension Costs for this weapon are as follows:
| Item | Quantity |
|---|---|
| Mora | 150,000 |
| Tile of Decarabian’s Tower | 3 |
| Debris of Decarabian’s City | 9 |
| Fragment of Decarabian’s Epic | 9 |
| Scattered Piece of Decarabian’s Dream | 4 |
| Heavy Horn | 15 |
| Black Bronze Horn | 18 |
| Black Crystal Horn | 27 |
| Divining Scroll | 10 |
| Sealed Scroll | 15 |
| Forbidden Curse Scroll | 18 |
Other Accessible weapons like free-to-play alternatives etc. Weapons with 44 base damage at level 1 for example the “Prototype Rancour” or the “Blackcliff Longsword” can be really great options for a good base attack option. These are late game options with the assumption that you have at least 200 Energy Recharge through your Artifacts.
If that is not the case and you have a bit low Energy Recharge, you can go for any sword with relatively high base damage and with an Energy Recharge Bonus effect for example: Festering Desire or Favonious Sword.
Do be careful with the Favonious Sword though as it has relatively low base attack at the cost of an Energy Recharge Bonus effect. It can make you miss out on a lot of team damage overall as your Bennett will buffing the other teammates for less.
Best Artifacts On Bennett
Moving on to Bennett’s artifact sets, there are some good options to go for, to get an optimal support build for Bennet.
Let’s get right into the first one without any delay.
Noblesse Oblige:
Generally for most players, the Noblesse Oblige will be your go-to set. This is because the Noblesse Oblige will buff your party member’s attack by 20% whenever you use your Burst.
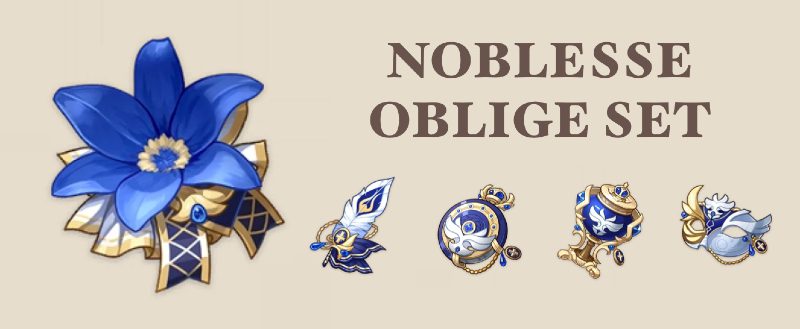
via Spiel Times
This is a bonus effect which surprisingly stacks on the already insane buff that Bennett’s Burst gives to the other party members. It also lasts roughly the same duration. This basically means you will be providing your team with a greater attack bonus due to the two way buff.
Bennett is a character who wants to use his Burst on cooldown constantly, and have the other teammates DPSing constantly for max damage. This will result in really good uptime on the Noblesse Oblige set buff and makes it a perfect option for Bennett.
The Noblesse Oblige set consists of the following:
- Flower of Life: Royal Flora
- Plume of Death: Royal Plume
- Sands of Eon: Royal Pocket Watch
- Goblet of Eonothem: Royal Silver Urn
- Circlet of Logos: Royal Masque
The set bonuses for this set are as follows:
2-Piece Bonus
The 2 piece simply increases your Elemental Burst damage by 20%.
4-Piece Bonus
As mentioned earlier, everytime you use your Elemental Burst, the other party members receive a 20% damage boost for 12 seconds.
How to obtain
You can obtain this from the Clear Pool and Mountain Cavern Domain of blessing in Liyue.
The Exile

via Games Atlas
Unlike the Noblesse set, this is a 4-Star set. This mainly acts as an energy source for your Bennett and the rest of your team. This will also get a lot less stats on your Bennett as compared to Noblesse and other 5-Star sets.
The Exile set consists of the following:
- Flower of Life: Exile’s Flower
- Plume of Death: Exile’s Feather
- Sands of Eon: Exile’s Pocket Watch
- Goblet of Eonothem: Exile’s Goblet
- Circlet of Logos: Exile’s Circlet
The set bonuses are as follows:
2-Piece Bonus
Simply provides the wielder with a 20% Energy Recharge Increase. As mentioned earlier, Bennett needs more Energy anyway so this is not a bad option.
4-Piece Bonus
This bonus is linked to your Burst, every time the Burst is used, it regenerates 2 Energy every 2 seconds for 6 seconds for the party members but not the wielder.
How To Obtain
This set can be obtained by challenging the following bosses:
- Pyro Abyss Mage
- Cryo Abyss Mage
- Hydro Abyss Mage
- Ruin Guard
- Stonehide Lawachurl
- Blading Axe Mitachurl
- Rock Sheildwall Mitachurl
- Fatui Pyro Agent
- Fatui electro cicin Mage
- Stormterror Davalin
- Lupus Boreas
- Hilichurl Cheiftain
- Geo Hypostasis
- Electro Hypostasis
- Cyro Regisvine
- Geovishap Hatchling
- Ruin Hunter
- Oceanid
- Childe
- Eye of the storm
- Frostarm Lawchurl
- Ruin Grader
- Ice Sheildwall Mitachurl
- Geovishap
- Primo Geovishap
- Azhdaha
- Cyro Hypostasis
- Mirror Maiden
- Perpetual Mechanical Array
- Ruin Sentinal
- Electro Abyss Mage
- Hydro Hypostasis
- La Signora
- Thunder Manifestation
- Rockfond Rifthound Whelp
- Rockfond Rifthound
- Thundercraven Rifthound Whelp
- Thundercraven Rifthound
- Golden wolflord
- Bathysmal Vishap Herd
- Raiden shogun
- Ruin Serpent
- Electro Regisvine
- Aeonblight Drake
- Scaramouche Boss
Instructor

via GameWith
Similar to The Exile, this is also a 4-Star set. This set particularly has a lot of potential, it can even be better than the Noblesse set in some cases particularly in Elemental Reaction teams when it comes to DPS.
This is however more difficult to proc as compared to Noblesse and again, being a 4-Star set, will provide way less stats.
The Instructor set consists of the following:
- Flower of Life: Instructor’s Brooch
- Plume of Death: Instructor’s Feather Accessory
- Sands of Eon: Instructor’s Pocket Watch
- Goblet of Eonothem: Instructor’s Tea Cup
- Circlet of Logos: Instructor’s Cap
The set bonuses are as follows:
2-Piece Bonus
The 2 piece bonus will increase Elemental Mastery by 80. In reaction teams with a cryo character, Bennett can dish out some insane damage numbers on his own.
4-Piece Bonus
Every time an elemental reaction is triggered, it will increase the team members’ Elemental Mastery by 120 for 8 seconds.
How To Obtain
Similar to The Exile, this can also be found only by challenging bosses. They are given below:
- Pyro Abyss Mage
- Cryo Abyss Mage
- Hydro Abyss Mage
- Ruin Guard
- Stonehide Lawachurl
- Blading Axe Mitachurl
- Rock Sheildwall Mitachurl
- Fatui Pyro Agent
- Fatui electro cicin Mage
- Stormterror Davalin
- Lupus Boreas
- Hilichurl Cheiftain
- Geo Hypostasis
- Electro Hypostasis
- Cyro Regisvine
- Geovishap Hatchling
- Ruin Hunter
- Oceanid
- Childe
- Eye of the storm
- Frostarm Lawchurl
- Ruin Grader
- Ice Sheildwall Mitachurl
- Geovishap
- Primo Geovishap
- Azhdaha
- Cyro Hypostasis
- Mirror Maiden
- Perpetual Mechanical Array
- Ruin Sentinal
- Electro Abyss Mage
- Hydro Hypostasis
- La Signora
- Thunder Manifestation
- Rockfond Rifthound Whelp
- Rockfond Rifthound
- Thundercraven Rifthound Whelp
- Thundercraven Rifthound
- Golden wolflord
- Bathysmal Vishap Herd
- Raiden shogun
- Ruin Serpent
- Electro Regisvine
- Aeonblight Drake
- Scaramouche Boss
What’s The Best Team For Bennett?
Moving on to Bennett’s best teams and synergies to get the most value out of his team comps as a support. This is because Bennett’s healing and damage buff is so good. This gives him a free pass into practically any team that requires a healer and Bennett will usually be the best option.
With that said, let’s look at some more specific team synergies other than just generic teams where Bennett can be used.
-
Support Battery Team Comp (Raiden National Team)
This team mainly utilizes Bennett as a battery to provide energy for the DPS carries to spam their Bursts. Additionally his damage bonus is a plus and makes the team super solid.
Xiangling

Characters who want a Pyro battery, like Xiangling, require a source of energy so they can spam their bursts. The finest illustration of this is Xiangling, who needs the particles Bennett gives her. Additionally, as her Pyronado Burst has a lingering effect, using it inside of Bennett’s Burst causes you to deal a lot of damage for the length of the Pyronado.
Due to all this, any Xiangling team you run, should have Bennett.
Raiden Shogun
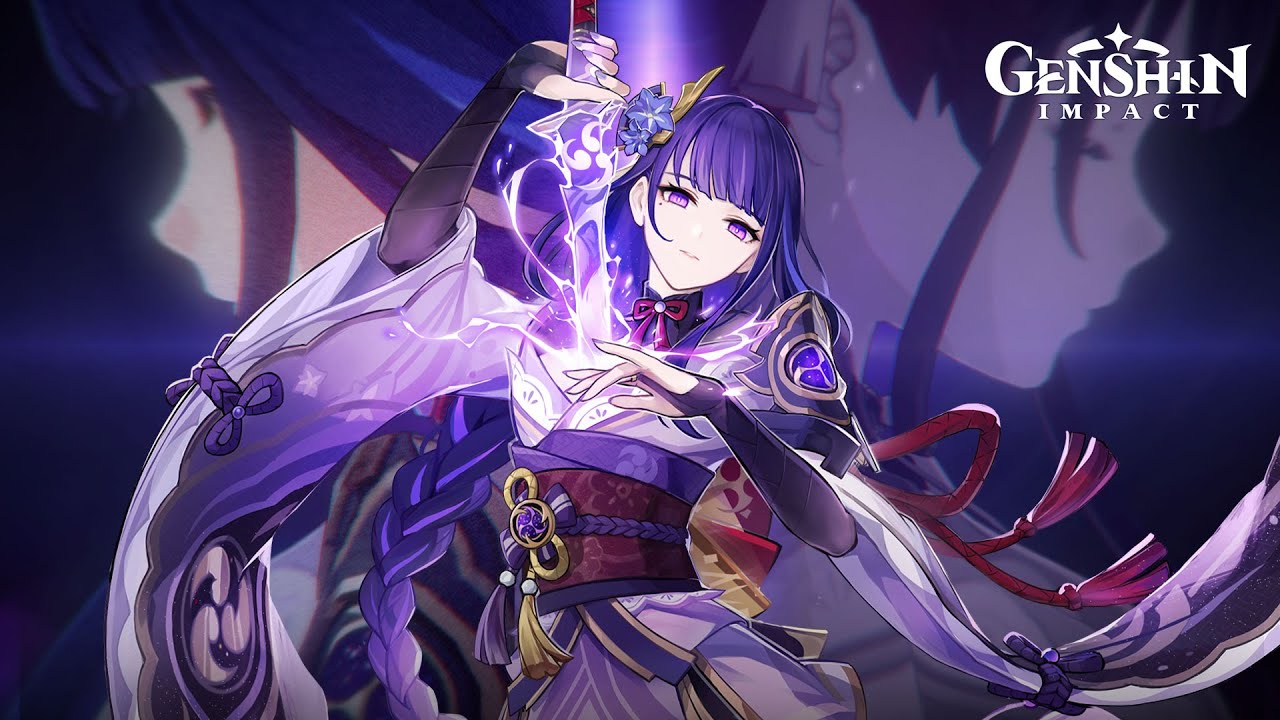
via Animevania
Raiden is placed in place of Chongyun in the original national team. She along with Xingling will be the main DPS of this team. You can utilize Bennett’s attack buff to its fullest with a 5-Star hyper carry like Raiden.
Plus, Raiden’s Elemental Burst can be used to deal extensive amounts of damage.
Xingqiu
via Pocket Tactics
The other cornerstone of this Genshin Impact team is Xingqiu, who supplies the crucial reactions required to keep the damage pouring.
His Elemental Explosion Guhua Sword: Raincutter offers Xiangling’s Pyronado a continuous stream of Hydro application and damage that it can vaporize.
-
Character Synergies
There are many other team comps that can make use of Bennett’s support capabilities. If it is not clear already, this is due to his ability to synergize with practically any DPS character.
In fact, even characters that synergize negatively with him, he can still be the best option.
With that being said, let’s take a look at characters that synergize very well and can make a good team in any team comp.
Chongyun

via Pocket Tactics
The earlier mentioned Support team comp namely – Raiden National Team, is a hybrid of the original National team. The original one consists of Chongyun instead of Raiden Shogun.
Chongyun can synergize especially well with Bennett due to his Burst – Cloud-Parting Star. This attack summons 3 Cryo blades and have Aoe damage.
The reason for this synergy is because Bennett’s Pyro application is strong enough to sustain the entirety of Chongyun’s Burst which has the ability to proc melt 3 times. This makes for some insane damage.
Ganyu

via Forbes
Using Bennett with Xiangling can help enable melt teams with Ganyu. Melt Ganyu is quite heavily dependent on the pyro support of Xiangling AND Bennett.
And with the addition of Bennett’s attack buff, this will make Ganyu’s charged attack deal crazy amounts of damage due to the 2 part attack of the fully charged version.
Rosaria

via VCgamers
The reverse-melt quick swap team also benefits from Pyro Resonance of Bennett and Xiangling. And again, with the addition of Bennett’s damage buff and heal, and some more buffs if you happen to be running Noblesse Oblige artifact set.
For Rosaria specifically, Bennett’s buff is especially superb because Rosara’s Burst, similar to Xiangling’s Pyronado, is of a lingering nature. And if it is cast while being within Bennett’s Burst radius, it will be imbued with the damage boost for the entirety of the attack even if Bennett’s Burst happens to run out first.
Aside from these characters specifically, as it was stated before, Bennett’s Burst makes him very versatile and gives him a free pass in quite literally any team. But again, these characters with their respective teams can capitalize more efficiently than others.
Bennett Ability Rundown
Bennett’s Burst has been mentioned many times throughout this guide, as it is the essential move that makes him so unique and strong.
Let’s take a look at the rest of his kit as well.
Normal Attack: Strike Of Fortune
This is a simple sword moveset, Bennett performs a 5 attack combo which can be interrupted.

via Wiki
Here is how the stat scaling looks like:
| 1 | 2 | 3 | 4 | 5 | 6 | 7 | 8 | 9 | 10 | 11 | |
| 1-Hit DMG (%) | 44.55 | 48.17 | 51.8 | 56.98 | 60.61 | 64.75 | 70.45 | 76.15 | 81.84 | 88.06 | 94.28 |
| 2-Hit DMG (%) | 42.74 | 46.22 | 49.7 | 54.67 | 58.15 | 62.13 | 67.59 | 73.06 | 78.53 | 84.49 | 90.45 |
| 3-Hit DMG (%) | 54.61 | 59.05 | 63.5 | 69.85 | 74.3 | 79.38 | 86.36 | 93.34 | 100.33 | 107.95 | 115.57 |
| 4-Hit DMG (%) | 59.68 | 64.54 | 69.4 | 76.34 | 81.2 | 86.75 | 94.38 | 102.02 | 109.65 | 117.98 | 126.31 |
| 5-Hit DMG (%) | 71.9 | 77.75 | 83.6 | 91.96 | 97.81 | 104.5 | 113.7 | 122.89 | 132.09 | 142.12 | 152.15 |
Charged Attack
This move consumes a fixed amount of stamina every time and makes Bennett perform 2 rapid sword strikes.

via Wiki
The stat scaling is as follows:
|
Charged Attack |
|||||||||||
|
Charged Attack DMG (%) |
55.9
+ 60.72 |
60.45
+ 65.66 |
65
+ 70.6 |
71.5
+ 77.66 |
76.05
+ 82.6 |
81.25
+ 88.25 |
88.4
+ 96.02 |
95.55
+ 103.78 |
102.7
+ 111.55 |
110.5
+ 120.02 |
118.3
+ 128.49 |
| Charged Attack Stamina Cost |
20 |
||||||||||
Plunge Attack
This is another standard move, a sort of ground pound starting mid-air and dealing Aoe damage as Bennett lands. Also does damage to any enemies on the way down.

via Wiki
The damage numbers for the plunge attack are given below:
|
Plunging Attack |
|||||||||||
| Plunge DMG (%) | 63.93 | 69.14 | 74.34 | 81.77 | 86.98 | 92.92 | 101.1 | 109.28 | 117.46 | 126.38 |
135.3 |
|
Low Plunge DMG (%) |
127.84 | 138.24 | 148.65 | 163.51 | 173.92 | 185.81 | 202.16 | 218.51 | 234.86 | 252.7 | 270.54 |
| High Plunge DMG (%) | 159.68 | 172.67 | 185.67 | 204.24 | 217.23 | 232.09 | 252.51 | 272.93 | 293.36 | 315.64 |
337.92 |
Elemental Skill – Passion Overload
Bennett’s Skill is a straightforward fiery slash dealing Pyro damage which can be tapped and charged up. There are 3 versions, the simple tap makes Bennett swipe once, this one being the most used since it has a very low cooldown.

via Wiki
The level 1 charged version of this makes Bennett slash twice whilst also launching enemies that are hit. And the level 2, fully charged attack is a triple slash with solid Pyro damage, but the last attack triggers an explosion launching both Bennett and the enemies. (Bennett takes no damage due to this)
Here is how the Skill’s attribute scaling looks like:
|
1 |
2 | 3 | 4 | 5 | 6 | 7 | 8 | 9 | 10 | 11 | 12 | 13 | 14 | |
| Press DMG (%) | 137.6 | 147.92 | 158.24 | 172 | 182.32 | 192.64 | 206.4 | 220.16 | 233.92 | 247.68 | 261.44 | 275.2 |
292.4 |
310 |
|
Charge Level 1 DMG (%) |
84
+ 92 |
90.3
+ 98.9 |
96.6
+ 105.8 |
105
+ 115 |
111.3
+ 121.9 |
117.6
+ 128.8 |
126
+ 138 |
134.4
+ 147.2 |
142.8
+ 156.4 |
151.2
+ 165.6 |
159.6
+ 174.8 |
168
+ 184 |
178.5
+ 195.5 |
189
+ 207 |
| Charge Level 2 DMG (%) | 88
+ 96 |
94.6
+ 103.2 |
101.2
+ 110.4 |
110
+ 120 |
116.6
+ 127.2 |
123.2
+ 134.4 |
132
+ 144 |
140.8
+ 153.6 |
149.6
+ 163.2 |
158.4
+ 172.8 |
167.2
+ 182.4 |
176
+ 192 |
187 + 204 |
198
+ 216 |
|
Explosion DMG (%) |
132 | 141.9 | 151.8 | 165 | 174.9 | 184.8 | 198 | 211.2 | 224.4 | 237.6 | 250.8 | 264 | 280.5 | 297 |
| CD |
5/7.5/10s |
|||||||||||||
Elemental Burst – Fantastic Voyager
Bennett’s Burst, is the main reason you want to use him. Bennett performs a jump attack which is followed by a field being placed down that will constantly heal your party members inside of it and additionally, provide them with a huge attack buff.
via Wiki
As mentioned in the weapons segment, this attack buff scales with Bennett’s base attack, so leveling Bennett up and having a high base attack weapon is very important.
However, if your Bennet is C0 (no Constellations unlocked), you will only gain the insane attack bonus that makes this ability so good, once you are above 70% HP and no longer healing from Bennett’s Burst.
Because of how much you heal however, and the almost constant uptime of this ability, this is in most cases not a big deal.
Here is a look into its stats:
| 1 | 2 | 3 | 4 | 5 | 6 | 7 | 8 | 9 | 10 | 11 | 12 | 13 | 14 | |
| Skill DMG (%) | 232.8 | 250.26 | 267.72 | 291 | 308.46 | 325.92 | 349.2 | 372.48 | 395.76 | 419.04 | 442.32 |
465.6 |
494.7 | 524 |
|
Continuous Regeneration Per Sec |
6% Max HP
+ 577 |
6.45% Max HP
+ 635 |
6.9% Max HP
+ 697 |
7.5% Max HP
+ 765 |
7.95% Max HP
+ 837 |
8.4% Max HP
+ 914 |
9% Max HP
+ 995 |
9.6% Max HP
+ 1082 |
10.2% Max HP
+ 1174 |
10.8% Max HP
+ 1270 |
11.4% Max HP
+ 1371 |
12% Max HP
+ 1477 |
12.75% Max HP
+ 1587 |
13.50% Max HP
+ 1703 |
| ATK Bonus Ratio (% Base ATK) | 56 | 60.2 | 64.4 | 70 | 74.2 | 78.4 | 84 | 89.6 | 95.2 | 100.8 | 106.4 | 112 | 119 | 126 |
| Duration |
12s |
|||||||||||||
|
CD |
15s | |||||||||||||
| Energy Cost |
60 |
|||||||||||||
Bennett – Passive Talent
Bennett’s Passive talents improve his Elemental Skill quite a bit, let’s take a look at the nitty-gritty details of them.
via GAMERS DECIDE
Ascension 1 Talent – Rekindle
This Talent is a simple cooldown reduction of Bennett’s Elemental Skill by 20%. Bennett’s Skill already has quite low cooldown and with this, the tap version of the Skill becomes a decent attack to frequently use.
Ascension 4 Talent – Fearnaught
Just like the first Talent, this gives his Elemental Skill another huge cooldown reduction by a whopping 50%. But this only takes effect when Bennett himself performs the skill whilst being within the radius of his Burst. Additionally, he does not get launched from the Level 2 charged version as well.
This makes the Elemental Skill’s Tap version very spammable and a solid option.
It Should Be Safe… – Automatic Unlock
The Auto unlock Talent of Bennett reduces the time consumed by 25% when exploring in the region he belongs to: Mondstadt.
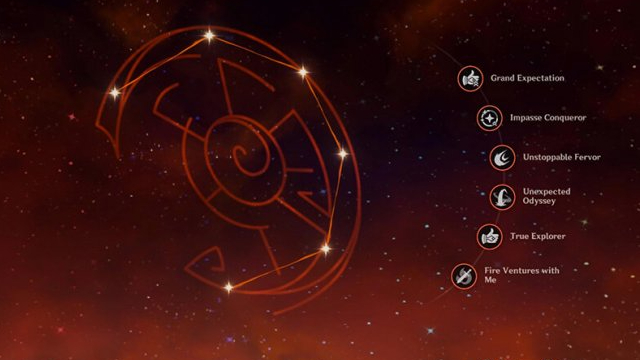
Bennett – Constellations
Let’s take a look at Bennett’s Constellations, how they improve Bennett’s and which ones are most helpful.

via Wiki
Level 1 Constellation – Grand Expectation
Right off the bat, the C1 Constellation is an insane upgrade to his already super strong Elemental Burst. This Constellation removes all HP restrictions on Bennett’s Burst and adds a damage buff of 20% of his base damage for any teammate inside.
This means that you will no longer be alternating between getting a damage boost and healing from Bennett’s Burst, but instead get both simultaneously.
In fact, this Constellation becomes more of a necessity than a recommendation.
Level 2 Constellation – Impasse Conqueror
The C2 Constellation increases Bennett’s Energy Recharge by a whopping 30% but only if his HP falls below 70%. Very straightforward but since Bennett heals a ton already, if you are below 70% health, in most cases you are about to die, but of course in exceptional cases this can prove to be very helpful.
Level 3 Constellation – Unstoppable Fervor
Another upgrade to Bennett’s Elemental Skill. This Constellation increases his Skill’s max level by 3. It is a simple and good upgrade to the already solid Skill.
Level 4 Constellation
The C4 Constellation is similar to the C3 one as it also improves the Elemental Skill. If you input a normal attack whilst in the animation of the Skill’s charged level 1 version, you can perform an additional attack. This does 135% damage of the second part of the Charge level 1 version.
Level 5 Constellation
The C5 Constellation also grants 3 extra levels just like the C4 but to the Elemental Burst instead of the skill. Not entirely required but is not bad in any way.
Level 6 Constellation
C6 Constellation gives another massive buff to the Elemental Burst. It makes it to where every sword, claymore, or pole-arm wielding character inside the Burst’s radius gets a 15% Pyro damage bonus. And on top of that, their attacks are infused with Pyro Damage.
Bennett’s Ascension: Stats and Material Costs
All ascension bonuses and material costs required for leveling up Bennett are given below:
| Ascension
Phase |
Level | Base
HP |
Base
ATK |
Base
DEF |
Special Stat |
|
0✦ |
1/20 | 1,039 | 16 | 64 | — |
| 20/20 | 2,670 | 41 |
166 |
||
Ascension Cost (0 → 1)
 Mora | via Wiki 20,000  Agnidus Agate Sliver | via Wiki 1  Windwheel Aster | via Wiki 3  Treasure Hoarder Insignia | via Wiki 3 |
|||||
|
1✦ |
20/40 | 3,446 | 53 | 214 | — |
| 40/40 | 5,162 | 79 |
321 |
||
| Ascension Cost (1 → 2)
Mora | via Wiki 40,000  Agnidus Agate Fragment | via Wiki 3 Windwheel Aster | via Wiki 10 Treasure Hoarder Insignia | via Wiki 15  Everflame Seed | via Wiki 2 |
|||||
|
2✦ |
40/50 | 5,714 | 88 | 355 | 6.7% |
| 50/50 | 6,573 | 101 |
408 |
||
| Ascension Cost (2 → 3)
Mora | via Wiki 60,000 Agnidus Agate Fragment | via Wiki 6 Windwheel Aster | via Wiki 20  Silver Raven Insignia | via Wiki 12 Everflame Seed | via Wiki 4 |
|||||
|
3✦ |
50/60 | 7,308 | 112 | 454 | 13.4% |
| 60/60 | 8,167 | 125 |
508 |
||
| Ascension Cost (3 → 4)
Mora | via Wiki 80,000  Agnidus Agate Fragment | via Wiki 3 Windwheel Aster | via Wiki 30 Silver Raven Insignia | via Wiki 18 Everflame Seed | via Wiki 8 |
|||||
|
4✦ |
60/70 | 8,719 | 134 | 542 | 13.4% |
| 70/70 | 9,576 | 147 |
595 |
||
| Ascension Cost (4 → 5)
Mora | via Wiki 100,000 Agnidus Agate Fragment | via Wiki 6 Windwheel Aster | via Wiki 45  Golden Raven Insignia | via Wiki 12 Everflame Seed | via Wiki 12 |
|||||
|
5✦ |
70/80 | 10,128 | 156 | 630 | 20.1% |
| 80/80 | 10,987 | 169 |
683 |
||
| Ascension Cost (5 → 6)
Mora | via Wiki 120,000  Agnidus Agate Gemstone | via Wiki 6 Windwheel Aster | via Wiki 60 Golden Raven Insignia | via Wiki 24 Everflame Seed | via Wiki 20 |
|||||
|
6✦ |
80/90 | 11,538 | 177 | 717 | 26.8% |
| 90/90 | 12,397 | 191 |
771 |
||
Bennett: Trial By Fire: Lore and Ability Showcase
Here is the official Bennett demo and showcase:
How To Obtain Bennett?
You can get Bennett on your team from gacha banners and Paimon’s Bargain using the in-game currency.
When it comes to Gacha banners, there are three types of them:
1. Featured Banner
These banners feature some characters to wish from. A 4-star item in any banner is guaranteed for every 10 wishes, and there is a 50% chance of getting one of the promoted characters. Players are guaranteed to receive a promoted character in the subsequent ten wishes if they do not receive one in the first ten.
2. Weapon Banner (Epitome Invocation)
Just like the Featured banner, the weapon banner also promotes times. This means getting characters is possible but the chances are low since they are not promoted.
3. Standard Banner (Wanderlust Invocation)
In this banner, you can get any 4-star character but the chances to get a specific character like Bennett in this case will be lower.
The other method to get Bennett is from Paimon’s Bargain shop. Unfortunately Bennett has only appeared twice in the shop, once in Nov 2020 and once in May 2021.
Try to keep an eye on Paimon’s Bargain shop and look out for new banners to see if Bennett is featured.
Conclusion
To sum up everything that has been stated thus far, Bennett is one of the best Support for characters Genshin Impact has to offer. He is incredibly flexible in general but also has very high synergy with Pyro characters or any characters that need a power support.
His versatile kit makes him a very fun Enabler and allows for the creation of very strong teams for example: National Team, Reverse-Melt Team, etc.
Investing in Bennett is never a bad idea, you can fit him in your current team and have positive results in most cases.
Despite being deemed unlucky by the world of Genshin Impact, Bennett still has a lot to offer to us players.
This is the build that we recommend for Bennett in Genshin Impact. If you are interested in learning more then you can check out our guide on how you can investigate the mysterious devices.


