
Archers have become quite popular in the Genshin Impact roster lately. They deal large amounts of damage while standing at a safe distance. One such example is Amber – with her plethora of deadly builds.
In terms of basic rarity, Amber is a regular Pyro Bow character that’s generally built to work as a sub-DPS carry or support for the team. However, optimizing her build can prove to be a challenge – especially if you’re new to the game.
So, in this guide, we will show everything you need to know in order to play a deadly yet charming Amber. So on that note, let’s jump right in and get started with this Amber build guide!
Who Is Amber In Genshin Impact?
As mentioned previously, Amber is a 4-star Pyro character who is the only remaining Outrider of the Knights of Favonius.
Being a sweetheart, she’s always willing to help the people of Mondstadt regardless of the task. Till now, there haven’t been any reports of the citizens taking advantage of her kindness.

via WA
Since she uses a bow to deal damage, Amber’s in-battle range is plentiful to act as the team’s rearguard while providing support to the frontline.
Kelly Baskin has been known to voice her in the English version of Genshin Impact, whereas Iwami Manaka has taken her vocal helm in the official Japanese version.
Best Amber Builds In Genshin Impact
Amber is generally versatile enough to make use of a wide variety of build options. However, you do still need to get your brain running in top gear if you’re looking for the best.
Having said that, there are a couple of builds that tend to synergize with her kit a bit too well, regardless of the meta. Let’s break them down to see how they function!
Best Weapons On Amber – Burst Sub-DPS Build
Amber generally tends to go Elegy for the End alongside Favonius Warbow or The Stringless in the offhand. However, Fading Twilight is not a bad choice either.
Having said that, the general idea is to maximize Amber’s Elemental Burst damage. Since the Favonius Warbow serves as an excellent F2P weapon, you have the option to seer the build however you like!
Example: You can choose Faconius Warbow with Elegy for the End to create a Pyro Burst Support build as well. However, this one is more suited in a team where you’re not the only Pyro damage.
Elegy For The End
Belonging to the Millennial Movement Series, the Elegy for the End is a 5-star bow capable of inflicting The Parting Refrain.
According to this ability, your Elemental Mastery is increased by 60 – 120. Upon the elemental skill of another ally character wielding an Elegy For The End hits the opponent. They gain a Sigil of Remembrance.
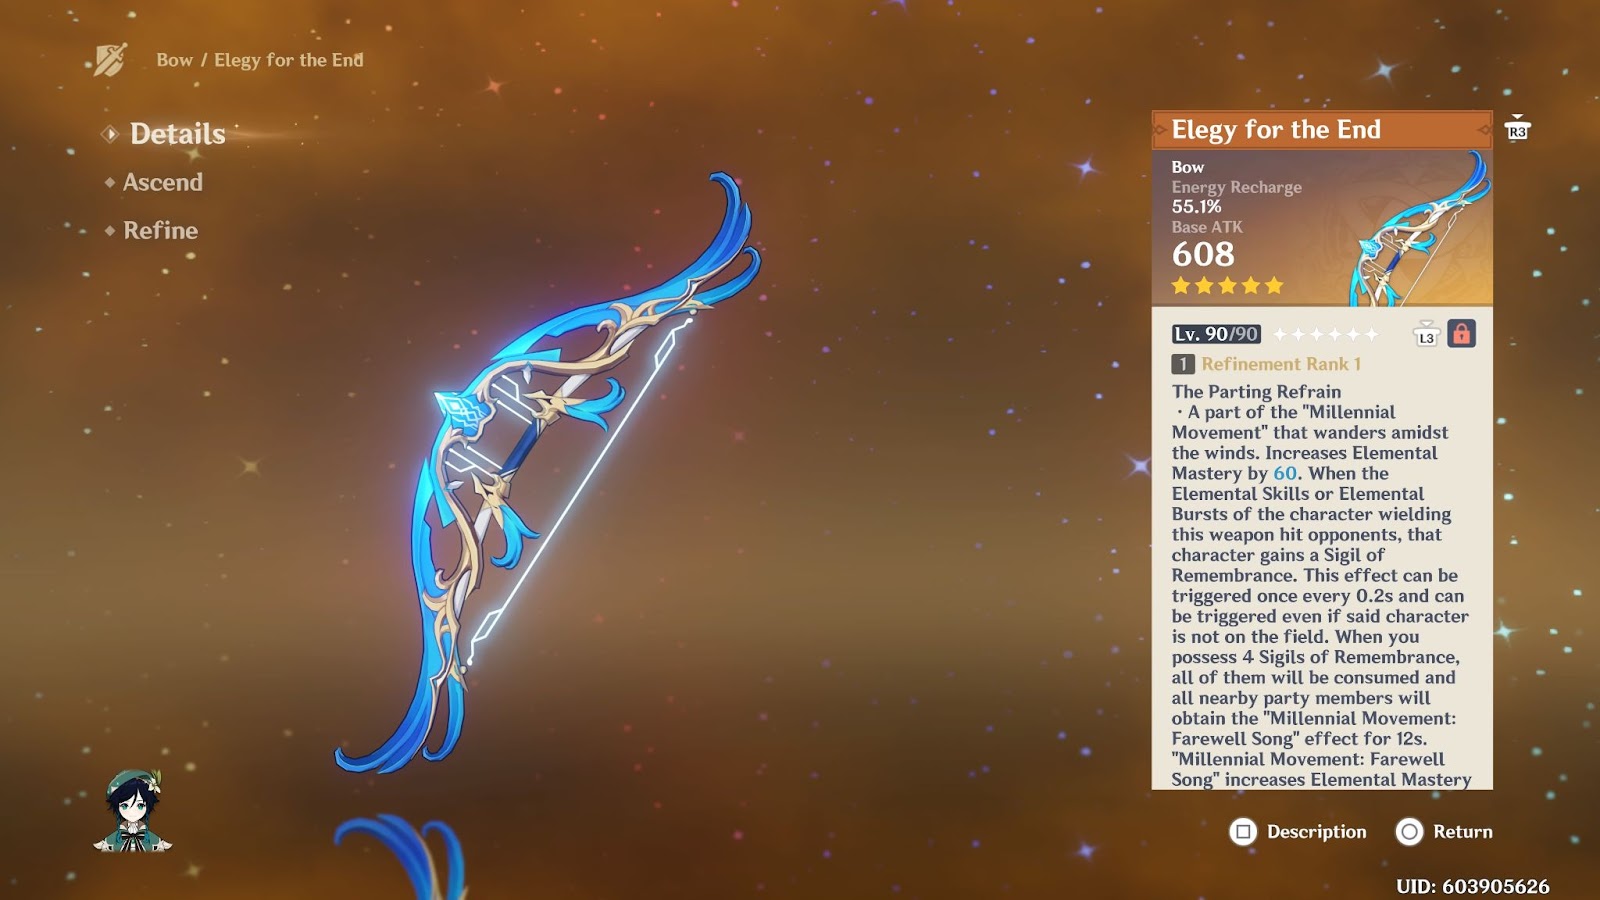
Elegy for the End | via Sportskeeda
There’s a 0.2-second cooldown on this effect, and it can be triggered even if the said character is no longer on-field.
Once you have a total of 4 Sigils of Remembrance, your party members will gain the Millennial Movement: Farewell Song for the next 12 seconds – while consuming the Sigils of Remembrance.
Millennial Movement: Farewell Song
This effect increases Elemental Mastery by 100 – 200 points while boosting ATK by 20% – 40%.
During the activation of Millennial Movement: Farewell Song, you will be unable to gain any Sigils of Remembrance for the next 20 seconds. Additionally, this buff does not stack between weapons.
Stats
Here is the stat distribution for Elegy for the End:
| Base ATK (LVL 1 – 90) | 2nd Stat Type | 2nd Stat (LVL 1-90) |
| 46 – 608 | Energy Recharge |
12% – 55.1% |
Weapon Refinement
You will be experiencing the following stat changes according to your weapon refinement level:
|
Stat |
Level 1 | Level 2 | Level 3 | Level 4 | Level 5 |
|
Upgrade Cost |
2000 Mora | 4000 Mora | 8000 Mora | 16000 Mora | – |
|
Self Elemental Mastery Increase |
60 | 75 | 90 | 105 |
120 |
| Millennial Movement Elemental Mastery Increase | 100 | 125 | 150 | 175 |
200 |
| Millennial Movement Attack Increase | 20% | 25% | 30% | 35% |
40% |
Ascension Costs
Here are all the Ascension costs related to upgrading Elegy for the End:
|
Item |
Quantity |
| Mora | 225,000 |
| Boreal Wolf’s Milk Tooth | 5 |
| Boreal Wolf’s Cracked Tooth | 14 |
| Boreal Wolf’s Broken Fang | 14 |
| Boreal Wolf’s Nostalgia | 6 |
| Heavy Horn | 23 |
| Black Bronze Horn | 27 |
| Black Crystal Horn | 41 |
| Recruit’s Insignia | 15 |
| Sergeant Insignia | 23 |
| Lieutenant’s Insignia | 27 |
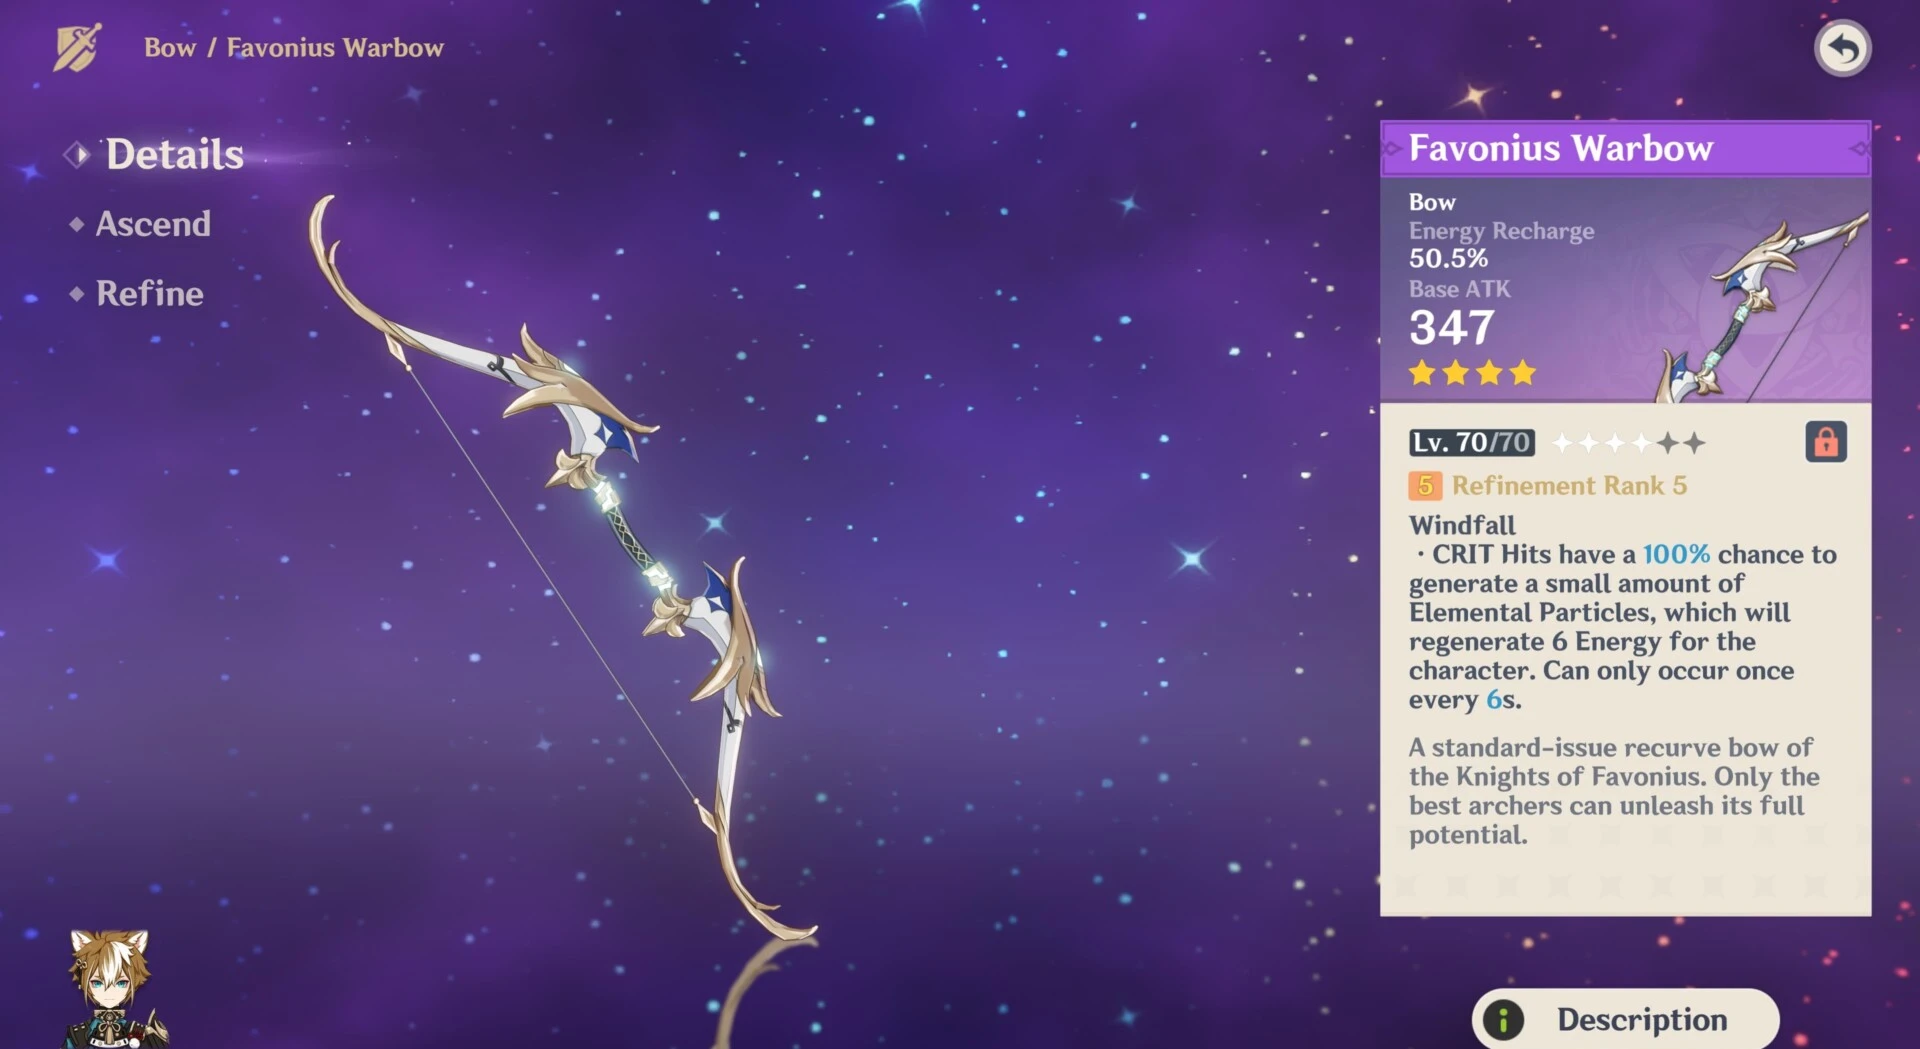
Favonius Warbow
This is a 4-Star bow belonging to the Favonius Series. The premise here is pretty simple; you want to generate as many particles as possible.
The more you generate, the more energy you will restore. This ability is called Windfall, and it essentially works by letting each of your CRIT attacks have a 60% – 100% chance of generating small amounts of Elemental Particles.
Favonius Warbow via PCinvasion
These particles generate 6 Energy of your character and will only occur once per 12s – 6s.
Stats
Here is the stat distribution for Favonius Warbow:
| Base ATK (LVL 1 – 90) | 2nd Stat Type | 2nd Stat (LVL 1-90) |
| 41 – 454 | Energy Recharge |
13.3% – 61.3% |
Weapon Refinement
You will be experiencing the following stat changes according to your weapon refinement level:
|
Stat |
Level 1 | Level 2 | Level 3 | Level 4 | Level 5 |
| Upgrade Cost | 1000 Mora | 2000 Mora | 4000 Mora | 8000 Mora |
– |
|
Particle Generation Chance |
60% | 70% | 80% | 90% | 100% |
| Effect Occurring Cooldown | 12s | 10.5s | 9s | 7.5s |
6s |
Ascension Costs
Here are all the Ascension costs related to upgrading Favonius Warbow:
|
Item |
Quantity |
| Mora | 150,000 |
| Fetters of the Dandelion Gladiator | 3 |
| Chains of the Dandelion Gladiator | 9 |
| Shackles of the Dandelion Gladiator | 9 |
| Dream of the Dandelion Gladiator | 4 |
| Chaos Device | 15 |
| Chaos Circuit | 18 |
| Chaos Core | 27 |
| Whopper Flower Nectar | 10 |
| Shimmering Nectar | 15 |
| Energy Nectar | 18 |
The Stringless
This is a 4-Star bow belonging to the Wanderer’s Troupe Series. It serves to increase your overall attack damage – which can be great considering bow characters are generally meant to inflict DPS.

The Stringless via Gameskinny
The Stringless’ passive is called Arrowless Song – which essentially increases your Elemental Skill and Elemental Burst DMG by 24% – 48%.
Stats
Here is the stat distribution for The Stringless:
| Base ATK (LVL 1 – 90) | 2nd Stat Type | 2nd Stat (LVL 1-90) |
| 42 – 510 | Elemental Mastery |
36 – 165 |
Weapon Refinement
You will be experiencing the following stat changes according to your weapon refinement level:
|
Stat |
Level 1 | Level 2 | Level 3 | Level 4 |
Level 5 |
|
Upgrade Cost |
1000 Mora | 2000 Mora | 4000 Mora | 8000 Mora | – |
| Elemental Burst DMG Increase | 24% | 30% | 36% | 42% |
48% |
Ascension Costs
Here are all the Ascension costs related to upgrading The Stringless:
|
Item |
Quantity |
| Mora | 150,000 |
| Tile of Decarabian’s Tower | 3 |
| Debris of Decarabian’s City | 9 |
| Fragment of Decarabian’s Epic | 9 |
| Scattered Piece of Decarabian’s Dream | 4 |
| Heavy Horn | 15 |
| Black Bronze Horn | 18 |
| Black Crystal Horn | 27 |
| Firm Arrowhead | 10 |
| Sharp Arrowhead | 15 |
| Weathered Arrowhead | 18 |
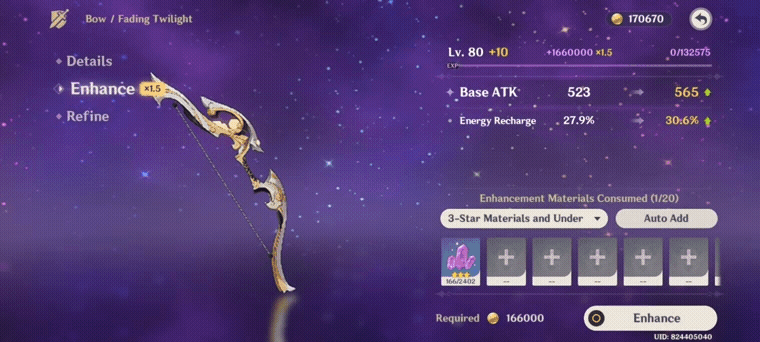
Fading Twilight
This is a 4-Star bow that was available in the Perilous Trail Event. It essentially increases your damage dealt in a bunch of states.
Fading Twilight’s passive is classed as Radiance of the Deeps. This ability has a total of three states that change whenever you hit your opponent.
Fading Twilight via HoYolab
These states increase the damage dealt in 6% – 12% / 10% – 20% / 14% – 28% packets. Having said that, these states can only be changed once every 7 seconds.
You can change the states of Fading Twilight even when the character is off-field.
Stats
Here is the stat distribution for Fading Twilight:
| Base ATK (LVL 1 – 90) | 2nd Stat Type | 2nd Stat (LVL 1-90) |
| 44 – 565 | Energy Recharge |
6.7% – 30.6% |
Weapon Refinement
You will be experiencing the following stat changes according to your weapon refinement level:
|
Stat |
Level 1 | Level 2 | Level 3 | Level 4 |
Level 5 |
|
Upgrade Cost |
1000 Mora | 2000 Mora | 4000 Mora | 8000 Mora | – |
| State 1 Damage | 6% | 7.5% | 9% | 10.5% |
12% |
|
State 2 Damage |
10% | 12.5% | 15% | 17.5% | 20% |
| State 3 Damage | 14% | 17.5% | 21% | 24.5% |
28% |
Ascension Costs
Here are all the Ascension costs related to upgrading Fading Twilight:
|
Item |
Quantity |
| Mora | 150,000 |
| Grain of Aerosiderite | 3 |
| Piece of Aerosiderite | 9 |
| Bit of Aerosiderite | 9 |
| Chunk of Aerosiderite | 4 |
| Hunter’s Sacrificial Knife | 15 |
| Agent’s Sacrificial Knife | 18 |
| Inspector’s Sacrificial Knife | 27 |
| Divining Scroll | 10 |
| Sealed Scroll | 15 |
| Forbidden Curse Scroll | 18 |
Best Artifacts On Amber
Amber can choose between both Emblem of Severed Fate and Noblesse Oblige. However, Crimson Witch of Flames is not a bad spot-holder either.
Since Amber is primarily reliant on her Elemental Burst, you just need Artifacts that can take her Elemental Burst damage numbers to insanity!
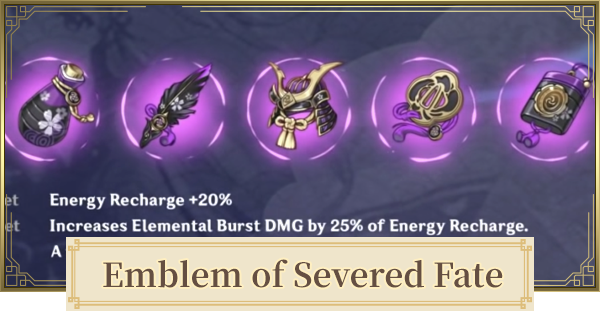
Emblem of Severed Fate
This artifact set focuses on your Energy Recharge and elemental burst damage – making it possible for Amber to unleash those huge damage combos continuously.
Emblem of Severed Fate via Gamewith
The Emblem of Severed Fate set consists of the following:
- Flower of Life: Magnificent Tsuba
- Plume of Death: Sundered Feather
- Sands of Eon: Storm Cage
- Goblet of Eonothem: Scarlet Vessel
- Circlet of Logos: Ornate Kabuto
The set bonuses for these artifacts activate at the following marks:
2 – Piece Bonus
Equipping any two of the above-mentioned items will increase your Energy Recharge by 20%.
4 – Piece Bonus
Equipping 4 of the above-mentioned artifacts increases your Elemental Burst DMG by 25% of your current Energy recharge.
However, this number is capped at 75% of your bonus DMG. However, even that is borderline absurd for an artifact set.
How To Obtain
Both 4* and 5* variants of this item can be obtained by challenging the Momiji-Dyed Court.
This Domain of Blessing is located in Inazuma. The higher the level you challenge and clear, the better the reward will be.
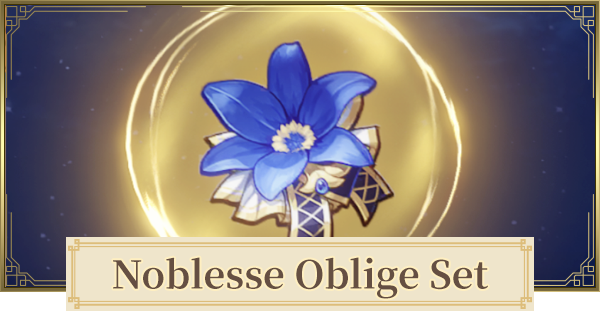
Noblesse Oblige
This artifact set grants an overall buff to your party members, with your Elemental Burst acting as a trigger.
Noblesse Oblige via Gamewith
The Noblesse Oblige set consists of the following:
- Flower of Life: Royal Flora
- Plume of Death: Royal Plume
- Sands of Eon: Royal Pocket Watch
- Goblet of Eonothem: Royal Silver Urn
- Circlet of Logos: Royal Masque
The set bonuses of these artifacts activate at the following marks:
2 – Piece Bonus
This bonus increases your Elemental Burst DMG by 20%. Considering you’re pretty much going all in on Elemental Mastery, this is not a bad buff at all.
4 – Piece Bonus
Whenever you use your Elemental Burst, your party members experience a 20% increase in their attack damage for the next 12 seconds.
This artifact set is pretty good if you’re opting for a Pyro burst support build since it not only ramps the attacks of your DPS carries but also allows you to unleash your Elemental Mastery in between.
How To Obtain
The Noblesse Oblige set can be obtained from the Clear Pool and Mountain Cavern – a Domain of Blessing located north of Mt. Aocang in Liyue.
The higher the levels you challenge, the better your chances of obtaining the 4* and 5* rarities.
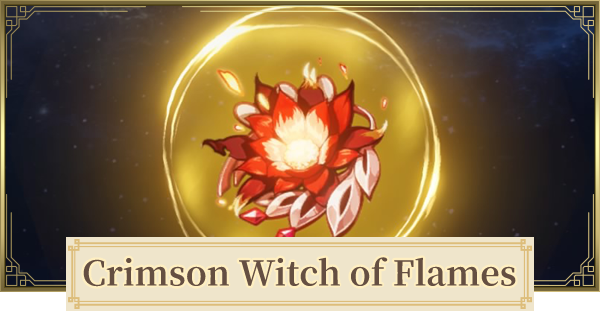
Crimson Witch of Flames
The Crimson Witch of Flames focuses on increasing your Pyro effect on the battlefield. It’s usually extremely good in teams where you’re the sole Pyro DPS.
Crimson Witch of Flames via GameWith
The Crimson Witch of Flames artifact set comprises the following:
- Flower of Life: Witch’s Flower of Blaze
- Plume of Death: Witch’s Ever-Burning Plume
- Sands of Eon: Witch’s End Time
- Goblet of Eonothem: Witch’s Heart Flames
- Circlet of Logos: Witch’s Scorching Hat
The set bonuses of these artifacts activate at the following marks:
2 – Piece Mark
This bonus increases your Pyro DMG Bonus by 15% – allowing you to deal more damage through your kit, thereby making you an effective sub-DPS.
4 – Piece Mark
Your following damages receive a 40% increase in their potency:
- Overloaded: An Elemental Reaction triggered by inflicting Electro Damage on Pyro-affected enemies.
- Burning: An Elemental Reaction triggered by inflicting Pyro Damage on Dendro-affected enemies.
- Burgeon: An Elemental Reaction triggered by inflicting Dendro Damage on Hydro-affected enemies. (Not a valuable buff in this case)
Consequently, your following damages receive a 15% increase in their potency:
- Vaporize: An Elemental Reaction triggered by inflicting Hydro Damage on Pyro-affected enemies.
- Melt: An Elemental Reaction triggered by inflicting Pyro Damage on Cryo-affected enemies.
Additionally, your 2-piece bonus effect also gains a 50% effectiveness boost from its starting value for the next 10 seconds. This effect only stacks thrice.
How To Obtain
The Crimson Witch of Flames set can be obtained from the Hidden Palace of Zhou Formula – a Domain of Blessing located on top of Wuwang Hill in Liyue.
You can also grab it from the Artifact Strongbox. The higher the levels you challenge, the better your chances of obtaining the 4* and 5* rarities.
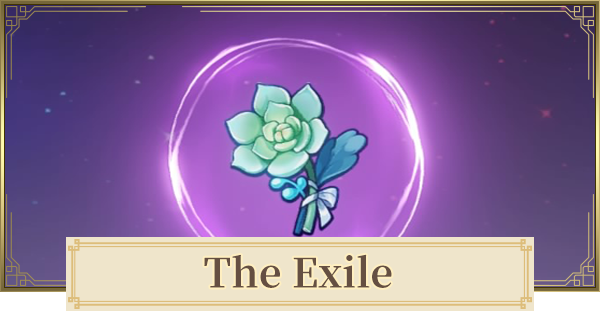
The Exile – F2P Route
This artifact set focuses on increasing your overall energy regeneration so you can consistently dish out Elemental Bursts without running out of steam.
The Exile via GameWith
The Exile set consists of the following:
- Flower of Life: Exile’s Flower
- Plume of Death: Exile’s Feather
- Sands of Eon: Exile’s Pocket Watch
- Goblet of Eonothem: Exile’s Goblet
- Circlet of Logos: Exile’s Circlet
The set bonuses for these artifacts activate at the following marks:
2 – Piece Bonus
Equipping any two of the above-mentioned items will increase your Energy Recharge by 20%.
4 – Piece Bonus
Whenever you use your Elemental Burst, all of your party members will re-generate 2 Energy points (not including you) every 2 seconds for a duration of 6 seconds.
While the effect is unstackable, pairing it with Amber’s Elemental Burst will still yield great results in a support Pyro build.
How To Obtain
The 3* and 4* variants of this artifact set is available from the following sources:
- Elite Enemy drops
- Normal boss drops
- Weekly boss drops
- Domain Reliquary: Tier III
- Chests (3* variants only)
What’s The Best Team For Amber?
Amber is supposed to be played as a support battery bank. However, that doesn’t make her less viable as a secondary carry, either.
Just don’t primarily rely on her for damage and you should be good to go. With that said, here are some of the most Amber-optimized team comps:
1. Sub DPS Team Comp
This team comp utilizes Amber as a sub-DPS carry in a partial Pyro setting. The main premise is to make Amber do the cleanup with her Elemental Burst while the rest of the team focuses on single target DPS.
Hu Tao
Hu Tao is your main DPS, and most of your single target damage. As a 5 star polearm character, her main aim is to utilize her Elemental Burst DMG along with her base crit to wreak havoc.
Hu Tao via WA
Pair that with her already-high HP and DEF, and she’s pretty much unstoppable – even as a solo carry. However, with Amber to back her up, the synergy becomes as strong as ever.
Xingqiu
As a 4-star Hydro Sword character, Xingqiu’s role is to provide an overall level of tankiness to the team while being the sole applicator of Hyrdo for elemental reactions.

Xingqiu via Zerochan
Xinqui is pretty weak solo, but the story changes when Amber comes into play! He becomes a viable sub-DPS pick, and can help maintain a constant damage throughput.
Zhongli
Zhongli is everything tankiness. He’s a 5-Star Geo Polearm character that’s capable of unleashing large amounts of damage while keeping the team shielded from any upcoming damage.
He’s also pretty good at providing crowd control, and can withstand through most of the enemy attacks with no difficulty.
2. Character Synergies
Amber is generally quite off-meta these days. However, she works insanely well with a few characters whose kits seem to be built as her playground.
Pair them up with Amber as an enabler, and you’d be flabbergasted at the results!
Diluc
Diluc is a Claymore type Pyro carry that can create good Elemental Resonance due to Amber in his party. Pair Amber’s sixth constellation to the mix, and it’s smooth sailing from there.

Diluc via WA
The general idea is to keep spamming both Elemental Bursts to experience an increase in overall Pyro ATK damage.
Klee
Klee is similar to Diluc in the way she benefits from Amber. Just keep spamming your abilities to create Elemental Resonance, and you’re pretty much good to go.

Klee via WA
However, this strat is only truly viable when Amber unlocks her 6th Constellation.
Tartaglia
Tartaglia is a Bow type Hydro character capable of chaining Elemental Reactions with Amber to deal high Vaporize DMG.

Tartaglia via WA
Similar to other characters in this list, Tartaglia also benefits immensely from Amber’s 6th Constellation.
Fischi
Fischi’s constant damage output makes it pretty easy for Amber to create Elemental Reactions.

Fischi via UHD-W
Pair crowd control into the mix, and the game gets flipped on top of its head.
Amber: Ability Rundown
As mentioned previously, Amber’s entire kit relies on her Elemental Reactions. However, she has a plethora of other abilities as well that prove to be a good roundup to her otherwise explosive kit.
With that said, here’s everything you need to know regarding Amber’s abilities:
Basic Attack: Sharpshooter
Amber unleashes up to 5 consecutive arrow shots with her bow that deal damage upon impact.

via Wiki
There’s not a lot associated with her basic blows since they’re meant to apply the weapon passives.
With that said, here’s how the damage scaling works for Sharpshooter:
| 1 | 2 | 3 | 4 | 5 | 6 | 7 | 8 | 9 | 10 | 11 | |
| 1-Hit DMG (%) | 36.12 | 39.06 | 42 | 46.2 | 49.14 | 52.5 | 57.12 | 61.74 | 66.36 | 71.4 | 76.44 |
| 2-Hit DMG (%) | 36.12 | 39.06 | 42 | 46.2 | 49.14 | 52.5 | 57.12 | 61.74 | 66.36 | 71.4 | 76.44 |
| 3-Hit DMG (%) | 46.44 | 50.22 | 54 | 59.4 | 63.18 | 67.5 | 73.44 | 79.38 | 85.32 | 91.8 | 98.28 |
| 4-Hit DMG (%) | 47.3 | 51.15 | 55 | 60.5 | 64.35 | 68.75 | 74.8 | 80.85 | 86.9 | 93.5 | 100.1 |
| 5-Hit DMG (%) | 59.34 | 64.17 | 69 | 75.9 | 80.73 | 86.25 | 93.84 | 101.43 | 109.02 | 117.3 | 125.58 |
Charged Attack
Amber unleashes a more precise aimed shot that deals higher damage compared to her normal attack.

Sharpshooter via Wiki
During the charge, flames will start to gather on the arrowhead. Partially charged arrows will only deal damage, whereas a fully charged one will deal Pyro DMG as well.
Here’s the damage composition for her charged attack:
|
Charged Attack (Aimed Shot) |
|||||||||||
|
Aimed Shot (%) |
43.86 | 47.43 | 51 | 56.1 | 59.67 | 63.75 | 69.36 | 74.97 | 80.58 | 86.7 | 92.82 |
| Fully-Charged Aimed Shot (%) | 124 | 133.3 | 142.6 | 155 | 164.3 | 173.6 | 186 | 198.4 | 210.8 | 223.2 |
235.6 |
Plunging Attack
Amber launches herself toward the ground from mid-air while unleashing a volley of arrows during her ground strike.

Sharpshooter Plunging Attack via Wiki
The attack hits the ground in an AoE radius and deals damage to any enemy caught in its range.
Having said that, here’s the damage breakdown for Amber’s Plunging attack:
|
Plunging Attack |
|||||||||||
| Plunge DMG (%) | 56.83 | 61.45 | 66.08 | 72.69 | 77.31 | 82.6 | 89.87 | 97.14 | 104.41 | 112.34 |
120.27 |
|
Low Plunge DMG (%) |
113.63 | 122.88 | 132.13 | 145.35 | 154.59 | 165.17 | 179.7 | 194.23 | 208.77 | 224.62 | 240.48 |
| High Plunge DMG (%) | 141.93 | 153.49 | 165.04 | 181.54 | 193.1 | 206.3 | 224.45 | 242.61 | 260.76 | 280.57 |
300.37 |
Explosive Puppet: Elemental Skill

Explosive Pupper via Wiki
The ever-reliable baron bunny takes the stage to unleash the following effects:
- The Baron Bunny taunts the enemy continuously in order to draw their fire.
- The greater Amber’s max HP, the higher the Baron Bunny’s max HP.
- Upon the timer or HP running out, the Baron Bunny will explode – dealing AoE Pyro DMG in a small radius.
On that note, here’s how its attribute scaling works:
| 1 | 2 | 3 | 4 | 5 | 6 | 7 | 8 | 9 | 10 | 11 | 12 | 13 | 14 | |
|
Inherited HP (% Max HP) |
41.36 | 44.46 | 47.56 | 51.7 | 54.8 | 57.9 | 62.04 | 66.18 | 70.31 | 74.45 | 78.58 | 82.72 | 87.89 | 93.1 |
| Explosion DMG (%) | 123.2 | 132.44 | 141.68 | 154 | 163.24 | 172.48 | 184.8 | 197.12 | 209.44 |
221.76 |
234.08 | 246.4 | 261.8 | 277 |
| CD |
15s |
|||||||||||||
Fiery Rain: Elemental Burst
Amber unleashes a shower of arrows toward the specified target to deal Pyro DMG in the Arrows’ AoE radius.

Fiery Rain via Wiki
Here’s the attribute scaling for Amber’s Elemental Burst:
| 1 | 2 | 3 | 4 | 5 | 6 | 7 | 8 | 9 | 10 | 11 | 12 | 13 | 14 | |
| Fiery Rain DMG Per Wave (%) | 28.08 | 30.19 | 32.29 | 35.1 | 37.21 | 39.31 | 42.12 | 44.93 | 47.74 | 50.54 |
53.35 |
56.16 | 59.67 | 63.2 |
|
Total Fiery Rain DMG (%) |
505.44 | 543.35 | 581.26 | 631.8 | 669.71 | 707.62 | 758.16 | 808.7 | 859.25 | 909.79 | 960.34 | 1010.88 | 1074.06 | 1137 |
| Duration |
2s |
|||||||||||||
|
CD |
12s | |||||||||||||
| Energy Cost |
40 |
|||||||||||||
Amber – Passive Talents
You might think there’s nothing more to Amber than her Elemental Burst. However, her passive talents are just as strong – if not stronger!
Here’s how they essentially work:
Every Arrow Finds Its Target – Ascension 1 Talent
This talent increases the CRIT Rate of your Fiery Rain ability while widening its AoE.
via Wiki
The CRIT increase is 10%, whereas the AoE improvement is a whopping 30% – making it pretty integral on Amber’s kit.
Precise Shot – Ascension 4 Talent
Amber’s weak spot hits using Aimed Shot increases her overall ATK by 15% for the next 10 seconds.

via Wiki
This introduces a reward-oriented playstyle for Amber – which might not be everyone’s cup of tea.
Gliding Champion – Automatic Unlock
Your party member’s Gliding Stamina Consumption is decreased by 20% throughout the duration.
This makes relocating quite hassle-free, both in and out of combat. However, this passive doesn’t stack with items/talents of the same effect.
Amber – Constellations
Like any other character in Genshin Impact, Amber’s kit comprises six unique constellations meant to provide a roundup to her as a support battery bank.
via Alphacoders
Here’s how they work:
Level 1 Constellation – One Arrow to Rule Them All
This constellation allows you to fire two arrows per Aimed Shot instead of one. However, the second one is only 80% as potent as the first one in terms of DMG.
Level 2 Constellation – Bunny Triggered
This constellation focuses on amping up your Baron Bunny to unlock new abilities. You can now manually detonate Baron Bunny by hitting a fully-charged aimed shot on its foot.
Detonating the Baron Bunny by using this method will deal twice the usual damage.
Level 3 Constellation – It Burns!
Fiery Rain’s level is increased by 3, with the upgrade level cap being 15.
Level 4 Constellation – It’s Not Just Any Doll…
Your Explosive Puppet’s cooldown is decreased by 20% of its duration. You also gain an additional charge!
Level 5 Constellation – It’s Baron Bunny!
Explosive Puppet’s level is increased by 3, with the upgrade level cap being 15.
Level 6 Constellation – Wildfire
This is Amber’s main power spike in terms of her effectiveness. It essentially increases the movement speed of your party members along with their ATK damage by 15% for the next 10 seconds.
You need to have Amber’s Stella Fortuna in order to activate these Constellations.
Amber’s Ascension: Stats And Material Costs
Here are all the ascension bonuses and material costs associated with leveling up Amber to reach maximum output:
|
Ascension Phase |
Level | Base
HP |
Base
ATK |
Base
DEF |
Special Stat |
|
0✦ |
1/20 | 793 | 18 | 50 |
— |
|
20/20 |
2,037 | 48 |
129 |
||
Ascension Cost (0 → 1)
 Mora | via Wiki 20,000  Agnidus Agate Sliver | via Wiki 1  Small Lamp Grass via Wiki 3  Firm Arrowhead | via Wiki 3 |
|||||
|
1✦ |
20/40 | 2,630 | 62 | 166 |
— |
|
40/40 |
3,940 | 92 |
250 |
||
| Ascension Cost (1 → 2)
Mora | via Wiki 40,000  Agnidus Agate Fragment | via Wiki 3 Small Lamp Grass via Wiki 10 Firm Arrowhead | via Wiki 15  Everflame Seed | via Wiki 2 |
|||||
|
2✦ |
40/50 | 4,361 | 102 | 276 | 6.0% |
| 50/50 | 5,016 | 118 |
318 |
||
| Ascension Cost (2 → 3)
Mora | via Wiki 60,000 Agnidus Agate Fragment | via Wiki 6 Small Lamp Grass via Wiki 20  Sharp Arrowhead | via Wiki 12 Everflame Seed | via Wiki 4 |
|||||
|
3✦ |
50/60 | 5,577 | 131 | 354 | 12.0% |
| 60/60 | 6,233 | 146 |
395 |
||
| Ascension Cost (3 → 4)
Mora | via Wiki 80,000  Agnidus Agate Chunk | via Wiki 3 Small Lamp Grass via Wiki 30 Sharp Arrowhead | via Wiki 18 Everflame Seed | via Wiki 8 |
|||||
|
4✦ |
60/70 | 6,654 | 156 | 422 | 12.0% |
| 70/70 | 7,308 | 172 |
463 |
||
| Ascension Cost (4 → 5)
Mora | via Wiki 100,000 Agnidus Agate Chunk | via Wiki 6 Small Lamp Grass via Wiki 45  Weathered Arrowhead | via Wiki 12 Everflame Seed | via Wiki 12 |
|||||
|
5✦ |
70/80 | 7,729 | 182 | 490 | 18.0% |
| 80/80 | 8,384 | 197 |
532 |
||
| Ascension Cost (5 → 6)
Mora | via Wiki 120,000  Agnidus Agate Gemstone | via Wiki 6 Small Lamp Grass via Wiki 60 Weathered Arrowhead | via Wiki 24 Everflame Seed | via Wiki 20 |
|||||
|
6✦ |
80/90 | 8,805 | 207 | 559 | 24.0% |
| 90/90 | 9,461 | 223 |
600 |
||
Amber: The Last Outrider: Lore & Ability Showcase
Here’s the official Amber’s showcase:
How to Obtain Amber?
Amber is obtainable from the following sources:
- Wind-Riding Knight: Completing this quest will reward you with Amber!
- Wanderlust Invocation: Amber can be obtained by trying your luck in this gacha.
Aside from these, Amber has been historically made available in a few events.
Paimon’s Bargains

Amber via Peakpx
Aside from the mentioned sources, Amber was also periodically available within 6 of Paimon’s Bargains Starglitter Exchange:
- September 2020 Exchange
- October 2020 Exchange
- April 2021 Exchange
- October 2021 Exchange
- April 2022 Exchange
- October 2022 Exchange
Looking at the above data, it won’t be difficult to predict the next availability of Amber.
Conclusion
All in all, Amber is a bit out of the meta due to her rarity and damage distribution. However, she’s pretty good at enabling team comps to deal insane numbers of damage.
Just chuck her in a pyro comp and see her numbers touch the sky!
This is the build that we recommend for Amber in Genshin Impact. You can also check out our build guides for Zhongli and Yanfei.


